Why your shower floor is moving beneath you
Movement and deflection are the primary causes of grout failure around shower drains. When the subfloor or the mortar bed lacks the required stiffness, the weight of a person causes the tile to flex. This microscopic shifting snaps the brittle cementitious bond of the grout, leading to persistent cracks and water infiltration issues. Most guys skip the leveling compound. They think the underlayment will hide the dip. It won’t. I spent three days grinding concrete on a job last month just so the floor wouldn’t click like a castanet. That job taught me that if the base is not dead flat and rock solid, your grout is just a ticking time bomb. I have seen guys throw more grout at a crack and think they solved it. They didn’t. They just put a band-aid on a broken leg. The physics of a shower floor are unforgiving. You have water, heat, and weight all fighting against a rigid surface. If that surface has even a fraction of an inch of play, the grout is the first thing to go. You can find more about maintaining these surfaces in our guide on grout restoration secrets for long lasting results. I have spent twenty five years looking at failed pans and the story is always the same. It is never just the grout. It is what the grout is sitting on. I smell like damp concrete and old thin-set most days because I do the work the right way. I do not trust a subfloor until I have checked it with a ten foot straightedge. Even then, I am looking for the slightest hint of a wobble. In this industry, a millimeter is a mile.
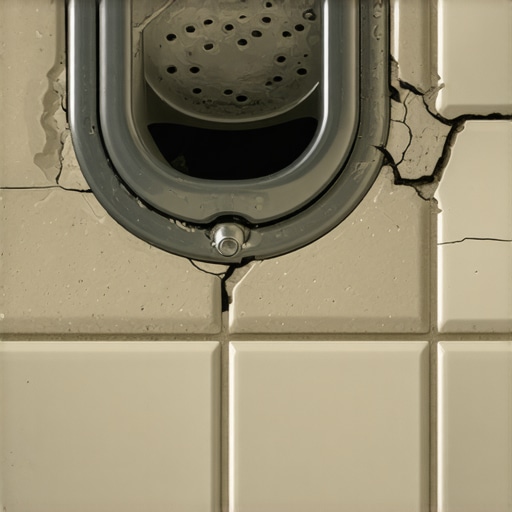
The ghost in the expansion gap
A lack of proper expansion joints around the drain assembly causes thermal and structural stress to concentrate in the grout lines. Without a flexible buffer, the natural expansion and contraction of the tile as it heats up from shower water will crush the grout. This is why high-quality installations require a specific gap filled with 100 percent silicone rather than hard grout. People think tile is static. It is not. It grows and shrinks. When you pour hot water down a drain, that drain assembly expands. If you have grout packed tight against that metal or plastic flange, something has to give. It is usually the grout. It turns to powder and then it washes away. Most homeowners think they need to how to refresh grout without replacing it but the reality is they need a structural relief valve. I have pulled up tiles that were so tightly packed they were under tension like a spring. The moment I hit them with a chisel, they popped off the floor. That is not how you build a shower. You build it to breathe. You build it to move without breaking. If you want showers that wow modern designs for 2025, you have to respect the chemistry of the materials. You cannot fight physics and expect to win.
“A floor is only as good as the subfloor beneath it; deflection is the enemy of every joint.” – Master Flooring Axiom
The chemistry of the bond
The chemical interaction between the drain flange and the surrounding mortar bed determines the longevity of the grout seal. Using standard cement grout in high-moisture areas without polymer additives leads to a porous structure that absorbs water and weakens over time. Modern epoxy grouts provide a superior chemical bond but require expert installation to avoid pinholes and haze. I have seen installers use cheap, store-bought bag mix for a custom shower pan. It makes me sick. That stuff is for a backsplash in a dry kitchen, not a wet environment where it will be saturated daily. You need high-performance modifiers. You need to understand the water-to-powder ratio down to the gram. If you add too much water, you create microscopic voids in the grout as it dries. Those voids are where the cracks start. It is a molecular failure that manifests as a visible crack. I tell my clients that if they want a floor that lasts, they need to stop looking at the color and start looking at the spec sheet. I use moisture meters on every job. If the slab is too wet, the thin-set will not cure properly. It is a chain reaction of failure. If you are struggling with a dirty look, check our tile cleaning tips for a sparkling bathroom in 2025 to keep things clear while you diagnose the structure.
| Material Type | Janka Rating / Strength | Water Absorption | Flexibility |
|---|---|---|---|
| Standard Cement Grout | Low | High | Zero |
| High-Performance Grout | Medium | Low | Moderate |
| Epoxy Grout | High | Zero | High |
| 100% Silicone Sealant | N/A | Zero | Extreme |
Concrete and the lie of level surfaces
Self-leveling underlayments and floor grinders are the only way to ensure a subfloor meets the strict TCNA requirements for large format tile. A slab that looks flat to the naked eye often contains dips and ridges that create hollow spots under the tile. These hollow spots are the primary cause of grout cracking near drains because they allow the tile to dip under the weight of a foot. I do not care if the house is brand new or a hundred years old. The concrete is never flat. I have spent entire Saturdays with a diamond cup wheel on a grinder, masked up, eating dust, just to get a floor within 1/8 of an inch over ten feet. That is the standard. If you miss that, you are just guessing. When you have a shower drain, the slope is even more critical. You are creating a funnel. If that funnel has a hump or a dip, the tile will not sit right. You will end up with ‘lippage’ where one tile is higher than the other. Then you try to fix it with grout. It never works. You can find more advice on professional standards if you contact us directly for a consultation. I have seen $20,000 bathrooms ruined because the guy was too lazy to use a level. It is pathetic. A real pro knows that the finish is only as good as the prep.
- Check subfloor deflection limits (L/360 for ceramic, L/720 for stone).
- Use a high-quality waterproofing membrane like Schluter-Kerdi or Laticrete Hydro Ban.
- Ensure the drain flange is set at the correct height relative to the tile thickness.
- Apply a 100 percent silicone bead at all change-of-plane joints.
- Allow for a 24-hour cure time before grouting to let the thin-set off-gas.
“Movement joints are not optional; they are the pressure release valves of a rigid surface.” – TCNA Industry Standard
Modern solutions for a permanent seal
Switching from cement-based grout to a high-performance epoxy or urethane grout around the drain eliminates the risk of moisture-induced cracking. These materials are non-porous and remain slightly flexible, allowing them to withstand the vibrations and thermal shifts of a residential shower environment. Most people want the thickest underlayment, but too much cushion actually causes the locking mechanisms on LVP or the grout on tile to snap under pressure. This is a common mistake. You want rigidity in the base and flexibility in the joints. That is the secret. I have been called into houses to fix ‘leaking’ showers where the only problem was the grout around the drain. The water was wicking through the cracks and getting into the subfloor. Over time, that rots the wood and causes the whole pan to drop. Then the cracks get bigger. It is a cycle of destruction. I stop that cycle by using the right chemistry. I do not use whatever is on sale. I use what works. I have a reputation to protect. My floors do not crack. My drains do not leak. I take the time to do the math. I measure the humidity. I check the cure times. It is not magic. It is engineering. If you are looking at the overall aesthetic of your bathroom, consider how chic baseboard designs that transform rooms in 2025 can complement a properly installed tile floor. Just make sure the floor is right first. A pretty baseboard will not hide a rotten floor. You have to be honest with the materials. You have to be honest with the client. Most of all, you have to be honest with the level. It does not lie. If the bubble is not in the center, the job is not done. I will stay on my knees for another four hours if that is what it takes to get it right. That is the difference between a floor guy and a master flooring architect. One does a job. The other builds a legacy. Your shower should last as long as your house. If it doesn’t, someone took a shortcut. And I hate shortcuts.
Comments
3 responses to “The Real Reason Your Shower Drain Grout Is Cracking and How We Finally Fixed It”
This article hits home for me. I’ve seen countless cases where homeowners or even handymen overlook the importance of proper subfloor prep and expansion joints, leading to costly repairs down the line. From my experience, ensuring the subfloor is perfectly level and using the right materials from the start can’t be emphasized enough. I also found that shifting to epoxy grout has made a big difference in durability around the drain area, especially in high-moisture environments. One challenge I’ve faced is convincing clients that investing more time and money upfront saves them much more in the long run. Has anyone explored innovative methods or materials that help streamline this meticulous prep while maintaining top quality? I’m curious if there are new tools or techniques that make ensuring flatness and proper expansion more accessible for smaller crews or DIY enthusiasts.
This article really underscores the importance of meticulous subfloor prep and understanding the physics behind tile movement. I’ve personally seen installations where neglecting proper leveling and expansion joints led to cracking grout and water leaks a few years down the line. One thing that stood out to me was the emphasis on using high-performance epoxy or urethane grouts; I’ve had great success with epoxy in recent projects, especially in wet areas, because of its flexibility and water resistance. It makes me wonder, are there any new advanced leveling tools or laser-guided systems that make achieving that perfect flatness easier and quicker for smaller crews or DIYers? Also, what’s everyone’s take on DIY solutions for installing expansion joints properly? I’ve seen some DIYers struggle with the silicone fill and end up causing more issues. Would love to hear about techniques or products that can help streamline the process without sacrificing quality.
This post really highlights the meticulous work needed for a durable shower installation. I especially agree with the importance of checking the subfloor with a straightedge — I’ve seen so many issues arise from neglecting that step. Perfect flatness isn’t just about appearance; it prevents hollow spots and grout cracking over time. Regarding expansion joints, I found that using flexible silicone around drains and other movement points makes a big difference. I’ve struggled with DIY expansion solutions — the key for me has been ensuring the joint is not overpacked with sealant, and maintaining the right gap size. Have others experimented with different silicone formulations or pre-made expansion joint accessories that make installation easier? Also, I’ve been curious about high-tech leveling tools like laser-guided systems for small crews; have they become more accessible or cost-effective lately? I’d love to hear what techniques or tools others swear by to streamline these critical prep steps.