
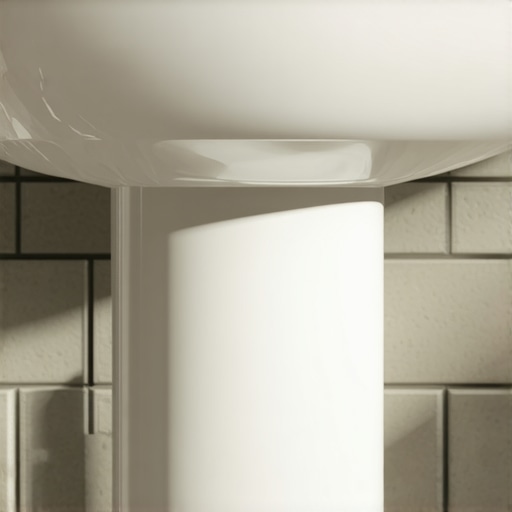
Most guys skip the leveling compound. They think the underlayment will hide the dip. It won’t. I spent three days grinding concrete on a job last month just so the floor wouldn’t click like a castanet. When you are dealing with a pedestal sink, that floor has to be more than just pretty. It has to be structurally sound because you are placing a concentrated load of sixty to eighty pounds of vitreous china on a very small footprint. If that floor flexes or if the tile is hollow underneath, you will hear a crack that sounds like a gunshot the first time someone leans on that basin. I have seen fifteen thousand dollar bathroom remodels ruined because an installer didn’t want to spend an extra afternoon with a straight edge and a bag of self-leveler. Tiling around a pedestal sink is a test of patience and technical precision that separates the masters from the weekend warriors who think a tub of pre-mixed mastic and a plastic trowel are all they need.
The subfloor secret that kills bathroom renovations
To tile around a pedestal sink successfully, you must first ensure the subfloor meets the L/360 deflection standard for ceramic or L/720 for natural stone. This means the floor cannot bend more than 1/360th of its span under a concentrated load. If your joists are too far apart or your plywood is only half an inch thick, your tile will fail. I always look for a minimum of 1.125 inches of total subfloor thickness before I even open a bag of thin-set. Most people forget that the sink foot applies pressure on a specific point. If there is a void in the mortar or a dip in the wood, that tile is going to snap. I spend more time with a floor grinder and a level than I do with a tile saw. You have to check for moisture too. In high humidity areas like the Gulf Coast or the Florida Everglades, concrete slabs can hold a massive amount of water. If you don’t use a proper moisture barrier or an uncoupling membrane, the vapor pressure will eventually pop your tiles right off the floor. I have seen it happen a hundred times. The homeowner thinks it is a bad batch of grout, but it is actually the physics of moisture trying to escape a sealed slab.
“A floor is only as good as the subfloor beneath it; deflection is the enemy of every joint.” – Master Flooring Axiom
The chemistry of the bond
Using the correct thin-set mortar is the difference between a permanent installation and a temporary one that will eventually shift and crack. I never use mastic in a bathroom. Mastic is basically organic glue that will re-emulsify if it gets wet. In a room with showers and pedestals, moisture is a constant. You need a polymer-modified thin-set that meets ANSI A118.11 standards. This stuff creates a chemical bond that actually bites into the tile and the subfloor. When I am mixing my mortar, I look for the consistency of creamy peanut butter. If it is too wet, it shrinks and pulls away. If it is too dry, it skins over and won’t stick. You also need to pay attention to the notched trowel size. For a standard bathroom floor tile, a 1/4 inch by 3/8 inch square notch is usually the sweet spot. You need to achieve 95 percent coverage in wet areas. I always back-butter the tiles that go under the sink. This ensures there are no air pockets. Air pockets are where water collects and where cracks begin. You can’t just slap tile down and hope for the best. You have to understand the molecular reality of the bond. The polymers in the thin-set are what allow the floor to handle the microscopic movements of the house without shattering the grout lines.
| Tile Type | Janka Hardness / Rating | Recommended Thin-set | Acclimation Time |
|---|---|---|---|
| Porcelain | PEI 4 or 5 | Polymer-Modified (ANSI A118.15) | 48 Hours |
| Natural Marble | Varies | White Medium Bed Mortar | 72 Hours |
| Ceramic | PEI 3 | Standard Modified (ANSI A118.11) | 24 Hours |
| Slate | N/A | High-Bond Strength Mortar | 48 Hours |
The 1/8 inch that ruins everything
Precision cuts around the pedestal base require a template method to ensure a professional finish without massive, ugly gaps. You don’t just eyeball a curve. You take a piece of heavy cardboard or stiff paper and you trace the footprint of the sink. I like to leave exactly 1/8 of an inch of space between the tile and the sink base. This space is not for grout. It is for a color-matched 100 percent silicone caulk. Tile and porcelain expand at different rates. If you grout right up to the sink, the movement will cause the grout to crumble within six months. I use a diamond hole saw for the bolt holes and a wet saw with a high-quality porcelain blade for the larger curves. If you are using a grinder, do it outside. The dust from modern porcelain is basically pulverized glass and it will get into every vent in your house. When you are making these cuts, take your time. If you force the blade, you will cause micro-fractures that will eventually grow into full cracks. Every cut should be smooth and clean. If the edge of your tile looks like a saw blade, you aren’t doing it right. I have seen guys try to hide bad cuts with thick baseboard designs, but you can’t hide a bad cut around a pedestal sink. It is right there in the open for everyone to see.
- Inspect the subfloor for any deflection or high spots.
- Create a precise template of the sink base using cardboard.
- Apply a moisture-resistant uncoupling membrane over the wood or concrete.
- Mix polymer-modified thin-set to a peanut butter consistency.
- Back-butter every tile that will sit under the weight of the pedestal.
- Maintain a 1/8 inch expansion gap around the perimeter and the sink.
- Use color-matched silicone caulk for transitions instead of hard grout.
Grout stability and the movement joint
Choosing the right grout is about more than just color; it is about managing the inevitable movement of the structure. I prefer high-performance cement grouts or epoxy grouts for bathrooms. Epoxy is a nightmare to work with if you aren’t experienced, but it is waterproof and stain-proof. If you use standard sanded grout, you have to seal it, and even then, it is going to absorb some moisture. This is why grout restoration is such a huge business. People don’t maintain their floors and the grout starts to fail. When tiling around a pedestal, the grout lines should be consistent. Use spacers. I don’t care how good you think your eye is, use the spacers. If your grout lines are wavy, the whole room looks crooked. Also, never put grout in the corners where the floor meets the wall. That is a change of plane. Changes of plane require caulk. If you put grout there, it will crack. The same logic applies to the area around the sink. The sink is a heavy object that will vibrate and move slightly. A flexible joint is your only protection against unsightly cracks. If you need to fix old grout in other parts of the bathroom, check out these tile cleaning tips to see if it just needs a deep scrub before you decide to tear it all out.
“Coverage of 95 percent in wet areas is non-negotiable for the longevity of ceramic tile installations.” – TCNA Handbook Extract
The final seal of professional integrity
A successful tile job around a pedestal sink is only finished when the plumbing is reinstalled without compromising the tile integrity. You have to be careful when you bolt that sink back down. If you overtighten the bolts, you will crack the tile you just spent all day cutting. I use rubber washers between the bolt head and the porcelain and between the porcelain and the tile. This creates a sandwich of protection. Once everything is tight, I run a clean bead of silicone around the base. This prevents water from the inevitable sink overflow from getting underneath the tile and rotting out your subfloor. This is the part where most people get lazy. They think the tile is waterproof. It isn’t. Tile is a shedding surface, but the grout and the thin-set can still hold moisture. You have to be the architect of the drainage. If you are working in a climate with high humidity, like the coastal regions of the South, you need to ensure your bathroom has proper ventilation. Without a good fan, your new floor will stay damp, leading to mold growth in the grout lines. Taking care of the floor after the install is just as important as the install itself. Clean it with pH-neutral cleaners and stay away from harsh acids that eat away at the grout’s molecular structure. A well-installed floor around a pedestal sink should last fifty years if the subfloor was prepped right and the chemistry of the mortar was respected. It is about doing the hard work that no one sees so the beauty everyone sees actually lasts.