The sticky reality of failed sealant
Removing old silicone from a shower pan fast requires a combination of mechanical shearing and chemical softening to break the bond between the polymer and the substrate. Speed in this context is not about rushing but about using the correct solvent to liquefy the residue so the scraper does not damage the acrylic or tile surface. I spent three days grinding concrete on a job last month just so the floor wouldn’t click like a castanet and that same level of obsessive prep applies to showers. Most guys skip the leveling compound or they think they can just put new silicone over the old stuff. It will fail. I once walked into a house where the homeowner had applied three layers of caulk over a moldy base. The moisture was trapped in the middle and had rotted the subfloor so badly I could push a screwdriver through the plywood with one finger. That is the price of a shortcut.
Why your shower pan is leaking
Silicone fails because it is a mechanical bond that relies on a perfectly clean surface. If there is a single molecule of body oil or soap scum left on the shower pan the silicone will not stick. Most people see a gap and just squeeze more goop into it. This is a mistake. Silicone does not stick to old silicone. It is chemically impossible for the new bead to fuse with the old cured material. When you leave old residue behind you are creating a microscopic tunnel for water to travel through. Over time that water sits against the studs. It breeds black mold. It destroys the integrity of your showers. You have to get back to the raw material. Whether it is acrylic or tile the surface must be pristine before you even think about opening a new tube of sealant.
Tools that actually cut through the sludge
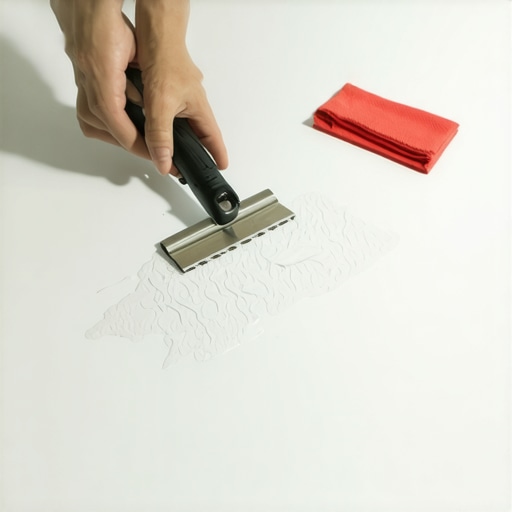
You do not need a fancy vibrating tool for this job. You need a sharp utility knife with a fresh pack of blades and a plastic scraper. I prefer the heavy duty nylon scrapers because they do not scratch the shower pan. Metal blades are dangerous in the wrong hands. One slip and you have a permanent gouge in your acrylic pan that will collect dirt forever. I carry a 5-in-1 tool for the heavy lifting but the fine work is done with a manual pull-scraper. The physics of the pull-scraper allows for better control of the pressure. You are trying to slide the blade under the skin of the silicone. If you push too hard you might pierce the waterproof membrane behind the tile. This is particularly dangerous in small bathrooms where space is tight and your angles are awkward. Precision beats power every single time.
The chemistry of bond breakers
Silicone is a polymer that is incredibly resistant to most household cleaners. To remove it fast you need a specialized silicone digester. These chemicals work by breaking the cross-linked bonds of the silicone molecules. I have seen guys try to use vinegar or bleach. It does nothing to the silicone. It just makes the room smell bad. You want a solvent like mineral spirits or a dedicated commercial silicone remover. Apply it and let it sit for twenty minutes. This is the part where most people fail. They apply the chemical and immediately start scraping. You have to give the chemistry time to work. The solvent needs to soak into the pores of the silicone to soften it. Once it turns into a soft jelly it will come off in long ribbons rather than tiny frustrating flakes.
| Method | Effort Level | Risk of Damage | Success Rate |
|---|---|---|---|
| Mechanical Only | High | High | Medium |
| Chemical Softening | Low | Low | High |
| Heat Gun Method | Medium | Very High | Low |
| The Pro Combo | Medium | Low | 100% |
Mechanical removal vs chemical assistance
The best approach is a hybrid. Start by cutting out the bulk of the old bead with a sharp blade. Be careful not to score the tile or the pan. Once the main body of the silicone is gone you will be left with a thin film. This film is the hardest part to remove. This is where the mineral spirits come in. I saturate a rag and lay it over the residue. This prevents the solvent from evaporating too quickly. If you are working on tile you can be a bit more aggressive. If it is an acrylic pan you must be careful because some solvents will melt the plastic. Always test a small hidden area first. The goal is to get the surface so clean that a piece of masking tape will stick to it perfectly. If the tape peels off easily you still have silicone residue present.
“A floor is only as good as the subfloor beneath it; deflection is the enemy of every joint.” – Master Flooring Axiom
Preparing the substrate for a new life
After the mechanical scraping and the chemical soak you are still not done. You must neutralize the chemicals. I use denatured alcohol for this. It evaporates quickly and leaves no residue. If you leave mineral spirits on the surface the new silicone will not cure. It will stay soft and gummy for weeks. I see this all the time when homeowners try to do it themselves. They think they are being thorough but they forget the final wipe down. This is the same logic we use when preparing eco-friendly tile installations. The bond is only as strong as the cleanliness of the interface. Here is a checklist for the final prep phase.
- Remove 95% of the bulk silicone with a plastic blade.
- Apply a silicone digester to the remaining film.
- Wait exactly twenty minutes for the chemical reaction.
- Wipe away the softened residue with a coarse scrub pad.
- Clean the entire joint with 90% isopropyl alcohol.
- Vacuum any dust or debris from the gap.
- Dry the area with a lint free cloth or a heat gun on low.
The error of the double bead
There is a common myth that more is better. Some guys think that if a thin bead is good then a thick wide bead is great. That is a lie. A thick bead of silicone is actually more likely to fail because it has more internal mass that pulls on the bond lines during temperature changes. Silicone is designed to stretch. If it is too thick it loses its elasticity and pulls away from the wall. This is a major issue near baseboards or where the floor meets the shower pan. The expansion and contraction of the house will rip a thick bead right off the surface. You want a clean concave bead that is about a quarter inch wide. Use a smoothing tool or a gloved finger dipped in soapy water to get that perfect finish. Do not use your bare finger. The oils from your skin will contaminate the silicone and cause it to yellow over time.
Avoiding the common pitfalls of grout and tile
If you are working with natural stone tile like marble or travertine you have to be extra careful. Acidic silicone removers will etch the stone and ruin the finish. For stone you need a pH-neutral remover. I have seen $20,000 bathrooms ruined because someone used a cheap hardware store solvent on expensive stone. If your grout is also looking rough you might want to look into grout restoration secrets while you have the tools out. Removing the silicone gives you a clear view of the grout lines at the base of the wall. Often these are cracked. Do not just put silicone over the cracks. You need to remove the loose grout and replace it or use a color-matched caulk that is designed for wet areas. If you are looking to refresh things without a full remodel check out how to refresh grout without replacing it before you reseal everything.
Why moisture is the ultimate enemy
The biggest reason silicone fails to bond is hidden moisture. You might think the surface is dry but there is often water trapped in the gap behind the tile. If you seal that water in it will eventually push the silicone out as it tries to evaporate. I like to use a hair dryer or a heat gun on a very low setting to blow air into the gaps before I apply the new bead. You would be surprised how much water comes bubbling out of a seemingly dry joint. If you are in a high humidity area like Florida or Houston this step is mandatory. You cannot rush the drying process. I usually tell clients to wait twenty four hours after the final cleaning before I come back to apply the new sealant. It is the only way to ensure a lifetime bond. If you have questions about specific materials you can always contact us for professional advice on your specific flooring or shower layout.
The final word on shower maintenance
A shower pan is a moving target. It flexes every time you step on it. This constant movement is why we use silicone instead of grout at the change of plane. Silicone is the suspension system for your shower. If it is old and brittle it cannot do its job. Removing it fast is a matter of having the right tools and the patience to let the chemicals work. Do not hack away at it like a madman. Be surgical. Treat the shower pan like a piece of precision engineering. If you take the time to do the prep work correctly you will not have to do this job again for another ten years. If you rush it you will be back here in six months doing it all over again with more mold and more frustration. Proper maintenance of your baseboards and shower seals will save you thousands in structural repairs down the road. Follow the NWFA and TCNA guidelines for all your wet area projects to ensure they last a lifetime.
Comments
One response to “How to Remove Old Silicone from a Shower Pan Fast”
This article really emphasizes the importance of patience and proper tools when removing old silicone. I used a similar approach last year where I started with a sharp utility knife and then applied a silicone digester, which made a huge difference compared to just scraping away with a metal blade. The idea of letting the chemical sit for twenty minutes is something I plan to stick with moving forward. One challenge I faced was ensuring the area was completely dry and free of oils before resealing, which is crucial for a lasting bond. Has anyone had success using eco-friendly or pH-neutral removers for natural stone tiles? I’d love to hear tips on balancing effective removal and protecting delicate materials, as I’m working on a marble shower in my rental and want to avoid etching or damage.