The Structural Reality of Pebble Shower Maintenance
Most guys skip the leveling compound. They think the underlayment will hide the dip. It won’t. I spent three days grinding concrete on a job last month just so the floor wouldn’t click like a castanet. This same neglect happens in showers. I once walked into a project where a pebble floor was essentially a swamp. The installer had ignored the pitch. Water sat in the grout valleys for weeks. It smelled like a stagnant pond. When I pulled up a single stone, the thin-set was mush. This is why we talk about engineering first and aesthetics second. A pebble floor is a collection of thousands of tiny river stones held together by cementitious grout and hope. If you do not understand the physics of how water behaves on a textured surface, you will destroy your investment with the wrong cleaning protocol. You need to treat this as a structural system, not a flat surface. Every stone has a different porosity. Every grout line is a potential failure point. If you use the wrong acid, you are not just cleaning, you are dissolving the very bond that keeps your shower waterproof. We have to look at the chemistry of the stone and the mechanical reality of the drain. This is not about a quick scrub. This is about preserving the mineral density of the stone and the hydrophobic properties of the sealer.
The structural lie of the pebble surface
Pebble shower floor cleaning requires alkaline degreasers and vapor steam to remove biofilm from cementitious grout. Proper maintenance prevents efflorescence and calcium deposits while protecting the structural integrity of the shower pan and waterproof membrane. Most homeowners assume that because stones are from a river, they are indestructible. This is a myth. River stones are often basalt, quartz, or sedimentary rocks. Each has a different mineral hardness and reaction to chemicals. When you walk on these stones, you are applying pressure to the grout joints. If that grout is softened by acidic cleaners like vinegar, it will crumble. The stones will then lose their lateral support. Once a stone wiggles, the waterproof seal is compromised. You are looking at a total tear-out. I have seen it a hundred times. People use a generic bathroom spray and wonder why their grout is turning into sand. You need to understand that the grout in a pebble shower is significantly more exposed than the grout in a standard tile layout. In a standard 12 by 12 tile, the grout is a tiny fraction of the surface area. In a pebble floor, the grout can be up to thirty percent of what you see. This means your cleaning focus must be on the grout, not just the stone face. For more detailed advice, check out tile cleaning tips for a sparkling bathroom in 2025.
Why your grout is a biological sponge
Porous grout joints act as a capillary network that pulls body oils, soap scum, and hard water minerals deep into the subfloor assembly. Cleaning must involve enzymatic cleaners that break down organic matter at a molecular level without etching the natural stone. Cement-based grout is essentially a hard sponge. It has millions of microscopic voids. When you take a shower, the water carries soap and dead skin into these voids. If you do not have a high-quality penetrating sealer, these materials stay there. They become a food source for mold and bacteria. This is how the pink slime, actually Serratia marcescens, begins to grow. It is not just on the surface. It is inside the grout. This is why a simple scrub brush rarely works. You are just moving the bacteria around on the surface. You need a cleaner that can penetrate the surface tension of the water and get into those voids. I always recommend an alkaline-based cleaner with a pH of about 9 or 10. This is high enough to break down oils but low enough that it won’t strip the color out of your stones. If you have already noticed the grout looking rough, you might need to look into grout restoration secrets for long-lasting results to fix the structural damage. It is a long process involving mechanical agitation and chemical neutralization.
“The installation of a waterproof membrane is secondary to the management of surface water through proper pitch and grout density.” – TCNA Handbook Analysis
The chemistry of the stone bond
Natural stone chemistry dictates that acidic cleaners will cause calcium carbonate to dissolve, leading to pitting and structural weakening of the pebble floor. Using pH-neutral stone soap is the only way to ensure the longevity of the mineral bond and the aesthetic finish. Let’s talk about the Janka scale and mineral hardness. While the Janka scale is for wood, we have the Mohs scale for stones. Most river pebbles are around a 6 or 7 on the Mohs scale, which is hard. However, the matrix they are set in is much softer. If you use a product containing citric acid or phosphoric acid, you are creating a chemical reaction. The acid hits the calcium in the grout or the limestone in the pebbles and creates carbon dioxide gas. You can actually see it fizzing sometimes. That fizzing is the sound of your floor being destroyed. It creates tiny pits that hold even more dirt. It is a downward spiral. You want a cleaner that uses surfactants to lift the dirt. Surfactants work by having one end of the molecule attach to water and the other end attach to oil. This allows the oil to be rinsed away. It is physics, not magic. If your floor has already suffered from this kind of chemical abuse, you should learn how to refresh grout without replacing it before the stones start falling out. I have had to rebuild entire shower floors because someone thought lemon juice was a good natural cleaner.
| Cleaner Type | pH Level | Effect on Pebble Stone | Effect on Grout |
|---|---|---|---|
| White Vinegar | 2.5 | Etching and dulling | Dissolves cement bond |
| Bleach | 12.0 | Discolors darker stones | Weakens polymer additives |
| Dish Soap | 7.0 | Safe but leaves film | Leaves sticky residue |
| Alkaline Degreaser | 10.0 | Deep cleans safely | Removes oils effectively |
| Vapor Steam | N/A | Sterilizes surface | Flushes pores deeply |
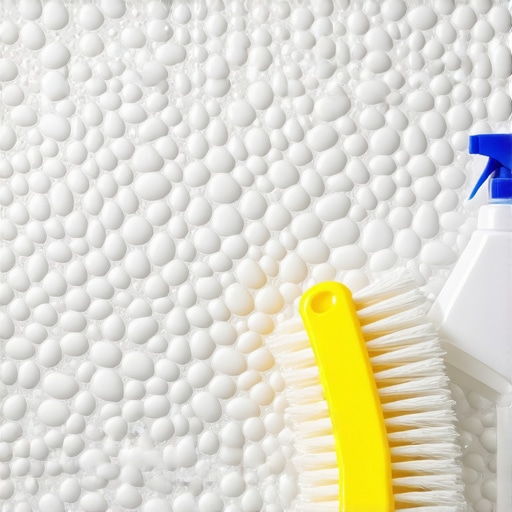
The vapor steam revolution for stone floors
Vapor steam cleaning utilizes high-temperature dry steam to sanitize and emulsify contaminants within the textured crevices of a pebble shower. This non-chemical method is the most environmentally friendly and effective way to maintain hygiene without residue buildup. If you want to get serious about cleaning, you have to stop thinking about liquids and start thinking about gas. A high-quality steam cleaner produces what we call dry steam. This is water heated to over 300 degrees Fahrenheit under pressure. When that steam hits the cold stone, it expands rapidly. This expansion forces the dirt and soap scum out of the microscopic pores of the grout. It kills mold spores on contact. It does this without any harsh chemicals. It is the only way to truly deep clean a pebble floor without degrading the sealer prematurely. I use a steam cleaner on every restoration job. It is the gold standard. It also helps in the corners where the floor meets the baseboards or the wall tile. These transitions are notorious for holding moisture. If you are planning a full bathroom update, you might want to consider chic baseboard designs that transform rooms in 2025 to complement your clean floor. The steam ensures that the interface between the floor and the wall stays sterile.
“A floor is only as good as the subfloor beneath it; deflection is the enemy of every joint.” – Master Flooring Axiom
Maintenance schedules that actually work
Routine maintenance for pebble shower floors must include daily squeegeeing and weekly pH-neutral cleaning to prevent biofilm accumulation and mineral crusting. A quarterly deep clean with a specialized stone brush ensures the valleys between stones remain debris-free and sanitary. You cannot treat a pebble floor like a porcelain tile. It requires more work. It is the price you pay for the spa-like feeling under your feet. If you are lazy with your maintenance, the floor will turn on you. You will end up with a brown, slimy mess that requires professional intervention. I tell my clients to follow a strict protocol. It is like changing the oil in your truck. You do it now so you don’t have to replace the engine later.
- Use a squeegee after every single shower to move water toward the drain.
- Spray the floor with a dilute pH-neutral stone cleaner twice a week.
- Use a medium-bristle nylon brush to scrub the grout lines every two weeks.
- Never use steel wool or metal brushes as they leave tiny bits of metal that will rust and stain the stone.
- Check the sealer every six months by dropping a few beads of water on the grout. If it soaks in, you need to reseal.
- Keep the shower door or curtain open to allow for maximum airflow and evaporation.
The physics of the shower drain and pitch
Shower floor drainage depends on the capillary break and the slope of the mortar bed to ensure that standing water does not saturate the stone mosaic. Proper installation of a linear drain or a centered point drain is vital for the evacuation of gray water and the prevention of mold. If your floor stays wet for hours after a shower, your pitch is wrong. There is no amount of cleaning that can fix a bad subfloor. Water is a solvent. Over time, standing water will find a way through the smallest pinhole in your grout. It will then sit on the waterproof membrane. If that membrane doesn’t have a clear path to the weep holes in the drain, the water just sits there. This is why some showers always smell like a wet dog. You are cleaning the top of the pebbles, but the rot is happening underneath. When cleaning, you must make sure the drain cover is clear of hair and debris. If the drain is slow, the water levels rise and submerge the grout for longer than intended. This increases the hydro-static pressure on the joints. It is a simple mechanical reality. If you are looking for design inspiration that handles these technical challenges well, look at showers that wow modern designs for 2025. They focus on drainage as much as they do on looks. A well-designed shower is a clean shower.
The final word on pebble floor longevity
The secret to a long-lasting pebble shower is not a magic bottle of cleaner. It is the discipline of dry surfaces. If you keep the stones dry, the minerals cannot crystallize. If you keep the grout dry, the mold cannot grow. It is a simple equation. You must be the master of your environment. Do not let the humidity in your bathroom reach levels where condensation stays on the walls for hours. Use your exhaust fan. Use a squeegee. Use the right chemistry. If you follow these rules, your pebble floor will last for thirty years. If you ignore them, I will be seeing you in five years for a tear-out. I prefer the first option. It is better for your wallet and my back. For any other questions or if you have ruined your grout already, you can always reach out via our contact us page for a professional assessment. We have seen every failure imaginable and we know how to fix them correctly. Structural integrity is not optional. It is the foundation of every beautiful home.