The hidden danger of the hollow tile and the tool that causes it
I spent three days grinding concrete on a job last month just so the floor wouldn’t click like a castanet. Most guys skip the leveling compound. They think the underlayment will hide the dip. It won’t. I walked into that kitchen and every third step sounded like a drum. The homeowner was devastated. They spent five thousand dollars on Italian porcelain only to have it sound like cheap plastic. When we pulled a tile up, the problem was obvious. The installer used a notch that was too small and didn’t collapse the ridges. The mortar looked like a dried-up riverbed instead of a solid bond. This is the reality of floor installation. If you ignore the physics of the trowel, you are building a failure. Flooring is an engineering task, not a hobby. You are managing moisture, deflection, and chemical adhesion. If any of those variables slip, the whole system collapses.
The deceptive sound of a hollow tile
Hollow tiles occur when there is an air pocket between the tile back and the substrate, usually caused by improper mortar coverage or the wrong trowel size. These voids create weak points where the tile is unsupported. When someone walks across the surface, the tile flexes into that void. Eventually, the bond breaks completely or the tile cracks under the pressure of a heel or a chair leg. Sound is the first warning. A solid tile produces a high-pitched, dense ‘tink’ when tapped. A hollow tile produces a deep, resonant ‘thud’ that signals a lack of structural unity. This lack of unity is a death sentence for your grout. If the tile moves even a fraction of a millimeter, the grout will pulverize into dust. You can read more about keeping your grout healthy in our guide on grout restoration secrets for long lasting results to understand how movement ruins the finish.
“A floor is only as good as the subfloor beneath it; deflection is the enemy of every joint.” – Master Flooring Axiom
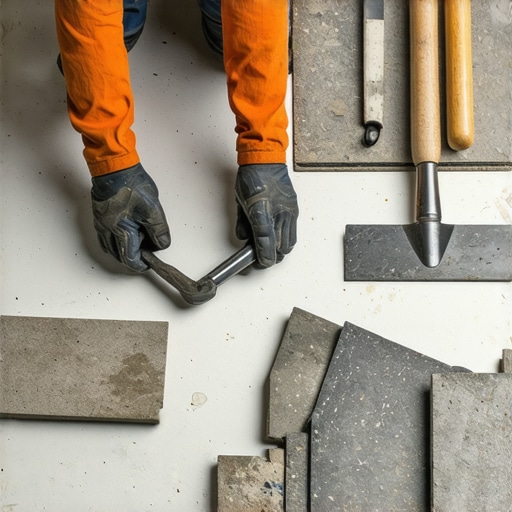
Physics of the notch and the collapse
A trowel notch is designed to meter out a specific volume of mortar while creating air channels that allow the tile to be pressed into place. When you pull a notched trowel across a floor, you are creating ridges. These ridges must collapse when the tile is set. If the ridges are too small, they won’t reach the back of the tile. If they are too large, the mortar will squeeze out of the sides and into your grout lines. The goal is 80 percent coverage for interior dry areas and 95 percent for wet areas like showers that wow. To achieve this, you must choose a trowel based on the flatness of your floor and the size of your tile. A 12 by 12 inch tile might survive a 1/4 inch square notch, but a 24 by 24 inch plank will fail every single time with that setup. The larger the tile, the deeper the notch needs to be to compensate for the inherent bowing in the ceramic or stone.
Why a 1/4 inch notch is usually a lie
Small trowel notches like the 1/4 by 1/4 inch variety are often misused on large format tiles leading to massive bond failure and hollow spots. These small trowels are meant for mosaics or small wall tiles. When you use them on floor tiles larger than 8 inches, you aren’t providing enough material to bridge the gap between a less than perfect subfloor and the tile. Tiles are rarely perfectly flat. Most have a slight ‘crown’ or ‘cup’ from the firing process. If you use a shallow notch, the center of the tile will never touch the mortar. You end up with ‘spot bonding’ which is a violation of every industry standard. This is why many installers are moving toward the Euro-notch or the U-notch. These shapes are designed to collapse more easily than the traditional square notch, ensuring the air is pushed out and the mortar spreads into a continuous bed of support.
| Tile Size | Trowel Notch Size | Recommended Application | Coverage Goal |
|---|---|---|---|
| 2×2 to 4×4 | 3/16 inch V-notch | Backsplashes and mosaics | 80% |
| 6×6 to 12×12 | 1/4 x 1/4 inch Square | Standard floor tiles | 80% |
| 12×12 to 16×16 | 1/4 x 3/8 inch Square | Medium format tiles | 85% |
| 18×18 and up | 1/2 x 1/2 inch Square | Large format porcelain | 95% |
The chemistry of thin set and mechanical bonds
Modified thin set mortar uses polymers to create a chemical bond that supplements the mechanical grip of the Portland cement. When the mortar is wet, it must ‘wet out’ the back of the tile. This means the liquid must penetrate the microscopic pores of the porcelain. If the mortar is too dry or if it has ‘skinned over’ because you spread too much at once, the bond will be superficial. It might hold for a month, but as the house shifts with the seasons, the tile will pop. This is especially true in regions with high humidity fluctuations. In a place like Houston or Miami, the constant expansion of the wood framing puts immense stress on the tile. Without a 95 percent bond, the floor cannot resist these forces. You should always back-butter large tiles. This involves spreading a thin, flat coat of mortar on the back of the tile before setting it into the notched bed. It ensures that the chemical bond is established on both surfaces before they ever meet.
Geometric consequences of the wrong metal
The shape of the trowel notch determines how much air is trapped under the tile and how much effort is required to set it. Square notches are the industry standard, but they require significant force to collapse. U-notches make it easier to embed the tile because the ridges are rounded and fall over with less resistance. For the modern installer working with Gauged Porcelain Tile Panels, the trowel is the most important tool in the kit. If you are installing eco friendly tile solutions, you want to ensure the installation lasts fifty years, not five. A failed floor is the least sustainable thing in a home because it all ends up in a landfill. Using a slanted notch trowel can also help. The slanted ridges are predisposed to collapse in one direction, which helps evacuate air and prevents those dreaded hollow sounds that haunt a contractor’s reputation.
“Proper mortar coverage is defined as 80 percent in dry areas and 95 percent in wet areas like showers.” – TCNA Handbook Standards
Modern showers and the waterproofing trap
Waterproofing membranes in modern showers require specific trowel techniques to ensure the fleece or material bonds correctly to the substrate. If you use a trowel that is too large when installing a membrane, you create a thick, squishy layer that can cause the tile above it to shift. If you use one that is too small, the membrane won’t stick. This is the delicate balance of the wet area. In showers with a style that uses small hex tiles, the trowel choice is even more vital. Large notches will ooze through the tiny grout joints, making a mess that is impossible to clean. You end up spending hours picking out dried mortar before you can even think about grout. For small shower floors, a 3/16 inch V-notch is often the best choice. It provides enough grab without over-filling the joints. If you need help cleaning up after a messy install, check out tile cleaning tips for a sparkling bathroom.
The 1/8 inch that ruins everything
A subfloor that is out of level by more than 1/8 inch over ten feet will cause lippage and hollow spots regardless of the trowel used. I have seen guys try to use a 3/4 inch notch to ‘build up’ a low spot in the concrete. This is a massive mistake. Mortar is not a leveling agent. It is an adhesive. When thick mortar dries, it shrinks. If one side of the tile has 1/4 inch of mortar and the other side has 3/4 inch, the shrinkage will pull the tile unevenly. This creates ‘lippage’ where one edge of the tile sits higher than its neighbor. Not only is this a tripping hazard, but it also makes the floor look like a DIY disaster. You must use self-leveling underlayment to get the floor flat before the trowel ever touches the ground. Only then can you achieve the clean lines seen in chic baseboard designs where the floor meets the wall perfectly.
A checklist for the perfect bond
- Check subfloor flatness using a 10 foot straight edge before starting.
- Select a trowel notch size based on the tile’s shortest side and manufacturer specs.
- Burn a thin layer of mortar into the substrate using the flat side of the trowel first.
- Combing the mortar in straight lines, never in swirls or ‘S’ patterns.
- Back-butter every tile larger than 12 inches to ensure 95 percent coverage.
- Periodically pull up a set tile to check for ridge collapse and coverage.
- Ensure the mortar hasn’t skinned over in high heat or breezy conditions.
The regional impact of humidity on open time
Ambient temperature and humidity significantly alter the ‘open time’ of your mortar, meaning the time you have to set the tile before the adhesive fails. In dry, arid climates like Arizona, the moisture in the thin set is sucked out by the air and the substrate almost instantly. You might only have five minutes to get that tile down. In humid coastal regions, you might have twenty. If you are working in a garage or an area with high airflow, the surface of the mortar will dry while the bottom is still wet. If you set a tile on ‘skinned’ mortar, it will feel like it’s stuck, but it’s actually just sitting on top of a film. This is the leading cause of tiles popping up six months later. Always touch the mortar ridges with your finger. If it doesn’t transfer to your skin, it is too dry. Scrape it up and start over. It is a pain, but it’s better than a callback.
Baseboards and the perimeter finish
The way your tile meets the wall is the final test of your floor’s structural integrity and aesthetic success. If your floor is level and your tiles are set correctly with the right trowel, your baseboards will sit flush against the surface. If you have lippage or uneven tiles, you will see unsightly gaps under the molding. You can find inspiration for finishing these transitions in our article on baseboards makeover ideas to elevate your space. Remember that you must leave an expansion gap at the perimeter. Don’t shove the tile right against the drywall. Houses move. Wood swells. If the tile is tight against the wall, it has nowhere to go but up. That is how you get ‘tenting’ where the floor literally jumps off the ground. The baseboard is there to hide that gap, giving the floor room to breathe while looking finished. Success in flooring is about what you don’t see. It’s about the mortar under the tile, the levelness of the slab, and the patience of the installer.