The chemistry of stone failure and the necessity of neutral cure silicone
I once walked into a house where a $15,000 wide-plank walnut floor was cupping so bad it looked like a potato chip because the installer didn’t check the crawlspace humidity, but that was nothing compared to the disaster I saw in a master suite shower last year. The homeowner had spent a fortune on book-matched Italian marble. The installer, a guy who usually stuck to basic ceramic, used a standard $5 tube of acetoxy silicone from a big-box store to seal the corners. Within six months, every joint had a dark, greasy-looking shadow bleeding two inches into the marble. It is called picture framing. The acid in the silicone reacted with the calcium carbonate in the stone, creating a permanent chemical stain that no amount of scrubbing could fix. The entire shower had to be ripped out. It was a heartbreaking waste of material and labor that could have been avoided with the right tube of goop. When you work with natural stone, you are not just a laborer. You are a chemist. You have to understand how the molecules in your sealant interact with the mineral structure of the rock. If you get it wrong, the stone wins every time.
The hidden danger of acidic curing agents
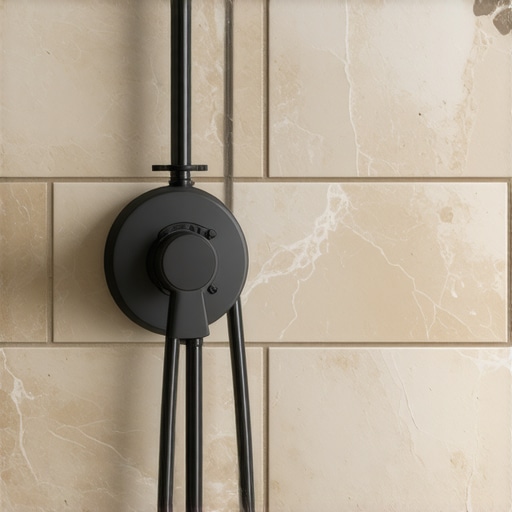
Neutral cure silicone is mandatory for natural stone because it lacks the acetic acid found in standard caulks. This acid reacts with the calcium carbonate in marble and limestone, causing permanent staining known as picture framing. Always verify the curing chemistry before application to prevent stone degradation and bond failure. Most people walk into a hardware store and grab whatever says silicone on the label. That is a massive mistake. Standard silicone sealants are acetoxy cure. As they dry, they release acetic acid. You can smell it. It smells like strong vinegar. For ceramic or porcelain, this is fine. For natural stone like marble, travertine, or limestone, it is a disaster. The acid eats into the stone surface and creates a pathway for the oils in the silicone to migrate into the pores. Once those oils are in the stone, they are there forever. You cannot pull them out with a poultice. You cannot sand them away. You have a ruined shower. Neutral cure silicone, on the other hand, releases alcohol or an oxime gas as it cures. These substances are pH neutral. They do not react with the minerals in the stone. They sit on the surface and bond to the edges without invading the internal structure of the material. It is the only way to ensure that your showers that wow stay looking that way for years. [image_placeholder_1]
“A floor is only as good as the subfloor beneath it; deflection is the enemy of every joint.” – Master Flooring Axiom
Why natural stone is more like a sponge than a rock
Natural stone possesses a high degree of porosity which allows for capillary action to pull liquids deep into its crystalline structure. This microscopic network of voids means that any chemical applied to the surface can potentially migrate throughout the entire tile. Proper sealing and neutral materials are required. When you look at a piece of granite or marble, it looks solid. It is not. Under a microscope, stone is a network of tiny tunnels and air pockets. If you drop water on an unsealed stone tile, you can watch it disappear. This is capillary action. When you apply an acetoxy silicone, the acid breaks down the natural seal of the stone and the oils follow the acid into those tunnels. This migration is what causes that dark halo around the edges of your tile. It is not just about aesthetics either. When the internal chemistry of the stone is altered, it can weaken the bond between the stone and the thin-set. I have seen tiles pop right off the wall because the silicone oils migrated behind the tile and contaminated the adhesive layer. This is why tile cleaning tips always start with using the right chemicals. If you use the wrong sealer or the wrong cleaner, you are literally dissolving your investment. You need to treat stone with the respect its geological history deserves. It took millions of years to form that marble. Do not ruin it in ten minutes with the wrong caulk.
Technical comparison of sealant types
| Feature | Acetoxy Silicone | Neutral Cure Silicone | Polyurethane |
|---|---|---|---|
| Curing Agent | Acetic Acid | Alcohol or Oxime | Isocyanate |
| Odor | Strong Vinegar | Low Odor | Moderate |
| Stone Compatibility | Very Poor | Excellent | Good |
| Flexibility | High | High | Medium |
| Price Point | Low | Premium | High |
The physics of movement joints in the shower
Movement joints are essential at every change of plane because buildings naturally expand and contract with temperature and humidity changes. Without a flexible neutral cure silicone in these joints, the grout will crack and moisture will penetrate the substrate. This leads to mold and structural rot. Every shower is a moving object. The house settles. The wood framing behind the walls expands when it gets humid and shrinks when the heater kicks on in the winter. Grout is rigid. It has zero flexibility. If you put grout in the corners where two walls meet, or where the wall meets the floor, it will crack. I guarantee it. These areas are called change of plane joints. According to the Tile Council of North America, these joints must be filled with a flexible sealant. If you use a rigid grout, the movement will force the grout to crumble, leaving a gap for water to get behind your tile. Once water is back there, you are looking at rot, mold, and a failed shower pan. Using a high-quality neutral cure silicone in these joints allows the shower to breathe and move without breaking the waterproof seal. It is a structural necessity that many installers skip because they are lazy or do not want to carry an extra tube of color-matched caulk. If you care about longevity, you do not skip the silicone. You can learn more about maintaining these areas in our guide on how to refresh grout without replacing it.
The role of baseboards and perimeter transitions
Baseboards serve as the final structural bridge between the floor and the wall, covering the essential expansion gaps required for natural materials. In wet areas, these transitions must be handled with moisture-resistant materials and compatible sealants to prevent water wicking into the drywall. Even in the bathroom, the way your tile meets the wall matters. You need an expansion gap. If you butt the tile tight against the wall, the floor has nowhere to go when the temperature changes. It will tent or crack. This gap is usually covered by baseboards. In a high-moisture environment like a bathroom, the intersection of the baseboard and the floor tile is a prime spot for water to collect. If you do not seal that gap with a neutral cure silicone, water from a splashing shower or a leaky toilet will wick up into the baseboard and the drywall behind it. I have seen beautiful chic baseboard designs completely ruined by black mold because the installer used a cheap acrylic caulk that shrank and pulled away from the floor. A neutral cure silicone stays flexible forever. It will not shrink. It will not crack. It creates a permanent dam against moisture. It is the difference between a bathroom that lasts thirty years and one that needs a remodel in five.
“A floor is only as good as the subfloor beneath it; deflection is the enemy of every joint.” – Master Flooring Axiom
Step by step guide to applying silicone to natural stone
The application process for neutral cure silicone requires meticulous surface preparation to ensure a molecular bond. Any dust, soap scum, or moisture present during application will lead to premature failure of the seal and potential water damage. Following a strict protocol is mandatory for professional results. You cannot just slap silicone over old grout and expect it to work. It will fail. You have to do the work. The surface must be surgically clean. If there is any old soap residue, the silicone will not stick. It will just sit there like a wet noodle. Here is the process I use on every single high-end stone job I do.
- Clean the joints with denatured alcohol to remove all oils and dust.
- Ensure the area is 100 percent dry before starting. Use a hair dryer if you have to.
- Apply painter’s tape to both sides of the joint to create a clean, crisp line.
- Cut the nozzle of the silicone tube at a 45-degree angle to match the joint width.
- Apply a steady bead of neutral cure silicone into the joint.
- Tool the joint immediately with a gloved finger or a specialized tool.
- Remove the tape while the silicone is still wet to avoid jagged edges.
- Allow the sealant to cure for at least 24 hours before exposing it to water.
The contrarian truth about underlayments and thickness
While most people want the thickest underlayment or the most cushioned feel, too much cushion actually causes the locking mechanisms on LVP or the joints in stone to snap under pressure. This same logic applies to silicone joints. If you make the bead too thick, it loses its ability to stretch. A thin, well-placed bead of neutral cure silicone is far superior to a giant glob. The geometry of the joint matters. You want the silicone to bond to the two sides of the stone, but not necessarily to the back of the joint. This is called three-sided bonding and it is a common cause of failure. If the silicone is stuck to the back, it cannot stretch when the walls move. It will tear down the middle. Professional installers use a backer rod in deep joints to prevent this. It is a small detail that 90 percent of DIYers and 50 percent of pros ignore. If you want to avoid a call-back, you learn the physics of the bead. If you are ever unsure about the materials you are using, it is best to contact us for expert advice before you ruin an expensive slab of marble. We have seen every mistake in the book and we know how to prevent them.