The myth of the universal color match
To match new grout to a 20-year-old tiled floor you must account for two decades of chemical carbonation, mineral absorption, and surfactant buildup within the porous cement matrix. This process requires a deep forensic cleaning of the existing lines followed by a side-by-side wet-sample test of modern high-performance grouts compared against the aged pigment of the original installation. Most homeowners think a simple color card will solve the problem, but they forget that the original Portland cement has undergone a permanent chemical shift. I have spent twenty-five years on my knees with a grout saw and a moisture meter, and I can tell you that the grout you see today is not the grout that was installed in 2005. Most guys skip the leveling compound. They think the underlayment will hide the dip. It won’t. I spent three days grinding concrete on a job last month just so the floor wouldn’t click like a castanet, and that same level of structural obsession is what you need for grout. If your subfloor is bouncing, your grout is cracking, and no color match in the world will save a floor that is physically moving under your feet.
The physics of aged portland cement and mineral staining
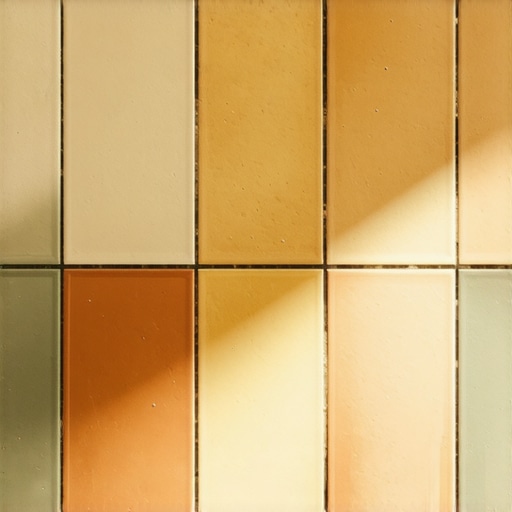
Aged grout behaves differently than fresh material because the calcium silicate hydrate gel has fully cured and reacted with atmospheric CO2. This carbonation reduces the pH of the grout and makes the surface more susceptible to deep-set staining from household cleaners and hard water minerals like iron and manganese. When you look at 20-year-old showers, you are looking at a fossil. The original pigment has been bleached by UV rays or darkened by oils. To get a real match, you have to look past the surface. [IMAGE_PLACEHOLDER] You need to understand that grout is essentially a microscopic sponge. Over two decades, that sponge has filled up with everything from skin cells to floor wax. If you just slap new grout into a patch, it will stand out like a sore thumb because the new material has a different refractive index and porosity. You are trying to match a living, breathing material that has aged with the house. This is why the structural integrity of the tile bond matters so much. If the tile is loose, the grout will fail regardless of the color.
“A floor is only as good as the subfloor beneath it; deflection is the enemy of every joint.” – Master Flooring Axiom
The three methods for perfect color synchronization
Successful grout matching involves physical pigment testing, chemical staining, or a complete grout colorant overhaul to ensure the entire floor looks uniform. You cannot trust a dry powder sample. Grout always dries lighter than it looks in the bucket. I always tell people to mix a small batch and let it cure for at least 24 hours on a piece of cardboard before touching the floor. If the match is for showers that wow, you also have to consider the humidity of the environment. In a high-moisture bathroom, the grout stays slightly darker because of the ambient vapor pressure. If you are working in a dry climate like Phoenix, the grout will ash out and look lighter. You must also consider the width of the joint. A 1/16 inch joint hides color variations much better than a wide 3/8 inch sanded joint. If the original floor was installed with sanded grout, you must use sanded grout for the repair, or the texture will catch the light differently and ruin the illusion. Texture is just as important as color when you are trying to fool the eye.
The structural reasons why your grout is failing
Grout failure is rarely just a cosmetic issue and usually indicates a problem with the subfloor deflection or the thin-set bond. If you see cracks running through the grout lines, your floor is moving. The TCNA (Tile Council of North America) has strict standards for deflection, usually L/360 for ceramic and L/720 for natural stone. If your joists are too thin or your subfloor is just a single layer of 5/8 inch plywood, the grout will crack every time you walk across the room. I hate seeing people waste money on expensive tile only to put it over a bouncy floor. You have to stabilize the structure first. Sometimes this means adding a layer of cement backer board or a modern uncoupling membrane. Without a solid foundation, you are just putting a band-aid on a broken leg. You can learn more about how these details impact your home aesthetic by looking at chic baseboard designs that transform rooms in 2025, as the transition from floor to wall is where many structural issues first become visible to the naked eye.
| Grout Type | Porosity Level | Flexibility Rating | Best Use Case |
|---|---|---|---|
| Sanded Grout | High | Low | Joints wider than 1/8 inch |
| Unsanded Grout | Medium | Low | Polished stone and thin joints |
| Epoxy Grout | Zero | High | Stain-prone areas and showers |
| Acrylic Grout | Low | Medium | Exterior or wet environments |
The expert checklist for grout restoration
Before you apply any new material, you must follow a rigid preparation protocol to ensure the chemical bond between the old and new substances. This is not a job you can rush. If you leave even a tiny bit of soap scum or old sealer behind, the new grout will peel off in sheets within six months. I have seen it happen a thousand times. You need to mechanicaly abrade the surface of the old grout to expose the raw minerals beneath. This gives the new polymer-modified grout something to bite into. Here is the checklist I use on every restoration job:
- Deep clean with an alkaline-based cleaner to strip oils and waxes.
- Use a carbide-tipped grout saw to remove the top 1/8 inch of old material.
- Vacuum the joints thoroughly to remove all dust and loose debris.
- Apply a pH neutralizer if you used an acid wash previously.
- Perform a moisture test to ensure the subfloor isn’t holding water.
- Mix the new grout with a distilled water or a latex additive for better adhesion.
Why baseboards and transitions dictate grout longevity
The perimeter of your tiled floor is an expansion joint that must remain flexible to prevent the grout from crushing itself during seasonal shifts. Many installers make the mistake of grouting the tile all the way to the wall. This is a amateur move. You should always leave a gap at the wall and cover it with baseboards. If you are looking for baseboards makeover ideas to elevate your space, remember that the baseboard serves a functional purpose, it hides the necessary expansion gap. In a humid climate, the subfloor will expand. In a dry climate, it will shrink. If the tile is locked tight against the wall, the pressure has nowhere to go but into the grout lines. This causes the grout to pop out or turn into powder. I have spent years fixing floors where the installer didn’t understand the basic physics of thermal expansion. It is the small details that determine whether a floor lasts five years or fifty years. You can find more grout restoration secrets for long-lasting results to ensure your repair stands the test of time.
“Grout is the fuse of the flooring system; it is the first thing to break when something else goes wrong.” – Master Flooring Axiom
The final seal and color matching pigments
Once you have achieved a color match, applying a high-quality penetrating sealer is the only way to lock in that color for another twenty years. If you don’t seal it, the new grout will immediately start absorbing dirt and will quickly look different from your test patch. I prefer solvent-based sealers for older floors because they penetrate deeper into the aged cement. However, if you are looking for eco-friendly tile solutions for sustainable homes in 2025, there are now water-based fluoropolymer sealers that perform nearly as well without the heavy fumes. The goal is to create a hydrophobic surface that sheds water and prevents pigment migration. If you are struggling with a match that just won’t work, consider a grout colorant. These are essentially epoxy-based paints specifically designed for grout lines. They allow you to change the color of the entire floor to a single, uniform shade, which is often the best solution for a 20-year-old floor that has seen too much wear. It’s a lot of work, but it’s better than looking at a patchy, mismatched mess every morning when you brush your teeth. If you need professional help assessing your subfloor or tile health, feel free to contact us for an expert consultation.