The subfloor secret that kills curbless dreams
Zero-entry showers require a recessed subfloor or a structural slope of at least 1/4 inch per foot toward the drain to prevent flooding. This achieved through grinding concrete or sistering joists. Success depends on a perfect capillary break at the threshold where the wet zone meets the dry bathroom floor.
Most guys skip the leveling compound. They think the underlayment will hide the dip. It won’t. I spent three days grinding concrete on a job last month just so the floor wouldn’t click like a castanet and the water would actually stay in the pan. My hands still vibrate from the grinder. I can smell the WD-40 on my tools and the fine gray dust of pulverized Portland cement. Everyone wants that high-end minimalist look. They want to walk straight from their bedroom into a shower without tripping over a four-inch curb. But they don’t want to hear about the physics of it. If your subfloor isn’t dead level before you start sloping it, you are building a very expensive bathtub that will overflow into your hallways. I have seen fifteen thousand dollar marble jobs ruined because the installer didn’t understand deflection or the L/360 standard required for natural stone. They just slapped down some thin-set and hoped for the best. Hope is not a waterproofing strategy. You need a mechanical bond and a chemical barrier that won’t fail when the house settles. It is about the microscopic reality of the installation. If the concrete slab has a moisture vapor emission rate higher than five pounds per thousand square feet, your tile will eventually pop. I use a moisture meter on every single job. I don’t care if the builder says it is dry. The builder wants to get paid and leave. I want the floor to stay put for thirty years.
“A floor is only as good as the subfloor beneath it; deflection is the enemy of every joint.” – Master Flooring Axiom
Why gravity dictates your bathroom layout
Water moves along the path of least resistance governed by the slope of the substrate and surface tension. A curbless shower must maintain a pitch that overcomes the hydraulic pressure of a high-flow showerhead. Without a deep recess or a linear drain, water will migrate across the tile surface.
When you remove the curb, you remove the physical barrier that saves you from bad plumbing. You are now relying entirely on the pitch of the floor. This is where the chemistry of the mortar comes into play. You need a medium-bed mortar that can support the weight of large format tiles without sagging. If one tile is a sixteenth of an inch higher than the next, it creates a dam. That dam sends water sideways. I have spent decades watching how water behaves on different surfaces. On a polished porcelain, water beads and runs fast. On a natural slate, it clings and creeps. You have to account for the coefficient of friction and the surface tension of the liquid itself. If you are using those fancy rain-heads that dump six gallons a minute, your 2-inch center drain isn’t going to cut it. You need to look at showers that wow modern designs for 2025 to understand how linear drains at the entry point act as a secondary defense. Most homeowners think the drain just sits there. It is actually a complex piece of engineering that must be tied into the waterproofing membrane with a fleece-lined flange. If that bond fails, the water goes into the joists. Then you get mold. Then you get a phone call from an angry client three years later. I don’t like those phone calls. I prefer the smell of fresh oak and clean grout. I prefer doing it right the first time.
The chemical bond of waterproofing membranes
Waterproofing for zero-entry showers involves a continuous bonded membrane that extends at least six feet outside the immediate spray zone. These systems use polyethylene or liquid-applied polymers to create an impervious shield. The bond strength must exceed 50 PSI to withstand the constant thermal expansion of hot water.
I have a deep distrust of anyone who says a shower is waterproof because they put up some greenboard. Greenboard is a joke. In a curbless environment, you need a tanking system. I use sheet membranes because I can verify the mil-thickness. When you paint on a liquid membrane, you are guessing. Is it 20 mils? Is it 30? If it is too thin, it will pinhole. If it is too thick, it won’t cure properly and will remain gummy. I want to see that bright orange or blue sheet covering every square inch of the floor and at least six inches up the wall. This is where the grout restoration secrets for long-lasting results start. If the waterproofing is solid, the grout stays dry from the bottom up. If the grout is constantly sitting in a pool of saturated thin-set, it will discolor and crumble. It is basic chemistry. Portland cement is porous. It is a sponge. You have to treat it like one. You need to use a modified thin-set with high polymer content to bridge the gap between the membrane and the tile. This creates a monolithic structure that moves as one unit. Without that flexibility, the sheer force of the house shifting will snap the locking mechanisms of your tile or crack the grout lines. It is a structural engineering challenge, not a decorating project.
| Feature | Traditional Curb | Zero-Entry Curbless | Structural Requirement |
|---|---|---|---|
| Subfloor Height | Standard | Recessed 2 inches | Joist Modification |
| Drain Type | Center Point | Linear or Offset | High Flow Capacity |
| Waterproofing | Pan Liner | Full Room Tanking | ANSI A118.10 |
| Tile Size | Any | Large Format with Pitch | Coefficient of Friction |
| Cost Factor | Standard | High (Labor Intensive) | Precision Leveling |
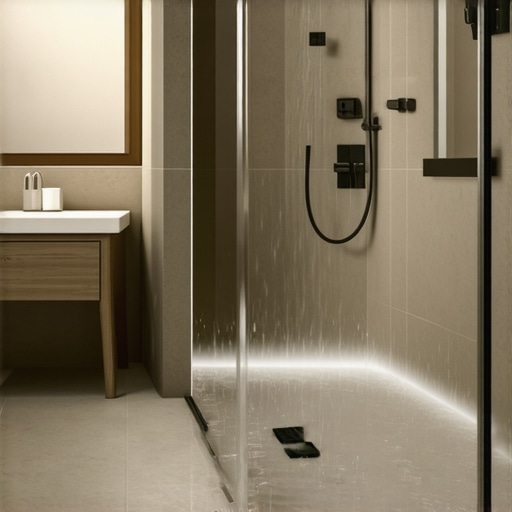
Linear drains and the geometry of drainage
Linear drains allow for a single-plane slope which simplifies the installation of large format tiles in a curbless shower. By placing the drain at the entrance or the back wall, you eliminate the need for complex four-way envelope cuts. This ensures a smoother water flow and a safer walking surface.
The geometry of a center drain is a nightmare for zero-entry. You have to cut the tile into triangles to make it slope toward the middle. It looks like a mess. A linear drain lets you tilt the whole floor in one direction. It is cleaner. It is faster if you know what you are doing. But if you miss the level by an eighth of an inch, the water pools in the corner and sits there until it gets slimy. I hate slimy grout. You have to be a stickler for the levels. I use a laser level that cost me more than my first truck. It doesn’t lie. Most people think they can just ‘eye it’ but the human eye is easily fooled by light and shadow. Water isn’t fooled. Water finds the low spot every single time. This is particularly important when you are trying to match the shower floor to the rest of the bathroom. You need a transition that is invisible but functional. I often suggest showers with a style trendy ideas for small bathrooms because they often utilize these linear systems to make a room feel larger. It creates a continuous visual line that doesn’t stop at a curb. But don’t let the beauty fool you. Underneath that tile is a system of stainless steel and rubber gaskets that have to be perfectly aligned. If the drain is slightly tilted, the grate won’t sit flush. It will rattle when you step on it. That is the sound of a bad contractor.
Structural deflection and the tile crack
Structural deflection refers to the degree an architectural element bends under load and must be limited to L/360 for ceramic and L/720 for stone. In curbless showers, the removal of subfloor material to create a slope can weaken the floor system. Adding plywood layers or steel plates is often necessary.
If your floor bounces, your tile will crack. It is a law of nature. When we go curbless, we are often cutting into the subfloor or the joists. You can’t just take a saw to a load-bearing member and expect nothing to happen. You have to reinforce it. I have spent days in crawlspaces sistering two-by-tens because some designer wanted a flat entry and didn’t think about the weight of the cast iron tub going in next to it. You have to calculate the dead load and the live load. Every time you step on a tile, you are applying pressure. If the thin-set is brittle, it snaps. I prefer high-performance adhesives that have a bit of ‘give’ in them. They cost forty bucks a bag instead of fifteen, but they save you thousands in repairs. While most people want the thickest underlayment for comfort, too much cushion actually causes the locking mechanisms on modern flooring to snap under pressure. In a shower, you want zero cushion. You want a rock-solid bond to the substrate. I want that tile to feel like it is part of the foundation of the house. That is how you prevent leaks. That is how you build something that lasts longer than the mortgage.
“A floor is only as good as the subfloor beneath it; deflection is the enemy of every joint.” – TCNA Handbook for Ceramic Tile Installation
Transition zones and the capillary break
A capillary break is a physical gap or a non-porous material that prevents water from traveling through the grout and thin-set into the adjacent room. In zero-entry designs, this is usually achieved with a silicone-filled joint or a metal profile. This prevents the ‘wicking’ effect that destroys hardwood in hallways.
Water is sneaky. It doesn’t just flow over the top. It travels through the grout. If you run your bathroom tile right up to your bedroom carpet without a break, the moisture will migrate. One day you wake up and your carpet is damp three feet away from the bathroom. That is capillary action. I use a Schluter profile or a deep bead of high-grade silicone at the doorway. It breaks the continuity of the cementitious materials. It stops the wick. It is a small detail that most guys forget because they are in a hurry to get to the next job. I am never in a hurry. I would rather spend an hour getting the transition right than a week tearing out a rotten subfloor later. You also have to think about the baseboards. If you have wood baseboards in a curbless bathroom, they will rot from the bottom up. I always recommend matching the tile for the baseboard or using a PVC product that won’t absorb moisture. You can find some chic baseboard designs that transform rooms in 2025 that are actually waterproof. It keeps the room looking clean and prevents that nasty black mold from growing behind the wood. I have pulled off enough rotted baseboards to know that water always finds a way behind the paint. You have to seal the bottom edge with a professional grade sealant. Don’t use that cheap caulk from the discount bin. It will yellow and peel in six months.
Baseboard protection in wet environments
Baseboards in a zero-entry bathroom must be installed with a waterproof sealant at the floor junction to prevent moisture from reaching the wall cavity. Since there is no curb to contain splashes, the perimeter of the entire room becomes a potential splash zone. Tile baseboards or high-density polymers are the industry standard.
When you take away the shower curb, the whole bathroom floor is now a wet area. People don’t realize this. They think only the 3×3 square under the showerhead gets wet. But when you turn on the water, steam and splashes go everywhere. Your baseboards makeover ideas to elevate your space need to include moisture resistance. I have seen beautiful custom oak baseboards turn black and soft within a year because someone took a long shower and the water sat on the floor. I tell my clients that if they want curbless, they need to think about the whole room as a wet room. That means waterproofing the walls at least a foot up. It means choosing materials that don’t care about humidity. I hate ‘builder-grade’ shortcuts. They use mdf baseboards in bathrooms and then wonder why the edges swell up like a sponge. It is garbage. If you are going to spend the money on a zero-entry shower, do it right. Use a tile base or a solid stone transition. It looks better and it will actually last. I have been in this business for twenty-five years and I have never had a callback on a wet-room. That is because I treat every bathroom like it is going to be submerged. It is the only way to sleep at night.
Grout chemistry and the moisture barrier
Modern grout is engineered with hydrophobic additives that repel water and reduce staining. However, in curbless showers, epoxy grout is preferred for its zero-porosity and high chemical resistance. This prevents the growth of bacteria and ensures the integrity of the slope remains intact over time.
Standard grout is just sand and cement. It is porous. If you look at it under a microscope, it looks like a series of caves and tunnels. Water loves those tunnels. Epoxy grout is different. It is a two-part resin system. It is basically plastic. It is a pain in the neck to install because it is sticky and you have to wash it off the tile before it hardens, or you will never get it off. But once it is in, it is bulletproof. It doesn’t stain and it doesn’t let water through. This is what I suggest for anyone worried about tile cleaning tips for a sparkling bathroom in 2025. If you use epoxy, you don’t have to scrub the grout with a toothbrush every weekend. You just wipe it down. It is the molecular density that makes the difference. Most homeowners see the price tag on epoxy grout and they choke. It is five times the cost of the cheap stuff. But do you want to pay for a new floor in five years or do you want to pay for the right grout today? I don’t give people the option of the cheap stuff anymore. If I am putting my name on the job, we are using the good stuff. I have seen too many beautiful tiles ruined by ugly, stained grout lines that won’t come clean. It is about the long-term performance of the surface. You have to think like an architect, not just a guy with a trowel.
- Verify subfloor levelness with a 10-foot straightedge
- Install a 2-inch recessed floor system for proper drainage
- Use ANSI A118.10 certified waterproofing membranes
- Select a linear drain with a minimum 2.5-inch outlet
- Apply epoxy grout for zero-porosity in the wet zone
- Seal all transitions with 100% silicone sealant
- Test the slope with a water flow test before tiling
The thermal expansion of heated floors
Heated floor systems in curbless showers must be installed with uncoupling membranes to allow for the thermal expansion of the tile. As the floor heats up, the materials expand at different rates, which can lead to debonding or cracking if not properly decoupled from the subfloor.
Everybody wants warm toes. I get it. Walking onto a cold tile floor in the winter is miserable. But putting heat under a zero-entry shower adds another layer of complexity. You have the moisture from the top and the heat from the bottom. This creates a thermal stress that can rip a floor apart. You need an uncoupling membrane. It is a plastic layer with a series of pockets that lets the tile move independently of the subfloor. Think of it like a shock absorber for your floor. If you don’t use it, the heat will cause the mortar to expand and eventually it will break the bond with the concrete or the wood underneath. I have seen floors where you could hear the tiles ‘crunching’ when you walked on them because they had detached from the substrate. It sounded like walking on potato chips. That is what happens when you don’t understand the physics of expansion. You also have to be careful with the wires. You can’t just throw them in the thin-set. They have to be embedded properly so there are no air pockets. Air pockets create hot spots. Hot spots burn out the cable. Then you have a very expensive floor that doesn’t heat up. I spend a lot of time on my knees with a multimeter checking the resistance of the wires during the installation. If I see a drop, I stop. I find the problem. I don’t just bury it. That is the difference between a professional and a handyman. One of them knows what happens a year from now.