Most guys skip the leveling compound. They think the underlayment will hide the dip. It won’t. I spent three days grinding concrete on a job last month just so the floor wouldn’t click like a castanet. That job was for a homeowner who spent ten thousand dollars on engineered white oak and then another three thousand on custom trim. When I got there, the gaps under the baseboards were big enough to swallow a pencil. The previous installer told them it was normal. It isn’t normal. It is laziness disguised as industry standard. If you want a floor that looks like it belongs in a magazine, you have to understand the physics of the gap. You have to respect the subfloor. You have to know that wood is a living thing that breathes and moves and mocks your attempts at a straight line. I smell like WD-40 and oak dust most days because I do not take shortcuts. I spend my time on my knees with a moisture meter and a six-foot level. If that floor is not flat within 3/16 of an inch over ten feet, your baseboards will never sit right.
The ghost in the expansion gap
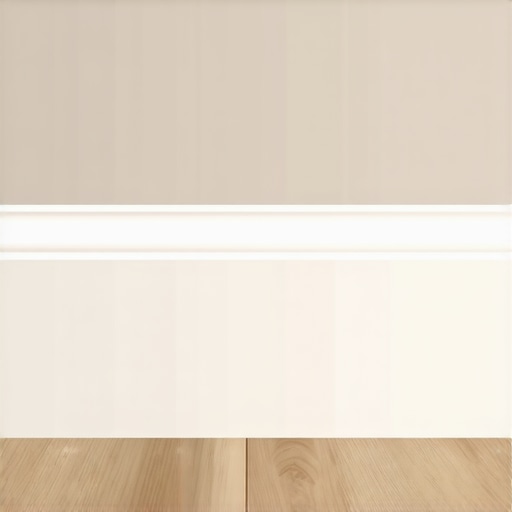
Baseboard gaps are the result of uneven subfloors or seasonal wood shrinkage caused by fluctuating humidity levels in the home. When a floor is installed, it requires an expansion gap at the perimeter to allow for the natural movement of the planks. If the subfloor has a dip or a crown, the rigid baseboard will remain straight while the floor drops away, creating an unsightly dark line of shadow. This is not just a cosmetic issue. It is a sign that the structural foundation of your finish floor is not uniform. In my twenty five years of pulling up old carpet, I have seen it all. I have seen gaps caused by settling foundations and gaps caused by poor joist spacing. You cannot just nail through the baseboard harder to close the gap. You will just split the wood or pull the nails out of the studs within a month. Wood has a memory. It wants to stay where it is comfortable.
“A floor is only as good as the subfloor beneath it; deflection is the enemy of every joint.” – Master Flooring Axiom
Why your subfloor is lying to you
Subfloor flatness is the most ignored specification in residential construction because it takes time and money to fix properly. Most builders consider a subfloor good enough if it does not collapse under a refrigerator. For a floor installer, good enough is a disaster. If you are working with a concrete slab, you are dealing with high spots and low spots created during the pour. If you are on a wood subfloor, you are dealing with warped plywood and joists that have crowned over forty years. When you lay a long, straight piece of baseboard over these waves, the gap is inevitable. You have to decide if you are going to fix the floor or hide the gap. Fixing the floor involves self-leveling underlayment or grinding down high spots. Hiding the gap involves trim work or caulking. For more inspiration on how to handle these details, look at baseboards makeover ideas to elevate your space. It will give you a sense of what is possible when the foundation is right.
The 1/8 inch that ruins everything
Small gaps under trim catch dust and create visual breaks that make an expensive flooring project look like a DIY disaster. Even a gap of 1/8 inch is enough to allow airflow behind the walls, which can lead to moisture buildup in humid climates like New Orleans or Houston. In these regions, the humidity will cause the wood fibers to swell. When the air turns dry in the winter, the wood shrinks. This cycle is what creates the shifting gaps you see throughout the year. If you live in a dry climate like Phoenix, your baseboards might shrink so much they pull away from the corners. You have to plan for this movement. You cannot fight nature. You can only negotiate with it. You need to use materials that can flex without breaking the bond between the wood and the wall.
| Solution Type | Gap Size Limit | Flexibility Rating | Best Use Case |
|---|---|---|---|
| Caulk | 1/4 Inch | High | Painted trim on minor dips |
| Shoe Molding | 3/4 Inch | Medium | Hardwood floors with major waves |
| Scribing | Infinite | Low | High-end custom carpentry |
| Wood Filler | 1/16 Inch | None | Minor cracks in solid wood |
Scribing your way to a professional finish
Scribing is the process of tracing the floor contour onto the baseboard so that the wood can be cut to match the waves of the subfloor exactly. This is the mark of a master. It involves using a compass or a dedicated scribing tool to follow the floor line. You then take the baseboard to the saw and back-cut the bottom edge at a 45 degree angle. This leaves a thin point of wood that can be fine-tuned with a block plane or a belt sander. It is tedious work. It makes your back ache and your eyes blur from the sawdust. But when you snap that board into place and it fits the floor like a glove with zero gap, it is art. Most modern installers do not do this because it takes four times as long as just nailing it up. If you are looking for chic baseboard designs that transform rooms in 2025, you will notice that the best ones always have a perfect floor-to-wall transition. They do not rely on thick layers of goop to hide mistakes.
Why shoe molding is not a failure
Shoe molding provides a secondary layer of trim that covers gaps by flexing more easily than the thicker, more rigid baseboard. Some purists hate it. They call it a cover-up. I call it a practical solution for a house that is not level. A piece of 1/2 inch by 3/4 inch shoe mold has enough give to follow a dip that a 5 inch tall baseboard would never touch. When you install it, you must nail it into the baseboard, not the floor. If you nail it into the floor, it will pull away from the wall when the flooring expands or contracts. This is a common mistake made by weekend warriors. They pin the floor down and then wonder why the planks are buckling in the middle of the room. The floor must be allowed to slide under the trim. The trim is the guardrail, not the anchor.
The chemistry of the perfect bead
Modern sealants use polymer chains that allow for 25 percent movement without losing adhesion to the substrate. If the gap is less than a quarter of an inch and your trim is painted, caulk is your best friend. But do not use cheap painter’s caulk. It will shrink and crack within six months. You need a siliconized acrylic or a high-performance polymer. This stuff is engineered at a molecular level to stretch. Before you apply it, you need to clean the area. Dust is the enemy of adhesion. I have seen guys try to caulk over sawdust and it just peels off like a scab. If you are dealing with gaps near wet areas like showers that wow modern designs for 2025, you must use a 100 percent silicone product. Silicone is waterproof and mold-resistant, which is vital when you are transitioning from a tile floor to a baseboard near a wet room. In bathrooms, the gap is often filled with grout, but that is a mistake. Grout is rigid. It will crack at the change of plane. Use a color-matched caulk instead.
“Tile is a rigid system and requires a stable foundation to prevent grout failure at the perimeter.” – Flooring Logic
Regional humidity and the moving wall
Environmental conditions dictate the width of the gap over the course of a year because wood is hygroscopic. In the Pacific Northwest, the constant moisture means your wood is almost always at its maximum width. If you install your baseboards tight in the winter in Chicago, come summer, that wood will expand and either crush itself or pop the trim off the wall. You have to understand the equilibrium moisture content of your specific region. I always tell people to acclimate their trim for at least 72 hours in the room where it will be installed. Do not leave it in the garage. Do not leave it in the bed of the truck. If you are working with tile, you might need how to refresh grout without replacing it if the movement has already caused the perimeter grout to crumble and fall out. You need to dig that old grout out and replace it with a flexible sealant that looks like grout but acts like rubber.
The checklist for a gap-free installation
- Check the subfloor with a straight edge before the floor goes down.
- Grind high spots and fill low spots with a high-compression strength compound.
- Acclimate all wood products to the home environment for three to five days.
- Use a moisture meter to ensure the subfloor and the flooring are within 2 percent of each other.
- Scribe the baseboard to the floor for the tightest possible fit.
- Use a high-quality flexible sealant for painted trim transitions.
- Nail trim into the wall studs and never into the flooring material itself.
Maintenance and long term care
Maintaining the seal between your baseboard and floor prevents pests and moisture from entering the wall cavity. Over time, even the best caulk will collect dirt. If you have tile floors, you should follow tile cleaning tips for a sparkling bathroom in 2025 to ensure you are not using harsh chemicals that break down the sealants at the baseboard line. If the gap reappears after a few years, it is usually because the house is still settling. Do not panic. Just clean out the old material and re-apply a fresh bead. If you find that your grout is the problem, you may need grout restoration secrets for long lasting results to get it back to a professional state. Remember that a house is a moving, breathing machine. It requires tuning. You would not drive a car for ten years without an oil change. Do not expect your floor to stay perfect without a little bit of grease and effort. If you ever feel overwhelmed by the technical requirements of a high-end installation, you can always contact us for expert guidance or professional services. We have the tools and the experience to handle the physics so you can enjoy the aesthetics. Always prioritize the structural integrity of the install over the speed of the finish. It is the only way to ensure the floor lasts as long as the mortgage. Check our privacy policy for more information on how we handle your data when you reach out for a quote.