Most guys skip the leveling compound. They think the underlayment will hide the dip. It won’t. I spent three days grinding concrete on a job last month just so the floor wouldn’t click like a castanet. That same job had a bathroom floor where the previous installer left a thick haze on the expensive porcelain tiles. He tried to tell the homeowner it was just dust from the construction. I knew better. It was cementitious polymer residue. I spent the next two days meticulously removing that film using nothing but mechanical friction and specific agitation techniques because the homeowner was sensitive to the harsh fumes of muriatic acid. It was a lesson in patience and the physics of surface tension.
The invisible film that ruins a perfect installation
Grout haze consists of cement particles and polymer additives that remain on the tile surface after the initial wash. This residue creates a cloudy appearance that masks the color and texture of your tile. Removing it without acid requires immediate action and specific tools like microfiber towels or white nylon pads to break the bond. If you wait too long, the polymers cure into a hard plastic like film that is nearly impossible to shift without heavy chemicals.
When you install showers or large format tile, the clock starts ticking the moment the grout hits the joint. The hydration process is a chemical reaction where the water reacts with the Portland cement to create a crystalline structure. If that structure forms on the surface of the tile instead of inside the joint, you have a haze. This is why pros talk about the window of workability. You need to understand that grout is not paint. It is a structural element that bonds the edges of your tiles. If you leave it on the face of the tile, you are essentially trying to scrub off a thin layer of concrete. This becomes even more complex with modern high performance grouts that include latex and color fast pigments. These materials are designed to be permanent. They do not want to come off. You have to convince them to move using physical energy rather than chemical burns.
The science of the cured polymer bond
Cured grout haze is a mix of calcium carbonate and acrylic polymers that have bonded to the microscopic pores of the tile glaze. Without using acid, you must rely on mechanical friction or alkaline solutions to lift these particles. Using a dry cheesecloth or a specialized haze sponge works by catching the protruding edges of the dried grout at a molecular level to snap them off the surface. Most people make the mistake of using too much water. When you use a soaking wet sponge, you are just moving the cement particles around in a slurry. You are not removing them. You are just rediluting the haze and spreading it thinner across the surface. This is why the floor looks great when it is wet but the white film returns as soon as it dries. You need to use the dry method or the damp method. Dry removal uses the abrasive nature of the grout against itself. By using a dry cloth, you are essentially using the larger sand particles in the grout to scrape away the finer cement particles that are stuck to the tile. It sounds counterintuitive, but sometimes the best way to clean grout is to use more dry grout or a very coarse dry fabric.
“A floor is only as good as the subfloor beneath it; deflection is the enemy of every joint.” – Master Flooring Axiom
The mechanical solution for stubborn film
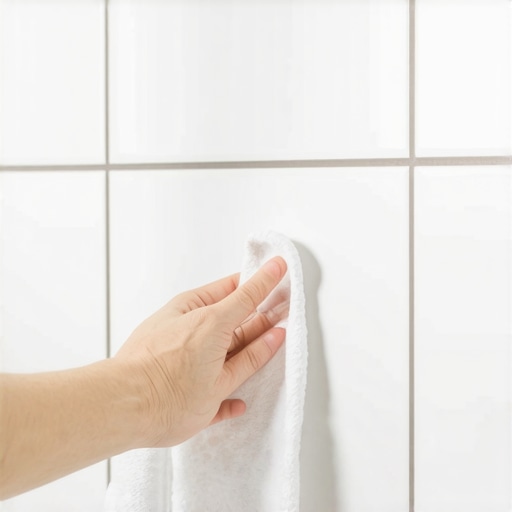
Mechanical removal of grout haze involves using abrasive tools that are softer than the tile glaze but harder than the cement residue. White nylon scrubbing pads and microfiber towels are the standard for this process. You apply firm pressure in a circular motion to physically dislodge the minerals from the tile surface. This method avoids the risk of etching the tile or damaging the baseboards. You must be careful with the type of pad you use. A green or black pad is often too abrasive and will leave permanent scratches on a polished porcelain or natural stone surface. Always stick to white pads. They are designed for delicate surfaces but have enough tooth to grab the haze. You also need to consider the texture of your tile. If you are working with a riven stone or a wood look plank with deep grain, a flat cloth will not reach the valleys. In those cases, you need a stiff bristled nylon brush. You are looking for something that can reach into the microscopic topography of the tile without scratching the finish. It is a delicate balance. You are basically performing a surgical cleaning of the tile face.
Why water is your worst enemy during cleanup
Excess water during grout cleanup weakens the joints and leads to a more persistent haze by transporting cement particles across the tile face. When you use a dripping sponge, you wash out the pigments and the binders from the grout. This leaves the joints sandy and brittle while depositing a heavy layer of residue on the tiles. Professional installers use the two bucket method with a very lightly damp sponge to avoid this. The goal is to keep the surface as dry as possible while still being able to shape the joint. If you see a milky puddle forming, you have used too much water. This excess moisture also delays the curing process of the grout inside the joint while accelerating the drying of the thin film on the surface. It is a recipe for disaster. You end up with soft grout in the cracks and a rock hard film on the surface. If you are looking for long term durability, check out grout restoration secrets for long lasting results to see how to handle older installations that were not cleaned properly the first time.
| Grout Type | Haze Difficulty | Removal Window | Best Non Acid Tool |
|---|---|---|---|
| Sanded Cement | Moderate | 24 Hours | Microfiber Towel |
| Unsanded Cement | High | 12 Hours | White Nylon Pad |
| Acrylic Premixed | High | 24 Hours | Damp Sponge Only |
| Epoxy Resin | Extreme | 4 Hours | Specialized Solvent |
The sugar water trick for hardened residue
A solution of white sugar and warm water can effectively break down the bond of cement based grout haze without using acids. The sugar acts as a retardant and a mild chelating agent that softens the calcium crystals in the cement. This allows you to scrub the haze away with much less physical effort. You mix about one cup of sugar into a gallon of warm water and apply it to the tiles. Let it sit for ten to fifteen minutes but do not let it dry. The sugar keeps the cement particles in a state where they can be lifted. This is an old timer trick that works surprisingly well on standard showers and floors. It is safe for the environment and won’t eat the finish off your baseboards. After the sugar solution has done its work, you must rinse the area thoroughly with clean water to avoid leaving a sticky residue that will attract dirt. This method is specifically for cement based products. It will not work on epoxy or pure urethane grouts because those are plastic based, not mineral based. For those, you need a different strategy entirely.
Preparation for a haze free finish
- Wait at least 20 minutes after grouting before starting the initial wash.
- Use a grout sponge that is damp to the touch but does not drip when squeezed.
- Change your wash water every 50 square feet to keep it clean.
- Perform a final dry buff with a microfiber cloth 2 hours after the wet wash.
- Protect the baseboards with painter tape to prevent grout accumulation in the corners.
- Avoid using tap water with high mineral content as it can contribute to efflorescence.
Protecting the perimeter and transitions
Managing the edges of your tile installation is just as vital as the center of the room. Grout haze often accumulates near the baseboards where the sponge cannot reach easily. This buildup creates a messy look that ruins the clean lines of a professional job. Use a margin trowel or a small brush to keep these areas clean during the install. If you find yourself needing to update the look of your room after the floor is done, you might consider chic baseboard designs that transform rooms in 2025 to hide any gaps or imperfections. The transition from the tile to the wall is a common failure point. Many installers pack grout into that corner, but it should actually be a movement joint filled with color matched caulk. Grout in the corners will eventually crack and contribute to more dust and haze. Keeping the perimeter clean and using the right materials will ensure your floor looks sharp for years. For more ideas on how to finish your space, look at baseboards makeover ideas to elevate your space. A clean floor paired with well designed trim is what separates a DIY job from a master craftsman’s work.
“Grout haze is the ghost of a sloppy installation. It haunts the light and hides the craft.” – Master Flooring Axiom
Dealing with haze in modern shower designs
Showers with intricate tile patterns are the most difficult areas to clean. The high humidity and constant moisture in a bathroom can also cause the haze to reappear if it was not fully removed. When working in tight spaces like showers with a style, you have less room to maneuver and more corners to clean. You must be methodical. Work from the top down so that any runoff does not contaminate the areas you have already cleaned. For a more modern look, showers that wow often use large porcelain slabs or mosaics that require different cleaning pressures. Mosaics have more grout lines per square inch, which means more surface area for haze to stick to. You need to be extra diligent with the dry buffing stage in these areas. If you miss the window and the haze sets, you will be spending hours with a toothbrush scrubbing each individual joint. For general maintenance once the haze is gone, refer to tile cleaning tips for a sparkling bathroom in 2025 to keep that shine. Keeping the grout clean in a shower is not just about looks; it is about preventing mold and mildew from taking root in the porous cement surface.
The importance of acclimation and environment
The temperature and humidity of your home play a massive role in how grout sets. In a very dry environment, the water in the grout evaporates too quickly, leaving a powdery haze that is easy to wipe off but results in a weak joint. In a humid environment, the grout stays wet too long and the polymers can migrate to the surface, creating a tough, rubbery film. This is why I always check the HVAC settings before I start a job. You want a stable environment. If you are installing tile in a house that is not climate controlled, you are asking for trouble. The same logic applies to the tiles themselves. They should be clean and at room temperature. If they are cold, the grout will take longer to set. If they are sitting in the sun, the grout will flash dry and lock onto the surface before you can even pick up a sponge. Professional results come from controlling these variables. If you need help with a project that went wrong, you can always visit our contact us page for professional advice. We also focus on sustainability, so check out eco-friendly tile solutions for sustainable homes in 2025 for materials that are easier to clean and maintain without harsh chemicals. If you are stuck with old grout that just won’t come clean, you might need to learn how to refresh grout without replacing it before you give up on the floor entirely. Your data and privacy are important during these searches, so feel free to review our privacy policy as well. Cleaning grout haze is a labor of love, but doing it without acid is the best way to preserve the integrity of your tile and the health of your home.