
The 1/8 inch that ruins everything
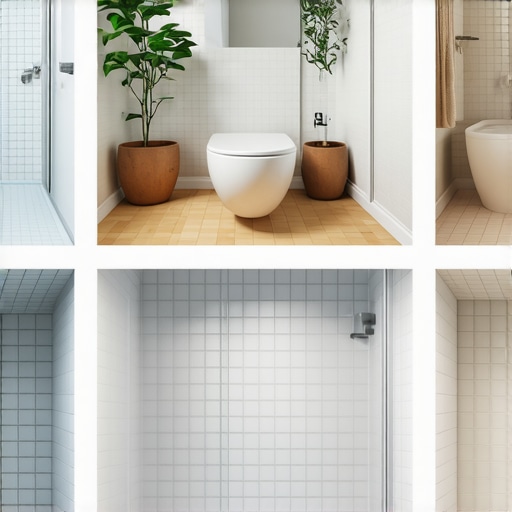
Small bathroom tile layouts create the illusion of expansive square footage by manipulating visual sightlines, reducing grout joint interruptions, and utilizing large format tiles to trick the human eye. Most guys skip the leveling compound. They think the underlayment will hide the dip. It won’t. I spent three days grinding concrete on a job last month just so the floor wouldn’t click like a castanet. That job was for a tiny five by eight bathroom in a downtown condo. The owner wanted it to feel like a spa. If I had just slapped tile down over that wavy slab, every single piece would have lippage. Lippage is the technical term for when one tile edge sits higher than its neighbor. In a small room, lippage kills the vibe instantly because it casts tiny shadows. Those shadows define the edges and make the room feel like a cramped grid. You have to start with a subfloor that is flat within 1/8 of an inch over 10 feet. Anything less and you are just decorating a disaster. When you are dealing with moisture, especially in showers, the chemistry of your bond is what keeps the tile from popping off the wall in three years. I use a high-polymer C2TE-grade mortar. The ‘C2’ means it has high bond strength, the ‘T’ is for thixotropic so it does not sag on the wall, and the ‘E’ gives me extended open time. You need that time to get these layouts perfect. Showers with a style require this level of mechanical precision. I smell like wet concrete and the metallic tang of a diamond blade every day because I know that the physics of the floor matter more than the color of the ceramic.
“A floor is only as good as the subfloor beneath it; deflection is the enemy of every joint.” – Master Flooring Axiom
The diagonal deception for tight spaces
Diagonal tile patterns expand a room by forcing the eye to follow the longest dimension of the space, effectively hiding the narrow walls and creating a sense of infinite movement. When you set tile at a 45-degree angle to the walls, you are messing with the brain’s ability to count. In a standard grid, your eye immediately tallies how many 12 inch squares fit between the toilet and the tub. If there are only three, the room feels small. But when those tiles are on a diagonal, the eye follows the hypotenuse. The math of a triangle means that line is longer. It makes the floor plane look wider. You have to be careful with the cuts at the perimeter though. If your cuts are messy, your baseboards won’t hide the shame. I always suggest checking out baseboards makeover ideas to elevate your space to see how the transition from a diagonal floor to the wall should be handled. You want a clean, sharp line. We are talking about the molecular bond of the grout here too. In a diagonal layout, the stress on the joints is different. You need a high-performance grout that can handle the slight lateral shifts of a house settling. I prefer epoxy or high-performance cementitious grout that resists cracking.
| Tile Feature | Impact on Small Space | Technical Requirement |
|---|---|---|
| Large Format | Reduces visual noise | 95% mortar coverage |
| Diagonal Angle | Increases perceived width | Precision perimeter cuts |
| Vertical Stack | Increases perceived height | Zero-sag mortar (C2T) |
| Light Grout | Blurs tile boundaries | High stain resistance |
Why large format tiles are a geometry hack
Large format tiles measuring 12×24 or 24×48 inches make small bathrooms appear larger by significantly minimizing grout lines, which reduces visual clutter and creates a unified surface. People think big tiles in a small room is a mistake. They are wrong. Fewer grout lines mean fewer interruptions for your eyes. Every time your eye hits a grout line, it stops. If you have a thousand tiny mosaic tiles, your eye stops a thousand times. That makes the room feel busy and claustrophobic. By using a 24 by 48 inch porcelain slab, you might only have two or three joints in the whole floor. It looks like a single piece of stone. But here is the catch. Large tiles require a perfectly flat floor. If the floor has a hump, the tile will teeter. If the floor has a dip, the tile will bridge over it and crack the first time a heavy person steps on it. You need a medium-bed mortar designed for the weight of these beasts. I am talking about a mortar that can support a 40 pound tile without shrinking as it cures. If the mortar shrinks, it pulls the tile down and creates lippage. I always use a mechanical leveling system. These are little plastic clips and wedges that lock the tiles together while the thin-set hardens. It ensures the surface is as flat as a lake in winter. For maintenance on these large surfaces, look at tile cleaning tips for a sparkling bathroom in 2025 to keep that expansive look clear of soap scum.
The vertical lift of stacked patterns
Vertical stack bond layouts draw the eye upward toward the ceiling, creating an illusion of height in bathrooms with low clearances or cramped shower stalls. This is the architect’s trick. If you have a standard eight-foot ceiling, a vertical stack makes it feel like ten. It is clean. It is modern. It is also a nightmare to install if your walls aren’t plumb. Most houses are built by guys in a hurry. Walls lean. Corners aren’t square. If you start a vertical stack on a wall that leans even a quarter of an inch, by the time you reach the ceiling, your tile is a mess. I spend hours with a six-foot level and a laser before the first bucket of thin-set is even opened. You have to shim the backer board. You have to plane the studs. It is a structural engineering challenge disguised as a bathroom remodel. The grout choice here is mandatory. You want a color that matches the tile exactly. If the tile is white, use white grout. This turns the wall into a monolithic pillar. If you use a dark grout with a light tile in a vertical stack, you just created a ladder. A ladder makes the eye step up rung by rung, which actually highlights how short the wall is. You want a continuous flow. If your grout starts looking dingy over time, you can learn how to refresh grout without replacing it to restore that height illusion.
The herringbone movement and sensory flow
Herringbone tile patterns introduce dynamic energy and directional flow, which prevents a small bathroom from feeling static or boxy by leading the eye through the space. This is a high-end look. It is also a lot of waste. You are going to have a 15 percent waste factor on a herringbone floor because of all the cuts. But the result is a floor that feels like it is moving. In a small bathroom, you want that movement. It breaks up the hard right angles of the walls. I prefer using a 3 by 12 inch tile for this. It is a classic proportion. The key to a good herringbone is the starting line. If you are off by a hair at the door, the pattern will look crooked at the tub. I snap chalk lines for every single row. It is tedious. It is dusty. But it is the only way to ensure the points of the ‘V’ align perfectly down the center of the room. This layout also works incredibly well when it transitions into the shower. If you carry the herringbone from the floor right up the back wall of the shower, you eliminate the visual break. The floor and the wall become one. This is how you make a room feel massive. Using eco-friendly tile solutions can also add a layer of modern ethics to this classic look. Check out eco-friendly tile solutions for sustainable homes in 2025 for materials that hold these patterns well.
“Proper mortar coverage for large format tile must exceed 95 percent in wet areas to prevent structural failure.” – TCNA Handbook Requirement
The unbroken plane of the curbless transition
Curbless shower entries create a seamless transition from the main floor into the wet area, removing the visual barrier of a curb and making the floor appear double the size. This is the gold standard for small bathroom design. When you have a standard shower, the curb is a wall. It tells your brain ‘the floor ends here.’ By sloping the entire floor toward a linear drain, you remove that wall. The eye sees one continuous plane from the vanity all the way to the back shower wall. This requires a deep understanding of slope and drainage. You have to drop the subfloor or use a specialized tray system. It is not just about the tile. It is about the waterproofing. I use a bonded waterproof membrane that sits right under the tile. This prevents water from soaking into the mortar bed. If water sits in the mortar, it grows mold and eventually the grout will fail. You need to keep the water on the surface. For the best long-term results, understanding grout restoration secrets for long-lasting results is vital because a curbless shower sees a lot of foot traffic and water flow over the joints.
Pro-Installer Checklist for Small Bathrooms
- Verify subfloor deflection is less than L/360 for ceramic.
- Check walls for plumb using a 72-inch box level.
- Acclimate tile to room temperature for 48 hours.
- Perform a dry lay to check for sliver cuts at the corners.
- Use a 1/2 inch by 1/2 inch square-notch trowel for large format.
- Back-butter every tile to ensure 95 percent coverage.
- Mix grout with a low-speed drill to avoid air bubbles.
The chemistry of the grout bond
Grout selection is the final structural component of a tile installation, providing lateral stability and water resistance that protects the integrity of the subfloor. Grout is not just a filler. It is a bridge. When you walk on a floor, the tiles want to move. The grout stops them. In a small bathroom, you want the smallest grout lines possible, usually 1/16 of an inch. To achieve this, you must use a non-sanded grout or a high-performance unsanded resin. Sanded grout has physical grains of sand that prevent the tiles from sitting close together. If you want that massive look, you need those tight joints. But thin joints are harder to fill. You have to force the grout deep into the pocket. If you just smear it on top, it will flake out in six months. I use a hard rubber float and work at a 45-degree angle to the joints. I push with enough force to ensure there are no voids. Voids are where water collects. Water is the enemy of every bathroom. It will find the smallest hole in your grout and seep down to the thin-set. Once the thin-set gets wet and stays wet, it undergoes a process called hydrolysis where the chemical bond begins to weaken. This is why your tiles eventually start to wiggle. A solid grout job is the insurance policy for your layout. If you want to see how this looks in the real world, visit our contact us page to discuss your project. We don’t just lay tile. We engineer surfaces that last a lifetime.