
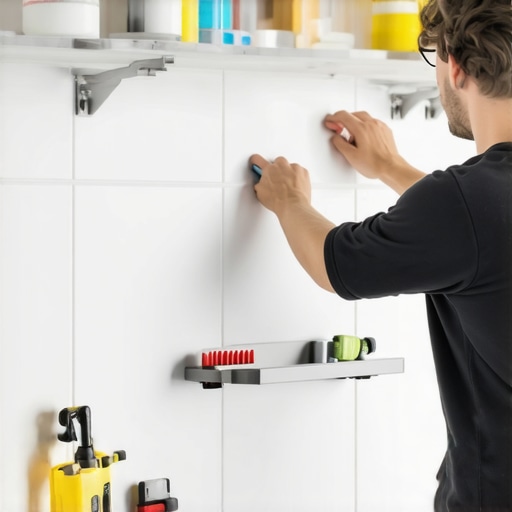
The physics of tile failure
Installing floating shelves over bathroom tile requires diamond-core drill bits and precise stud location to prevent stress fractures. You must penetrate the glaze without creating localized heat pockets that cause ceramic or porcelain to spiderweb. Most installers treat tile like wood, but tile is a brittle, glass-like surface that reacts poorly to percussion and heat. I once walked into a house where a homeowner tried to toggle-bolt a heavy shelf into cheap ceramic tile and blew out the entire wall. They hit a hairline fracture in the porcelain that traveled three feet down to the showers that wow in their master suite. The water behind the tile had already started to rot the green board because they did not seal the holes. It was a mess. I spent three days grinding and replacing individual tiles just to undo an afternoon of poor decisions. The smell of wet mortar and old grout is something you never forget. You have to understand that tile does not stretch. It breaks. If you do not respect the Mohs hardness of the material, you will lose the battle before you even turn on your drill. I smell like WD-40 and oak dust most days, but when I am in a bathroom, I smell like a surgeon. You have to be that precise. This is not about aesthetics, it is about structural engineering within a rigid substrate. This guide breaks down the chemical and physical requirements for a permanent, crack-free installation. Look at your tile as a shield. You are trying to pass a bolt through that shield without shattering the glass. It requires patience. It requires the right RPM. It requires a deep understanding of what lies behind the thin-set. If you skip the prep, you are just waiting for the sound of a ceramic snap in the middle of the night.
“A floor is only as good as the subfloor beneath it; deflection is the enemy of every joint.” – Master Flooring Axiom
Why your drill bit is your worst enemy
The selection of a drill bit determines the success of your shelf installation because thermal expansion is the primary cause of tile cracking during the drilling process. High-speed steel bits will overheat and fail instantly while masonry bits often require too much percussion for brittle porcelain. You need a diamond-tipped core bit. This bit does not cut the tile, it grinds it. Think of the bit as a microscopic sander. As it spins, the diamonds wear away the glaze and the clay body of the tile. If you use a standard masonry bit with a hammer drill, you are literally hitting the tile with a hammer thousands of times per minute. That is a recipe for disaster. Porcelain has a Mohs hardness of about 7 or 8. Steel is much lower. You cannot cut something harder with something softer. You need the diamond. Also, you must keep the bit cool. Heat causes the silica in the tile to expand. Since the rest of the tile is cold, the tension becomes too great. The tile pops. I always keep a spray bottle of water handy. If I see steam, I am going too fast. I am going too hard. Speed kills tile. You want low RPM and steady pressure. It is a slow dance, not a race. Most guys want to be in and out in ten minutes. That is how you end up with a cracked wall and a call to a specialist like me. Take your time. Let the diamonds do the work. If you feel the bit wandering, you did not use enough tape. Put a piece of painter’s tape over your mark. It gives the bit something to grab onto before it bites into the glaze.
| Tile Type | Mohs Hardness | Drill Bit Type | Cooling Method |
|---|---|---|---|
| Ceramic | 3-5 | Carbide Tip | Dry or Light Mist |
| Porcelain | 7-8 | Diamond Core | Continuous Water |
| Natural Stone | Variable | Diamond Core | Wet |
| Glass Tile | 6 | Diamond Core | Submerged or Heavy Mist |
The myth of the hollow wall anchor
Floating shelves must be anchored into wall studs because the weight of the shelf and its contents creates a lever effect that will pull standard anchors through the tile and drywall. Relying on the tile surface to hold weight leads to structural failure and cracked grout lines. I see it all the time. Someone uses a plastic butterfly anchor and thinks it is fine. Then they put three bottles of shampoo and a decorative plant on the shelf. The physics of a floating shelf are brutal. The bracket acts as a lever. The further out the weight is, the more force is applied to the wall. If that force is not transferred to a 2×4 stud, the anchor will start to tilt. As it tilts, it puts pressure on the edge of the hole you drilled. Tile cannot handle that lateral pressure. It will crack. Always find the stud. Use a deep-scan stud finder to see through the tile, the thin-set, and the backer board. If you cannot find a stud, you need to open the wall and add blocking. It sounds like a lot of work. It is. But it is less work than replacing a whole wall of tile. When you find the stud, you are golden. The lag bolt goes through the shelf bracket, through the tile, through the backer board, and deep into the wood. The tile is just a decorative layer at that point. It is not carrying the load. The wood is. This is the secret to a shelf that stays level for twenty years. You also need to consider the moisture. In bathrooms, moisture gets everywhere. Every hole you drill is a path for water. Use 100 percent silicone sealant in the hole before you drive the screw. It keeps the water out of your wall cavity. It prevents mold. It prevents rot. It is a simple step that most amateurs skip. Don’t be that guy. Use the silicone.
- Diamond-core bits for porcelain
- Painter’s tape for grip
- Deep-scan stud finder
- 100 percent silicone sealant
- Variable speed drill (non-hammer)
- Level for precise bracket alignment
“The coefficient of thermal expansion in porcelain requires specific tolerances when introducing mechanical fasteners to avoid hairline fractures.” – Tile Installation Principle
Measuring twice and drilling once
Precision layout is mandatory for tile installations because you cannot easily patch a hole in porcelain or ceramic without leaving a visible scar in the bathroom finish. Marking your drill points on painter’s tape allows for clean lines and prevents the drill bit from wandering across the glaze. I measure three times. I check my level four times. I look at the tile cleaning tips for the area to make sure there is no wax or residue that will make my tape slide. If you mess up a hole in drywall, you just patch it with some mud and paint. If you mess up a hole in tile, you are in trouble. You have to be perfect. I start by marking the studs. Then I mark the height. I use a laser level if I have the room. It gives me a perfectly straight line across the grout joints. Speaking of grout, try to avoid drilling directly into a grout line. People think it is easier. It is not. Grout is soft. The drill bit will wander into the harder tile edge and chip it. Drill in the center of the tile if you can. It is the strongest part of the material. Once the tape is down and the mark is made, I use a small center punch very gently. Just a tap. It creates a tiny divot for the bit to sit in. Then I start the drill at an angle. I don’t go straight in. I start at 45 degrees to get the edge of the diamond bit to bite. Once I have a crescent shape, I slowly bring the drill to 90 degrees. This prevents the bit from skating across the wall. It is a technique you learn after doing it a thousand times. Your hands have to be steady. If you are nervous, you will shake, and the bit will skip. Take a breath. Trust your tools. If the tile starts to smell like burning, stop. You need more water. You need less speed. The goal is a clean, circular hole with no chipping around the edges.
The role of grout in structural stability
Grout serves as the expansion joint between rigid tiles and must be maintained to prevent moisture from undermining the structural integrity of the shelving substrate. If your grout is failing, any shelf installation will eventually shift as the underlying backer board absorbs humidity and swells. You cannot just ignore the state of your walls. If you see cracks in the grout, you need to fix them. I recommend checking out how to refresh grout without replacing it before you start drilling. You want a solid foundation. If the tile is loose, the shelf will be loose. I have seen shelves pull the tile right off the wall because the mortar bond had failed due to water intrusion. It is all connected. The baseboards, the tile, the grout. They all work together to keep the water where it belongs. If you are doing a full renovation, look at baseboards makeover ideas to ensure your bathroom has a unified, water-tight look. When you finish the shelf installation, don’t forget to seal the gap between the bracket and the tile. A tiny bead of clear silicone is all it takes. It prevents water from sitting behind the bracket. Standing water is the enemy of every bathroom. It will find a way in. It will cause the grout to soften and the tile to pop. I have spent my life fighting water. It always wins if you give it an opening. Your job is to make sure there are no openings. A properly installed shelf is a sealed shelf. It looks professional and it lasts. If you follow these steps, you won’t have to call me to fix a shattered wall. You can just enjoy your bathroom. It is about doing it right the first time. No shortcuts. No cheap bits. No hollow anchors. Just solid engineering and a little bit of patience. That is how you build a floor, and that is how you mount a shelf.