
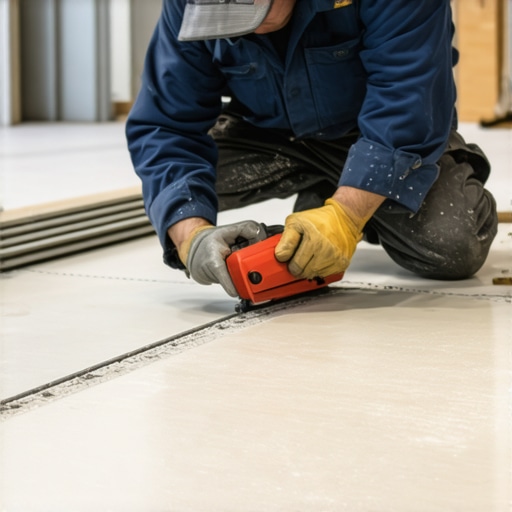
I spent three days grinding concrete on a job last month just so the floor wouldn’t click like a castanet. That level of obsession with the subfloor is what separates a master from a weekend warrior. Most guys skip the leveling compound. They think the underlayment will hide the dip. It won’t. But even a perfectly level floor won’t save you if you snap a 24 by 48 inch porcelain slab because you did not understand the physics of a notch cut. I have seen installers lose three thousand dollars in material costs in a single afternoon because they treated large format tile like it was standard subway ceramic. Large format porcelain is a different beast. It is dense, it is brittle, and it holds internal tension like a coiled spring. When you cut an L-shaped notch for a door frame or a shower bench, you are creating a stress riser. Without a radius at the corner, that tile is guaranteed to crack. I have spent twenty five years with sawdust under my nails and thin-set in my pores. I have learned the hard way that a floor is a performance surface, not a decoration.
The physics of the internal corner
Cutting notches in large format tiles requires a diamond core pilot hole to dissipate stress. When you make two straight saw cuts that meet at a ninety degree angle, you create a sharp point where tension concentrates. A radius hole drilled at the vertex prevents the porcelain from snapping during installation. This is the most important rule in the TCNA handbook that everyone ignores. Porcelain is manufactured under extreme pressure, often exceeding five thousand pounds per square inch. This creates a highly vitreous material with a water absorption rate of less than zero point five percent. However, that density comes with a price. It has a high modulus of elasticity but very low ductility. When your diamond blade creates a sharp internal corner, the vibration of the saw or the subsequent weight of the installer will cause a crack to propagate from that point. It is a microscopic failure that leads to a macroscopic disaster. You need a variable speed grinder and a high quality diamond bit. You drill the corner first. You create a circular relief. Then, and only then, do you bring the wet saw blade to meet the edge of that hole.
“A floor is only as good as the subfloor beneath it; deflection is the enemy of every joint.” – Master Flooring Axiom
Why your subfloor ruins your cuts
Subfloor deflection and lack of planarity are the primary causes of tile failure after the notch is cut. If the floor has more than an eighth of an inch of dip over ten feet, the notched tile will flex and break at its weakest point. Proper substrate preparation prevents mechanical stress. I once walked into a project where the homeowner complained that their showers were leaking. The installer had notched the tile around the curb but failed to level the subfloor. As people stepped on the tile, the deflection caused the notched corner to open up, tearing the waterproofing membrane beneath it. You can find better inspiration for showers with a style but no amount of style saves a cracked floor. You must check the joist spacing. You must check the plywood thickness. If you are going over concrete, you must verify the moisture vapor emission rate. A damp slab will prevent your thin-set from reaching its full shear strength. This leads to hollow spots. A notched tile over a hollow spot is a ticking time bomb.
The diamond blade anatomy and selection
Selecting the correct diamond blade involves matching the metal bond hardness to the density of the tile. A soft bond blade is required for hard porcelain because it exposes new diamonds faster to maintain a clean cut. Using the wrong blade causes heat build up and edge chipping. You should look at the rim of your blade. A continuous rim is mandatory for clean edges in porcelain. If you see a segmented blade, put it back in the truck. That is for masonry or concrete. For tile work, you want a mesh turbo blade if you are working dry, or a high grade continuous rim for wet work. The RPM of your saw matters too. If you run the blade too fast, you glaze the diamonds. The metal melts over the stones. The blade stops cutting and starts rubbing. Rubbing creates heat. Heat creates expansion. Expansion creates a crack at your notch. Use plenty of water. Keep the slurry clear. If the water looks like thick milk, you are just grinding with recycled grit, which dulls the blade faster. Clean tools make clean cuts. This is not a suggestion; it is a law of the job site.
| Material Type | Janka Hardness / Density | Blade Type Recommended | Cutting Method |
|---|---|---|---|
| Ceramic | Low to Medium | Continuous Rim Standard | Dry or Wet |
| Porcelain | High Density | Mesh Turbo / Ultra Thin | Wet Preferred |
| Natural Stone | Varies (Granite High) | Segmented Diamond | Wet Only |
| Glass Tile | Brittle / High Stress | Fine Grit Continuous | Wet Only |
The pro checklist for notched cuts
Successful notch execution depends on a strict sequence of drilling, bracing, and slow speed cutting. You must support the entire length of the tile on a flat surface during the process. Any overhang during the cut will lead to a gravity induced snap before the cut is finished.
- Mark your notch lines on the back and front of the tile using a wax pencil.
- Use a 1/4 inch or 3/8 inch diamond core bit to drill the interior corner.
- Ensure the drill bit is kept wet to prevent the diamond matrix from overheating.
- Cut the shortest side of the notch first using a wet saw or a grinder.
- Use a suction cup stabilizer to hold the free end of the notch if the piece is narrow.
- Slow your feed rate as you approach the pre-drilled pilot hole.
- Smooth the edges with a diamond hand pad to remove micro-burrs.
Grout and expansion joints at the notch
Grout joints near notched tiles must account for building movement and thermal expansion. Hard grout should never be used in a change of plane or where a notch meets a fixed object like a door frame. Silicone sealant provides the necessary flexibility for these high stress areas. People think grout is just filler. It is a structural component. But it cannot be stiffer than the tile itself. If you are interested in keeping things clean, you should look into grout restoration secrets for when things go wrong. In a notched cut, the tile is vulnerable. If you jam the notch tight against a wall or a cabinet without a movement joint, the house will shift and the tile will buckle. You need a minimum of a sixteenth of an inch gap. Fill that gap with a color matched 100 percent silicone caulk. This allows the tile to breathe. It prevents the notch from becoming a pivot point for a fracture. Don’t be the guy who grouts the baseboards either. Baseboards are meant to hide the expansion gap. You can find some baseboards makeover ideas that will cover even a wide half-inch gap. Use them. That gap is your insurance policy.
“For tiles larger than fifteen inches on any one side, the subfloor must be flat within an eighth of an inch over ten feet.” – TCNA Standard
The ghost in the expansion gap
Expansion gaps are the invisible safety valves of a professional tile installation. Skipping these gaps near notches results in tenting where the tiles lift off the floor due to pressure. Every perimeter wall and fixed vertical surface requires a movement joint. I have seen floors that were installed perfectly but failed three years later because the installer forgot about the seasons. In the summer, humidity levels rise. The subfloor expands. The tile stays relatively stable. If there is no room at the walls, the pressure has nowhere to go but up. The notched tile, having been weakened by the cut, is the first to fail. It will pop. It will sound like a gunshot. You have to leave that gap. This is especially true in showers where the temperature fluctuates fifty degrees in ten minutes. The thermal shock is real. Always use a high quality uncoupling membrane like Schluter Ditra or similar products. These membranes allow the substrate to move independently of the tile. It is the only way to guarantee a notch won’t snap over a plywood seam.
The final transition and finishing
Finishing a notched cut involves more than just the saw work; it requires mechanical polishing of the edge to eliminate stress points. A raw saw cut has thousands of tiny jagged edges that can develop into cracks over time. Polishing these edges with a diamond pad strengthens the tile. Once the cut is made and the piece is set, you need to think about the baseboards and how they interface with your work. If your notch is around a door casing, the cut must be precise. I prefer to undercut the casing so the tile slides underneath. This looks better than trying to notch the tile around the wood. It is cleaner. It is faster. It is what a pro does. If you are struggling with how to finish the look, check out chic baseboard designs for a modern touch. Remember that the floor is a system. The tile, the thin-set, the membrane, the subfloor, and the trim all work together. If one part of the system is weak, the whole floor is compromised. Do not let your notch be the weak link. Take the time to drill the hole. Take the time to level the floor. Your knees and your wallet will thank you. It will not buckle. It will last a lifetime.