The Real Reason Your Shower Handle Is Leaking Behind the Tile
I spent three days last month tearing out a ten thousand dollar shower because the homeowner thought a bit of caulk could save a bad grout job. They saw a small damp spot on the drywall in the hallway. They thought it was a simple plumbing fix. It was not. The plumber came out, swapped the cartridge in the mixing valve, and left. A week later, the wall was mush. When I got there with my moisture meter and a sledgehammer, I found the truth. The water was not coming from a burst pipe. It was migrating through the microscopic pores of the grout and wicking up the back of the tile because the installer skipped the waterproofing membrane. It is a story I see twice a week. People focus on the shiny chrome handle and the pretty ceramic, but they ignore the hydraulic reality of a wet environment. A shower is not just a room. It is a high-pressure water management system that relies on the chemical integrity of every layer. When that system fails, the damage is silent and structural.
The hidden physics of moisture migration
Shower handle leaks often occur due to capillary action where water travels behind the escutcheon plate and into the wall cavity through unsealed penetrations. This happens when the secondary waterproofing layer is missing or the grout has lost its hydrophobic properties, allowing liquid to move through the assembly. Many installers believe that tile and grout are waterproof. They are not. Grout is a cementitious product, which means it is essentially a hard sponge. Under a microscope, it is full of tiny tunnels. When you spray water on it, the surface tension pulls that water deep into the matrix. If there is no liquid-applied membrane or sheet membrane behind that tile, the water hits the backer board. In older homes, this was often greenboard, which is just water-resistant drywall. Once that gets wet, it stays wet. This creates a dark, damp environment where mold thrives and the structural studs begin to rot long before you see a drip on the floor.
“Tile and grout are not waterproofing; they are the decorative wear surface of a multi-layered hydraulic system.” – Master Flooring Axiom
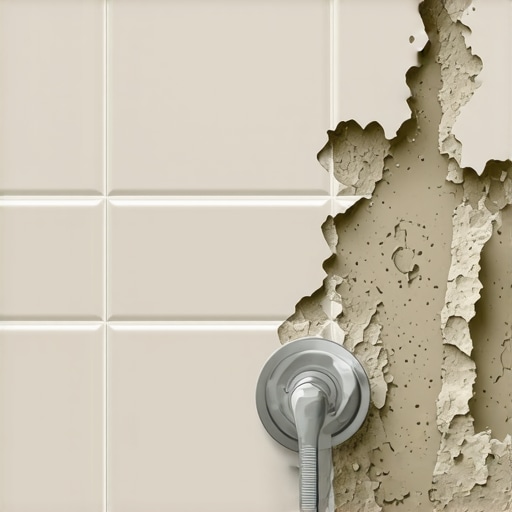
The escutcheon plate failure point
The escutcheon plate is the metal cover behind your shower handle that serves as the first line of defense against water entering the wall. If the foam gasket behind this plate is compressed or degraded, water running down the tile face will slip directly into the wall cavity. Most people do not realize that the hole cut into the tile for the mixing valve is usually much larger than the valve itself. This gap is the danger zone. When you take a shower, gravity pulls water down the wall. If the top and sides of the escutcheon plate are not properly sealed with a high-grade 100 percent silicone sealant, that water finds the gap. I always tell my clients to look for the weep hole at the bottom of the plate. You should seal the top and sides but leave a tiny gap at the bottom. This allows any moisture that does get behind the plate to drain back out into the shower instead of being trapped against the plumbing. For those looking to upgrade their space, exploring showers that wow modern designs for 2025 can provide insight into integrated waterproofing systems that eliminate these common failure points.
Why grout is not a waterproof barrier
Grout functions as a filler for joints between tiles but remains porous unless treated with specialized sealants or replaced with high-performance epoxy alternatives. Standard cementitious grout will absorb water through its mineral structure, eventually leading to subsurface saturation and potential leaks behind the shower handle. The chemistry of grout is fascinating and frustrating. It is composed of Portland cement, sand, and pigments. When mixed with water, it forms a crystalline structure. However, these crystals have spaces between them. Over time, the minerals in your water and the chemicals in your soap can break down these bonds. This is why grout restoration secrets for long-lasting results are so important. Without proper maintenance, the grout becomes a highway for moisture. If you notice your grout is darker in some spots even when dry, it is likely saturated with oils and moisture that are weakening the bond to the tile edge. When the bond breaks, a hairline crack forms. You might not see it, but water sees it. Water is lazy; it will always take the path of least resistance, which is usually right into your wall studs.
| Grout Type | Porosity Level | Moisture Resistance | Best Use Case |
|---|---|---|---|
| Sanded Cement | High | Low | Large joints over 1/8 inch |
| Unsanded Cement | High | Moderate | Small joints and polished stone |
| Epoxy Grout | Zero | Excellent | High-moisture and commercial |
| Urethane Grout | Very Low | High | Residential showers and floors |
The role of capillary action in tile assemblies
Capillary action is the phenomenon where liquid flows into narrow spaces without the assistance of, or even in opposition to, external forces like gravity. In a shower, this means water can actually travel upward behind tiles if the thin-set mortar was not applied with proper directional troweling. This is the ghost in the machine. When an installer swirls the thin-set instead of combing it in straight lines, they create air pockets. These pockets act like little vacuum chambers. When water enters a crack in the grout, capillary action pulls it into these pockets. If the pockets are connected, the water can travel several feet away from the original leak site. This is why you might have a leak near your shower handle, but the mold shows up near the chic baseboard designs that transform rooms in the adjacent bedroom. The water is literally crawling through the walls. To prevent this, professional installers use the collapsing ridge method, ensuring 95 percent coverage and no air channels for water to inhabit.
Structural defects in the wet area wall
Structural defects such as wall stud deflection or improper backer board installation can cause the tile assembly to shift, cracking the grout and breaking the waterproof seal around the shower valve. Even a 1/32 inch movement in the subfloor or wall framing can ruin the integrity of a tile installation. If your house settles, or if the studs were wet when the house was built, they will twist as they dry. This movement puts immense stress on the rigid tile. Since tile does not bend, the grout must give way. Once the grout cracks, the seal around your shower handle is compromised. I always check for deflection before I ever lay a single tile. If the wall moves when I push on it, it is not ready for tile. We have to stiffen the assembly, often using blocking between the studs or switching to a more robust cement board. It is the boring work that nobody sees that makes the difference between a shower that lasts five years and one that lasts fifty.
“A floor is only as good as the subfloor beneath it; deflection is the enemy of every joint.” – Master Flooring Axiom
How to diagnose a slow subsurface leak
Diagnosing a subsurface leak involves checking for soft spots in the surrounding drywall, using an infrared camera to find temperature anomalies, and performing a moisture meter test on the grout lines. A slow leak behind a shower handle may not show visible water for months while rot progresses. You should start by removing the escutcheon plate. Look inside the wall with a flashlight. Is the insulation wet? Are there water stains on the wood? Next, look at your baseboards. If you see paint peeling or wood swelling, the water has already hit the floor level. For those concerned about maintaining their surfaces, following tile cleaning tips for a sparkling bathroom can help you spot early signs of grout erosion before it becomes a structural failure. I recommend homeowners perform a spray test. Dry the shower completely, then spray water specifically around the handle for ten minutes. If the wall on the other side gets cold or damp, you have found your culprit. It is a simple test that can save you thousands in remediation costs.
- Check the integrity of the escutcheon plate gasket every six months.
- Apply a high-quality grout sealer annually to reduce porosity.
- Inspect the corners of the shower for cracked caulk or separated grout.
- Monitor the water bill for unexplained increases that might suggest a slow plumbing leak.
- Ensure the shower arm pipe is also sealed where it exits the wall.
Modern waterproofing membranes that actually work
Modern waterproofing relies on uncoupling membranes and liquid-applied barriers that create a continuous, rubberized skin behind the tile. These systems ensure that even if grout fails, the water is contained within the shower stall and directed toward the drain. The industry has moved away from just using cement board. Now, we use products like RedGard or Schluter-Kerdi. These are game changers. They are vapor-tight. This is critical because even steam can move through walls and condense into liquid water inside the framing. When I build a shower now, I treat the entire enclosure like a swimming pool before a single tile is installed. I flood test it. I plug the drain and fill the base with water to ensure there are no leaks. Only when it holds water for 24 hours do I proceed. This level of rigor is what separates a master installer from a handyman. If you are planning a renovation, you might also look into baseboards makeover ideas to elevate your space once the structural integrity of your wet areas is confirmed. A beautiful room is worthless if the skeleton is rotting from a hidden leak. Final assessment requires looking past the surface. Do not trust the tile. Trust the prep work that lives beneath it.