
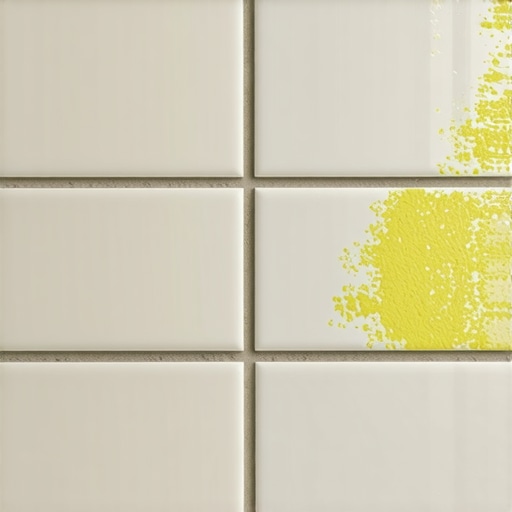
I have spent twenty-five years on my knees with a moisture meter and a level. I have seen every way a floor can fail. I have got calluses on my hands and the smell of oak dust permanently etched into my lungs. People think a floor is just something pretty you walk on. They are wrong. A floor is a structural performance surface. When a homeowner calls me complaining that their bathroom grout looks like a used cigarette filter, they usually expect me to suggest a magic spray. It does not work that way. Most guys skip the leveling compound and ignore the subfloor. They think the underlayment will hide the dip. It won’t. I spent three days grinding concrete on a job last month just so the floor wouldn’t click like a castanet. That same job had yellowing grout because the previous installer ignored the moisture levels in the slab. You cannot just mask these problems. You have to understand the chemistry of the bond. Grout is a porous, cement-based material that acts like a microscopic sponge. If your grout is turning yellow, it is likely a victim of chemical oxidation, mineral deposits, or surfactant buildup from the very soaps you use to stay clean.
The chemical reality of porous grout
Bathroom grout turns yellow because of a reaction between urea in urine, minerals in hard water, and surfactant buildup from soaps. Porous cement-based grout acts like a sponge, pulling these liquids into its crystalline structure where they oxidize and change color over time. Standard grout is made of Portland cement and sand. This mixture creates a lattice of tiny capillaries. When you take a shower, water carries dissolved solids into these pores. As the water evaporates, it leaves the solids behind. Over months and years, these solids accumulate. If your water has a high iron content, you get an orange or yellow tint. If you use heavy waxes or oils in your body wash, those oils go rancid inside the grout lines. It is a slow, chemical degradation that ruins the aesthetic of even the most expensive showers that wow. You have to treat grout as a chemical filter that has become clogged.
“A floor is only as good as the subfloor beneath it; deflection is the enemy of every joint.” – Master Flooring Axiom
The moisture migration from the subfloor
Moisture migrating through a concrete slab or wooden subfloor can carry alkali salts that react with grout pigments. This process, known as efflorescence, often presents as a white powder but can turn yellow if the moisture interacts with old adhesives or contaminants under the tile. I see this all the time in older homes. A contractor slapped down tile over an old vinyl floor or left patches of black mastic adhesive. When water seeps through the grout lines, it dissolves those old chemicals and wicks them back to the surface. This is why proper subfloor preparation is the only way to ensure a long-lasting finish. If you do not address the moisture coming from below, no amount of cleaning will fix the yellowing. It is like trying to paint over a rust spot on a truck. The problem is deep. You need to verify that your tile cleaning tips include a check for subfloor integrity.
Why your cleaning products are the enemy
Many homeowners use too much soap or oil-based cleaners which leave a sticky residue that traps dirt and yellows over time. This is the biggest mistake I see. People dump floor wax or heavy detergents onto their tile, thinking more soap means more clean. In reality, the grout sucks up the soapy water. The water evaporates, leaving the soap behind. That soap becomes a magnet for dust and hair. Eventually, the soap itself begins to oxidize and turn yellow. I always tell my clients to stop using those big-box store floor glosser products. They are essentially a layer of plastic that traps filth. If you want to keep your bathroom looking sharp, you need to understand the pH balance of your cleaners. A neutral cleaner is best. Anything too acidic will eat the cement. Anything too alkaline will leave a film. For those looking to fix the damage, learning how to refresh grout without replacing it is the first step toward a professional result.
Grout Composition Comparison
| Grout Type | Porosity Level | Chemical Resistance | Best Use Case |
|---|---|---|---|
| Sanded Cement | High | Low | Floor joints over 1/8 inch |
| Unsanded Cement | High | Low | Wall tile and narrow joints |
| Epoxy Grout | Zero | High | Showers and high-moisture areas |
| Acrylic Resin | Low | Medium | Flexible joints and stain resistance |
The failure of the sealing illusion
Grout sealer is not a permanent shield and will yellow if the product itself is low quality or applied over existing moisture. Most guys think they can just spray a sealer and walk away. That is a lie. If the grout is not bone dry, you are just trapping moisture inside. This leads to a process called saponification where the oils in the sealer react with the minerals in the cement. The result is a murky, yellow film that looks like old varnish. You have to use a high-quality, penetrating sealer that allows the grout to breathe while repelling liquids. I prefer solvent-based sealers for bathrooms because they penetrate deeper into the crystalline structure of the Portland cement. If you use a cheap water-based sealer from a discount warehouse, you will be scrubbing it off in two years. This is why I stress the importance of grout restoration secrets that focus on chemical compatibility rather than just surface appearance.
Managing the baseboard transition
Yellowing often starts at the edges where the tile meets the baseboards due to water pooling and dust accumulation. The joint between the floor and the wall is a movement joint. It should never be filled with hard grout. It should be caulk. When installers use grout in that corner, it inevitably cracks. Water then sits in those cracks and rots the bottom of the wall plate. This moisture then wicks back into the floor grout, carrying tannins from the wood or chemicals from the drywall. This creates a yellow or brown ring around the perimeter of the room. I always recommend upgrading to chic baseboard designs that allow for a proper expansion gap filled with 100 percent silicone caulk. This prevents the moisture trap that ruins grout color. If you are doing a renovation, check out baseboards makeover ideas to ensure your transitions are both functional and aesthetic.
“Standard cementitious grout is inherently porous and will absorb any liquid contaminant it contacts unless a permanent sealer is applied.” – Master Flooring Axiom
The ghost in the expansion gap
There is a physical reality to how floors move that most people ignore. A bathroom floor is a living system. Every time the humidity changes, your subfloor expands and contracts. If you have solid wood or even some engineered products near your tile, they are constantly pushing and pulling. This movement creates micro-fissures in your grout. These fissures are the entry point for the yellowing agents. I have seen beautiful showers with a style destroyed because the installer did not leave enough room for the floor to breathe. The yellowing is often just the first sign of a structural failure. When the grout turns yellow, it means it is saturated. When it is saturated, it loses its structural integrity. You start getting pop-outs and cracks. This is why I am a stickler for the TCNA standards. You follow the rules or you pay for it later. For those interested in long term sustainability, look into eco-friendly tile solutions that use more stable materials.
Grout Maintenance Checklist
- Wipe down shower walls after every use to prevent mineral buildup.
- Use a pH-neutral cleaner specifically formulated for stone and tile.
- Inspect the perimeter caulk every six months for cracks or peeling.
- Deep clean with a steam cleaner once a year to lift embedded surfactants.
- Test the sealer by dropping water on the grout; if it sinks in, re-seal immediately.
Professional restoration techniques
Restoring yellowed grout requires a deep chemical strip followed by an acid-wash to open the pores before re-sealing. You cannot just scrub it with a toothbrush and some dish soap. You need a professional alkaline stripper to remove all the old waxes and oils. Once the surface is stripped, you use a mild phosphoric acid solution to etch the surface of the cement. This removes the top layer of stained crystals and reveals fresh grout underneath. It is a dangerous job if you do not know what you are doing. You need proper ventilation and skin protection. After the acid wash, you must neutralize the floor with a baking soda solution to stop the reaction. Only then, once the floor has dried for at least forty-eight hours, can you apply a high-quality colorant or sealer. If you have questions about this process, you can contact us for expert advice on your specific flooring situation. Our privacy policy ensures your data is protected while we help you solve your flooring architectural challenges. Don’t let yellow grout ruin your home’s value. Fix the chemistry and you fix the floor.