
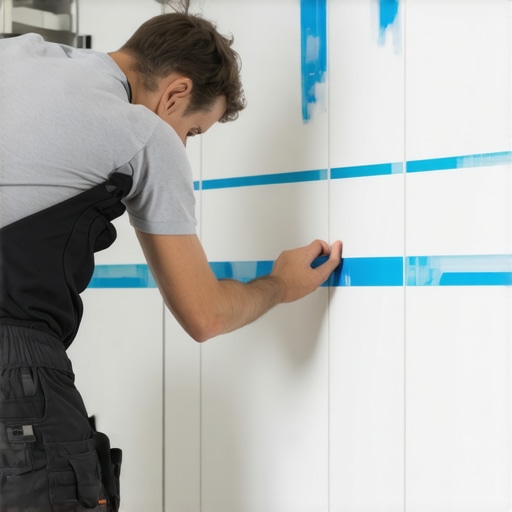
Professional Precision Masking for Tile Silicone Joints in Custom Bathrooms
Most guys skip the leveling compound. They think the underlayment will hide the dip. It won’t. I spent three days grinding concrete on a job last month just so the floor wouldn’t click like a castanet. That level of obsession with the substrate is what separates a floor that lasts thirty years from one that fails in three. When it comes to the finishing stage of a project, specifically applying silicone caulk to showers or where tile meets baseboards, that same technical rigor must apply. You cannot just smear goop into a corner and expect it to perform. You have to understand the chemistry of the bond and the physics of the joint. Silicone is not just a gap filler. It is a structural component designed to accommodate movement. If you do not mask your tile properly, you are essentially gambling with the longevity of the installation and the waterproof integrity of the entire wet area.
The subfloor secret that dictates your finish
Masking tile for silicone requires cleaning the substrate with 99 percent isopropyl alcohol to remove all surfactants and dust before applying high-quality painter tape precisely 1/16 inch from the joint edge. This technique creates a clean bond line and prevents the silicone from feathering onto the tile face where it will eventually peel. I have seen too many installers treat caulking as an afterthought. They finish a beautiful porcelain install and then ruin the aesthetics with a jagged, smeared bead. A floor is only as good as the preparation that goes into it. If the subfloor is not flat, the tile will move. If the tile moves, the silicone joint is the only thing standing between a dry house and a moldy crawlspace. You have to treat the perimeter of the room as a living, breathing expansion joint.
“A floor is only as good as the subfloor beneath it; deflection is the enemy of every joint.” – Master Flooring Axiom
The chemistry of silicone adhesion on glazed surfaces
Silicone is a polymer that relies on a clean, dry surface to achieve a mechanical and chemical bond. On glazed ceramic or porcelain, the surface is often non-porous and incredibly smooth. This is why tile cleaning is a vital step before you even think about reaching for the tape. Any residual grout haze, soap scum, or factory-applied wax will act as a bond breaker. When you mask the tile, you are defining the exact area where the silicone will live. If that area is contaminated, the silicone will pull away from the wall within months. This is particularly problematic in high-moisture zones. The silicone must be 100 percent RTV (Room Temperature Vulcanizing) to withstand the constant thermal expansion and contraction found in modern bathrooms. Cheap caulks use solvents that evaporate, causing the bead to shrink and pull away from the tape line. This creates a pocket where water sits, leading to the failure of the entire system.
The selection of bond breaking tapes
Not all tapes are created equal when you are working with tile. You need a tape with a medium tack that will not leave adhesive residue behind but is strong enough to resist the moisture of the caulk. Standard tan masking tape is a nightmare. It is too porous and the adhesive can bake onto the tile if it is left too long. I prefer a specialized blue or green tape with a fine edge. The tape needs to be thin enough so that when you pull it, you do not leave a massive cliff of silicone. The goal is a transition so smooth you can barely feel it with your finger. Consider the following comparison of common masking materials used in professional flooring.
| Tape Type | Adhesive Strength | Edge Precision | Residue Risk |
|---|---|---|---|
| Standard Masking | High | Low | High |
| Blue Painter Tape | Medium | High | Low |
| Frog Tape Green | Medium-High | Very High | None |
| Automotive Fine Line | Low | Absolute | None |
The physics of the perfect bead
When you apply the tape, you are setting the limits of the silicone’s elasticity. According to the TCNA, a movement joint must have a specific depth-to-width ratio. If the silicone is too thin, it will tear. If it is too deep, it will not have enough flexibility to stretch. By masking exactly 1/16 or 1/8 of an inch away from the corner, you ensure that the silicone has enough body to maintain its structural integrity. I always use a backer rod in joints deeper than a quarter inch. This prevents three-sided adhesion, which is a common cause of failure. Silicone should only stick to the two sides of the joint, not the back. This allows it to stretch like a rubber band as the building settles or the seasons change. In regions with high humidity, this movement is even more pronounced as the wood framing behind the tile expands and contracts with the moisture levels.
“Movement joints in tile installations shall be filled with a flexible sealant to accommodate structural shifts.” – TCNA Handbook Section EJ171
The 1/8 inch gap that ruins everything
Precision in masking is about more than just straight lines. It is about the specific geometry of the sealant. If you mask too close to the corner, the silicone will be too thin and will likely peel when you clean the floor. If you mask too far away, you end up with a bulky bead that collects dirt and looks amateur. The sweet spot is always determined by the size of the grout joints in the rest of the room. Consistency is what makes a project look professional. When you are working on eco-friendly tile solutions, you are often dealing with recycled materials that might have slight variations in edge thickness. You must account for these variations when laying your tape lines. Use a small spacer or a ruler to ensure your tape is equidistant from the corner at every point. It is tedious work, but it is the difference between a job that looks like a DIY hack and one that looks like it belongs in a magazine.
The pre-caulk checklist for installers
- Verify that the grout is fully cured and dry for at least 24 hours.
- Vacuum the joints to remove all loose debris and dust.
- Wipe the tile edges with isopropyl alcohol and a lint-free cloth.
- Apply the masking tape in long, continuous strips to avoid jagged overlaps.
- Press the tape edges down firmly with a plastic tool to prevent bleed-under.
- Ensure the room temperature is between 40 and 90 degrees Fahrenheit.
- Double check that no water has entered the joint in the last 12 hours.
Managing movement joints in wet environments
In a shower, the vertical corners and the change of plane where the wall meets the floor are the most common failure points. If you use grout in these corners, it will crack. It is a mathematical certainty. You must use a high-quality silicone. Masking these areas is difficult because you are often working in tight spaces. You have to be careful not to touch the wet silicone with the tape as you remove it. I always pull the tape at a 45-degree angle away from the bead. This shears the silicone and leaves a crisp edge. If you pull it straight out, you risk dragging the wet material across the face of your clean tile. It takes a steady hand and a lot of patience. If you rush this step, you will spend the next two hours with a razor blade trying to clean up the mess. And believe me, scraping dried silicone off a textured tile is a special kind of hell that you want to avoid.
The impact of local humidity on cure rates
Depending on where you are located, the weather will dictate your working window. In the humid Southeast, the moisture in the air can actually accelerate the skinning time of some silicones. You might only have five or ten minutes to tool the joint and pull the tape before it starts to set. In dry desert climates, you might have more time, but the tape adhesive can become more aggressive and harder to remove. Always test a small area first. If the silicone starts to drag or clump when you pull the tape, you have waited too long. You need to work in small sections, maybe three or four feet at a time, rather than trying to mask and caulk the entire room in one go. This incremental approach ensures that every inch of the bead is perfect and that the tape comes off cleanly without disturbing the curing polymer. Success in flooring is not about speed, it is about controlling the variables that lead to failure. Keep your tools clean, your tape straight, and your subfloor flat, and the rest will fall into place.