
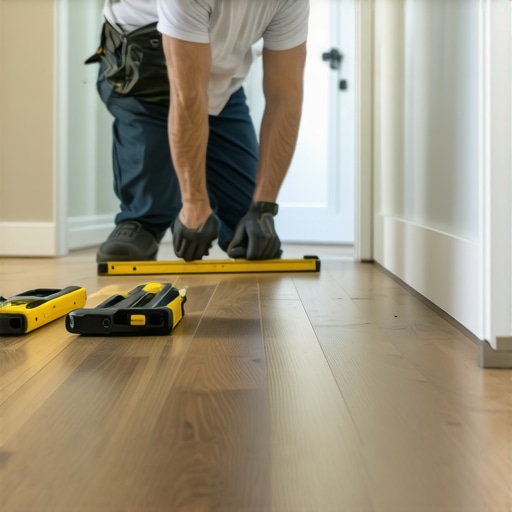
The Best Way to Install Baseboard on a Sloped Floor
Most guys skip the leveling compound. They think the underlayment will hide the dip. It won’t. I spent three days grinding concrete on a job last month just so the floor wouldn’t click like a castanet. That is the reality of the trade. If you think you can just slap a straight piece of trim over a floor that rolls like the Atlantic, you are in for a world of hurt. You will see gaps large enough to swallow a pencil, and your miters will never, ever line up. Installing baseboards on a sloped floor is not about carpentry as much as it is about geometry and the physics of optical illusions. You are trying to make a crooked world look straight, and that requires more than just a hammer and some nails. It requires the skill of scribing, a deep understanding of subfloor deflection, and the patience of a saint.
The ghost in the expansion gap
To install baseboard on a sloped floor, you must scribe the bottom of the board to match the floor’s contour. This involves holding the board level, using a compass or a spacer block to trace the floor’s unevenness onto the wood, and then cutting along that line with a jigsaw. This method ensures the top edge of the baseboard remains perfectly level and aligned with the rest of the room’s trim, effectively hiding the floor’s structural imperfections. If you simply push the board down to meet the floor, the top edge will dive, making every door casing and corner joint look amateurish. This is particularly important when you are considering chic baseboard designs that transform rooms in 2025 because the more ornate the profile, the more obvious a bad installation becomes.
The subfloor is the foundation of everything, and often, a slope is not just a slope. It is a sign of joist settlement, poor planning, or moisture issues. When I look at a floor, I am not seeing the pretty laminate or the hardwood. I am seeing the 3/4 inch OSB or the concrete slab. I am looking for the crown in the joists. A floor that slopes 1/2 inch over an 8 foot run is a nightmare for standard installation methods. You cannot just nail through it and hope for the best. The mechanical fasteners will eventually pull loose as the house breathes. Wood is a living material. It expands and contracts based on the grains per pound of moisture in the air. When you force a straight board into a curved dip, you are building tension into the system. That tension wants to be released. Eventually, it will manifest as a popped nail or a cracked caulk line.
Why your subfloor is lying to you
A subfloor might look flat to the naked eye, but the 6-foot level never lies. The primary cause of baseboard gaps is subfloor deflection or humps in the concrete. When the slab is poured, it is rarely a perfect plane. As the water evaporates from the mix, the concrete shrinks and curls. In wood-framed houses, the rim joists might settle at a different rate than the interior piers. This creates a slope that pulls the flooring away from the wall. If you are working in a bathroom where there is tile cleaning tips for a sparkling bathroom in 2025 to consider, you also have to deal with the thickness of the thin-set and the waterproofing membrane. Every layer adds a variable.
I have seen guys try to use flexible PVC baseboards to solve this, but those lack the structural integrity of real wood or high-density MDF. They follow the floor too well, which means the top of your baseboard now looks like a roller coaster. That is not craftsmanship. Craftsmanship is maintaining a level line regardless of what the floor is doing. You have to understand the chemistry of your materials. Solid wood has a cellular structure that reacts differently to humidity than MDF. If you are using solid oak, you have to account for the way the grain will resist a scribe cut. MDF is easier to scribe but it acts like a sponge if there is any moisture. This is why I always check the moisture content of the subfloor before I even pull a tape measure. If the slab is over 4 percent moisture, you have bigger problems than a gap in your trim.
The 1/8 inch that ruins everything
In the world of professional flooring, 1/8 of an inch is a mile. If your baseboard is off by that much at a corner, your miter will have a gap that no amount of wood filler can truly hide. When dealing with a slope, the traditional 45-degree cut is useless. You are now dealing with a compound angle because the floor is not perpendicular to the wall. This is where most installers fail. They cut their miters at 45 degrees and then wonder why the top of the joint is tight but the bottom is open by a quarter inch. It is because the floor has tilted the board. To fix this, you have to find the actual angle of the floor relative to the wall using a digital protractor. Only then can you calculate the correct miter and bevel for the cut.
| Floor Slope (per 4ft) | Adjustment Method | Difficulty Level | Recommended Tool |
|---|---|---|---|
| Under 1/8 inch | Caulk and Paint | Low | High-grade Acrylic Caulk |
| 1/8 to 3/8 inch | Simple Scribe | Medium | Compass and Jigsaw |
| Over 3/8 inch | Leveling and Scribe | High | Power Plane and Level |
| Structural Sag | Joist Repair | Expert | Hydraulic Jack |
The physics of the cut are simple but the execution is hard. You are essentially creating a custom-fitted piece of furniture for every wall. If you are working on baseboards makeover ideas to elevate your space, you need to be prepared for the extra labor. Scribing a single 12-foot board can take twenty minutes. You have to prop the board up, level it with shims, mark it, cut it, and then dry-fit it. Most of the time, you will have to take another hair off with a power plane or a rasp. It is a slow process, but it is the only way to get a professional result. Shortcuts lead to call-backs, and call-backs eat your profit.
“A floor is only as good as the subfloor beneath it; deflection is the enemy of every joint.” – Master Flooring Axiom
The precise art of scribing
Scribing is the process of transferring the profile of an irregular surface onto a workpiece. To do this correctly, you need a steady hand and a sharp pencil. Start by placing your baseboard against the wall and leveling the top edge. You will see the gap at the bottom where the floor falls away. Take a compass and set the distance between the point and the lead to match the widest part of the gap. Keeping the compass perfectly vertical, run the point along the floor while the lead marks the baseboard. This gives you a line that perfectly mimics the slope of the floor. When you cut this line, the board will drop down, the gap will disappear, and the top edge will remain perfectly level.
When cutting the scribe, I always use a jigsaw with a fine-tooth blade. I cut slightly to the waste side of the line and then use a belt sander or a power plane to fine-tune the edge. If the slope is severe, you might need to back-bevel the cut. This means angling the blade so that the front of the board is slightly longer than the back. This allows the board to sit tighter against the floor and makes it easier to shave off small amounts of material during the fitting process. It is a messy, dusty job, and you will smell the friction of the blade against the wood, but there is no better feeling than watching a board snap into place with zero gaps. This is especially true when transitioning between different surfaces, such as moving from a hardwood hallway into a tiled bathroom where you might be looking for grout restoration secrets for long-lasting results.
- Always use a 6-foot or 8-foot level to check the floor before starting.
- Use a compass with a locking mechanism so your measurement doesn’t slip.
- Level the board with shims before scribing to ensure the top stays true.
- Cut on the waste side of the line and sand down to the mark.
- Test fit each piece before applying any adhesive or nails.
- Use high-quality wood glue on all mitered corners.
- Back-bevel your scribe cuts for a tighter fit against the floor.
Moisture and the chemistry of adhesives
One thing people forget is that floors move. A floor that is sloped today might be slightly different in six months because of seasonal humidity changes. In regions with high humidity, like the coastal South, the wood will swell. In dry desert climates, it will shrink. This movement puts stress on the baseboard. I always use a combination of 18-gauge finish nails and a high-quality construction adhesive. The nails hold the board in place while the adhesive dries, but the adhesive provides the long-term structural bond. You want an adhesive that remains slightly flexible. If the adhesive is too brittle, it will crack when the house settles or when the moisture levels shift.
If you are working near showers with a style trendy ideas for small bathrooms, you have to be even more careful. The moisture in a bathroom is a constant threat to baseboards. I have seen beautiful baseboards rot from the bottom up because the installer didn’t seal the bottom edge of the scribe cut. When you cut into wood or MDF, you are opening up the pores. You must prime or seal that cut edge before installation to prevent capillary action from sucking up water from the floor. This is even more vital if the floor is tile and the grout is not properly sealed. Moisture travels through grout like a wick, and if your baseboard is sitting on top of damp grout, it will fail within a few years.
“The allowable deflection for ceramic tile and stone installations is L/360 or L/720 respectively.” – TCNA Handbook
The final transition and aesthetic integrity
Once the boards are scribed and nailed, the work is not finished. You still have to deal with the transitions. If the slope continues through a doorway, you have to transition the baseboard height to match the next room. This might require a transition block or a clever bit of miter work. Never just end a baseboard abruptly. It looks unfinished. If you are dealing with a bathroom and need how to refresh grout without replacing it, you might notice that the grout line where the tile meets the wall is also uneven. This is where a well-scribed baseboard saves the day by covering that messy junction.
The goal is always to create a visual line that the eye perceives as straight. The human brain is very good at spotting a line that is slightly out of level, especially when it is near a door frame or a window. By scribing the baseboard, you are tricking the brain into thinking the floor is flat. It is the ultimate flooring architect’s trick. It takes more time, and it requires more tools, but the results speak for themselves. You go from a house that looks like it was built by a cut-rate developer to a home that feels solid and well-engineered. Do not be the guy who relies on caulk to fill a half-inch gap. Be the guy who knows how to use a scribe. Your floors, and your reputation, will be better for it.