
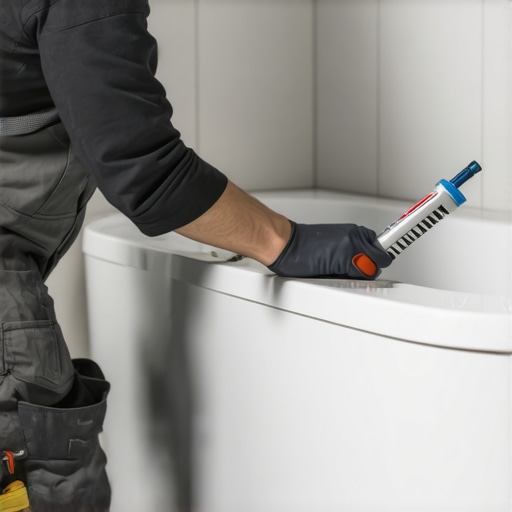
The Science of Sealing the Joint Between the Tub and the First Row of Tile
Most guys skip the leveling compound. They think the underlayment will hide the dip. It won’t. I spent three days grinding concrete on a job last month just so the floor wouldn’t click like a castanet. That same level of neglect usually happens at the transition between the tub and the vertical wall. When you are dealing with tile, showers, and grout, you are essentially managing a hydraulic system that is constantly under stress from thermal expansion and structural weight. I have seen thousand dollar custom tile jobs ruined because a contractor used hard grout at the base of a tub instead of a proper expansion joint. The result is always the same. Within six months, the grout line cracks, water migrates into the subfloor, and the baseboards in the adjacent room start to swell. This is not just a cosmetic fix. It is a structural necessity.
The ghost in the expansion gap
Movement joints in showers are essential because bathrooms experience dynamic loads and thermal shifts. When you fill a bathtub with water, the weight can exceed six hundred pounds. This causes the floor joists to deflect, creating a microscopic gap between the tub rim and the tile. If this gap is filled with rigid material, it will fail. Most homeowners do not realize that the joint where two different planes meet must be treated as a movement joint according to the Tile Council of North America standards. If you are looking at showers that wow modern designs for 2025, you must prioritize this structural integrity over mere aesthetics. A rigid joint will inevitably shear away from the substrate. This creates a pathway for moisture to infiltrate the wall cavity, leading to mold growth that you cannot see until it is too late.
“A floor is only as good as the subfloor beneath it; deflection is the enemy of every joint.” – Master Flooring Axiom
Why your subfloor is lying to you
The subfloor beneath your bathtub often hides structural deficiencies like joist spacing issues or wood rot that affect the tile installation. Even if the floor looks flat, the introduction of a massive water load changes the geometry of the entire room. You have to account for the modulus of elasticity in your sealant. If your subfloor has too much flex, even the best silicone might struggle. This is why we check for deflection before even thinking about the first row of tile. Many installers think they can hide a sloppy subfloor with extra thinset. They are wrong. That extra material just creates more mass that can shrink and pull away from the tub flange. If you have older tile that is already failing, you might want to look into how to refresh grout without replacing it before the damage reaches the studs. Moisture management starts at the structural level, not the surface level.
The 1/8 inch that ruins everything
A proper expansion joint should be one eighth inch wide to allow for compression and extension cycles in tile assemblies. This specific measurement is the industry standard for a reason. If the joint is too narrow, the sealant cannot stretch properly. If it is too wide, the sealant may sag or fail to maintain a cohesive bond across the gap. You need to maintain a consistent gap between the bottom of your first row of tile and the top of the tub. I use plastic spacers to ensure this gap is uniform all the way around the perimeter. For those interested in eco friendly tile solutions for sustainable homes in 2025, using high quality, low VOC silicones is part of a responsible build. You can find more info at eco friendly tile solutions for sustainable homes in 2025. The 1/8 inch gap is the safety valve for your bathroom walls.
Chemistry of the perfect bond
100 percent silicone is the standard for wet areas because it offers superior adhesion and mildew resistance compared to acrylic. Do not use cheap painter’s caulk here. You need something that can handle 25 percent movement. There are two main types of silicone: acetoxy cure and neutral cure. Acetoxy cure smells like vinegar and is generally cheaper, but it can react poorly with certain natural stones. Neutral cure is more expensive but adheres better to a wider variety of surfaces including plastics and metals used in modern tubs. When you are performing grout restoration secrets for long lasting results, you have to ensure that the old residue is completely gone. Silicone will not stick to old silicone. It will not stick to soap scum. It will not stick to moisture. The surface must be chemically clean. I use denatured alcohol to prep the area. It evaporates quickly and leaves no residue behind, ensuring the molecular bond between the silicone and the tile is unbreakable. Check out grout restoration secrets for long lasting results to see how to prep these surfaces correctly.
The weight of failure
Bathtub deflection occurs when the weight of water and a human body causes the tub to settle slightly. If you apply your sealant while the tub is empty, you are setting yourself up for failure. When the tub is later filled, it pulls away from the tile, stretching the sealant to its breaking point. This is called adhesive failure. To prevent this, I always fill the tub with water before applying the silicone. I leave the water in there until the silicone has fully cured. This ensures the joint is sealed while the tub is at its maximum deflection point. When the water is drained, the silicone is under slight compression, which is the strongest state for the material. This is a pro tip that separate the mechanics from the handymen. It takes more time, but it means you won’t be back in a year to fix a leak. If your bathroom transition involves baseboards, you should also look at chic baseboard designs that transform rooms in 2025 to ensure the rest of the room matches the quality of your tile work.
“Every change in plane requires a flexible movement joint to accommodate the inevitable shifting of the building envelope.” – TCNA Handbook Section EJ171
Tools for a lifetime seal
High quality sealant, denatured alcohol, masking tape, and caulk finishing tools are the requirements for a professional finish. You cannot just wing this with a wet finger. The oils in your skin can actually contaminate the silicone and cause it to yellow or peel over time. I use blue painter’s tape to mask off the tub and the tile row, leaving exactly an eighth of an inch exposed. This gives me a perfectly straight line that looks like it came from the factory. After tooling the bead, I pull the tape while the silicone is still wet. This prevents a ridge from forming at the edge of the sealant. Using a dedicated tooling puck ensures the bead has a concave shape, which helps water shed away from the joint instead of pooling on top of it. Detail matters. If you want tile cleaning tips for a sparkling bathroom in 2025, keeping this joint smooth is the first step because mold loves to grow in the rough ridges of a poorly tooled caulk line.
| Feature | 100% Silicone | Acrylic Caulk | Sanded Grout |
|---|---|---|---|
| Flexibility | High (25-50%) | Low (5-10%) | None (Rigid) |
| Water Resistance | Excellent | Moderate | Porous |
| Mold Resistance | High | Moderate | Low |
| Life Expectancy | 20+ Years | 3-5 Years | Fails on movement |
Physics of the concave bead
The concave shape of a sealant bead is engineered to distribute stress and promote water drainage. When a bead is flat or convex, it creates a shelf where water can sit. Standing water is the enemy of any bathroom. Over time, that water will find a way through even the best sealant if it is allowed to pool. By creating a concave profile, you are using gravity to your advantage. Water hits the tile, rolls down to the sealant, and is directed into the tub basin. Furthermore, a concave bead has more surface area in contact with the tub and tile relative to its thickness in the middle. This allows the center of the bead to stretch more easily without pulling away from the edges. It is simple physics applied to home maintenance. If your baseboards are showing signs of water damage near the tub, it is almost certain that this joint has failed. You can see baseboards makeover ideas to elevate your space to learn how to fix the damage, but you must fix the leak first.
- Remove all old grout or sealant using a plastic scraper to avoid scratching the tub.
- Clean the joint with denatured alcohol or acetone to remove all oils and soap scum.
- Fill the bathtub with water to simulate the maximum load and deflection.
- Apply blue painter’s tape to both the tub rim and the first row of tile.
- Apply a continuous bead of 100 percent silicone sealant into the gap.
- Tool the bead with a smoothing tool to create a concave surface.
- Remove the masking tape immediately while the sealant is still wet.
- Allow the sealant to cure for at least 24 hours before draining the water.
The movement joint is the most common failure point in a bathroom because it is where the rigid meets the flexible. By treating it with the technical respect it deserves, you ensure that your showers remain waterproof for decades. Don’t be the guy who thinks a bit of extra grout will hold. It won’t. Use the right chemistry, the right geometry, and the right preparation. If you have questions about your specific layout, you can always contact us for expert advice on flooring and tile installations.