
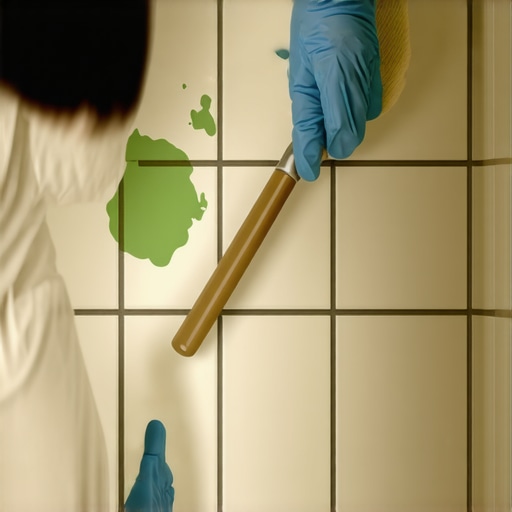
Most guys skip the leveling compound. They think the underlayment will hide the dip. It won’t. I spent three days grinding concrete on a job last month just so the floor wouldn’t click like a castanet. This is the reality of the trade. If the foundation is a lie, the finish is a failure. Painting bathroom tile is exactly the same game. You are not just slapping a coat of pigment on a wall. You are attempting to chemically fuse a polymer to a non-porous vitreous surface. It is a war against surface tension and high humidity. I have seen enough peeling tubs and flaking floors to know that most people treat this like a craft project. It is actually a structural engineering challenge on a microscopic scale.
The lie of the smooth surface
Painting bathroom tile requires a mechanical bond because ceramic glazes are designed to repel foreign substances. You must use a high-adhesion bonding primer specifically formulated for glass or tile. Success depends on the removal of all surface contaminants like soap scum, hard water deposits, and body oils. Most homeowners think a quick wipe with a wet rag is enough. It is not. If you leave a single molecule of hair conditioner on that surface, the paint will slide right off within six months. You need to understand the chemistry of the glaze. Ceramic tile is essentially a layer of liquid glass fired at over 2,000 degrees. It is dense. It is non-absorbent. To get paint to stick, you have to create a profile. That means sanding. You are not sanding to make it smooth, you are sanding to create microscopic scratches where the primer can bite. If you skip this, you are just wasting money on expensive paint. You can learn more about maintaining surfaces at tile cleaning tips for a sparkling bathroom in 2025.
Preparation is the only thing that matters
The preparation phase involves deep cleaning with trisodium phosphate and thorough sanding with 120-grit sandpaper to break the surface tension of the factory glaze. This ensures that the bonding agent can penetrate the micro-fissures created by the abrasive. Any remaining moisture in the grout lines will cause immediate failure. I have spent decades watching people rush this part. They want the pretty color, not the hard work. You need to scrub the grout with a stiff brush until your shoulders ache. Grout is porous. It holds onto oils and minerals. If those oils are not neutralized, the paint will bubble over the joints. This is why many pros suggest how to refresh grout without replacing it before they even think about the tile. When you are working around showers with a style, the stakes are higher because of the constant cycle of heat and moisture expansion.
“A floor is only as good as the subfloor beneath it; deflection is the enemy of every joint.” – Master Flooring Axiom
The microscopic war between epoxy and moisture
Epoxy-based paints are the gold standard for tile refreshes due to their high cross-linking density and resistance to water vapor. These coatings create a hard shell that mimics the original ceramic glaze while providing a waterproof barrier. Standard latex paint will fail in a high-moisture bathroom environment. You have to look at the chemistry. A two-part epoxy involves a resin and a hardener. When they mix, a chemical reaction occurs that creates a much stronger bond than simple evaporation-based drying. In a shower, the air is saturated. Water molecules are small enough to penetrate weak paint films. Once they get behind the paint, the bond is broken. This is particularly problematic in showers that wow where aesthetic goals often clash with the physics of steam. You need a coating that can handle the expansion and contraction of the substrate. If the tile gets hot and expands, but the paint is too brittle, it cracks. If the paint is too soft, it peels. It is a balancing act of Shore hardness and tensile strength.
| Paint Type | Bond Strength | Moisture Resistance | Cure Time |
|---|---|---|---|
| Two-Part Epoxy | Very High | Excellent | 72 Hours |
| One-Part Tough Acrylic | Medium | Moderate | 24 Hours |
| Standard Latex | Low | Poor | 4 Hours |
| Urethane Alkyd | High | Good | 48 Hours |
Why your grout lines will betray you
Grout lines act as a thermal break and a moisture reservoir, making them the most common point of failure for painted tile surfaces. You must treat grout with a specialized sealer or ensure the paint completely encapsulates the porous cement. Failure to do so leads to moisture wicking under the paint film. I have seen guys think they can just roll over the grout like it is a flat wall. It is not. Grout has texture. It has valleys. If your roller does not push the paint into those valleys, you leave pinholes. Those pinholes are like open doors for steam. Within weeks, the paint starts to lift around the edges of the tile. This is why grout restoration secrets for long-lasting results are so vital. You are trying to turn a modular system of tiles into a monolithic surface. The physics are against you. Every time the house shifts, those grout lines want to move. If the paint is not flexible enough, it will snap at the joints. It is a brutal reality of the trade.
The steps to a temporary fix
The application process must follow a strict sequence of cleaning, etching, priming, and multiple thin coats of topcoat to ensure a professional finish. Each layer must be allowed to degas and cure according to the manufacturer’s technical data sheet. Rushing the recoat window will trap solvents and lead to a gummy finish. Here is how you do it if you want it to last more than a week. First, remove all hardware and scrape away old silicone caulk. Paint will not stick to silicone. Ever. Next, use a heavy-duty degreaser. Then, sand every square inch. Use a vacuum with a HEPA filter to get the dust out of the grout. Use a tack cloth. Then, apply the bonding primer. Don’t use a cheap brush. Use a high-density foam roller for a smooth finish. If you want eco-friendly tile solutions, look for low-VOC epoxies. They are harder to find but better for your lungs in a small bathroom. Apply two thin coats of the final color. Do not go thick. Thick paint drips and takes forever to cure. You want thin, even layers that build up a durable film thickness.
- Remove all traces of silicone caulk before starting.
- Scrub the surface with trisodium phosphate or a similar heavy degreaser.
- Sand the tile with 120 to 150 grit sandpaper until the shine is gone.
- Apply a dedicated high-adhesion bonding primer.
- Use a foam roller to prevent brush marks and texture.
- Allow at least 48 hours of cure time before exposing the surface to water.
Baseboards and the finishing touch
Baseboards provide the structural transition between the new painted tile floor and the wall, hiding the expansion gap necessary for the floor to breathe. Choosing the right profile can elevate a temporary paint job into a cohesive design. The gap at the bottom must be sealed with a paintable, flexible caulk. When you finish the tile, you realize the edges look like a mess. That is where trim comes in. You can check out baseboards makeover ideas to elevate your space for inspiration. A solid baseboard covers the sins of the edge. In a bathroom, I always recommend a PVC or moisture-resistant material. Wood baseboards will rot if they sit on a wet floor. If you are looking for something more modern, chic baseboard designs that transform rooms in 2025 offer ways to make a cheap paint job look like a high-end renovation. The transition is where the amateur is separated from the professional. It is about the 1/8 inch gap. Too small and things buckle. Too big and it looks sloppy.
“Deflection is the silent killer of tile; if the substrate moves, the finish fails regardless of the paint quality.” – Master Flooring Axiom
Living with a painted floor
Maintenance of painted tile requires non-abrasive cleaners and the avoidance of standing water to preserve the integrity of the polymer bond. Sharp objects and heavy furniture will chip the surface because the paint is a topical coating rather than a through-body color. It is a temporary solution that requires careful management. You cannot treat a painted floor like a ceramic one. You cannot scrub it with a wire brush. You cannot use harsh acids. If you drop a glass bottle, it will chip. That is the trade-off. You are saving thousands of dollars on a remodel, but you are paying for it in maintenance. You have to be diligent. If you see a chip, touch it up immediately. If water gets under the film, the whole floor is toast. I tell people this is a two-year fix. It is for the person who hates their bathroom but isn’t ready for the $10,000 bill to gut it. It is a bridge to the future. Treat it with respect and it will hold. Treat it like a standard floor and you will be back to square one in a month. For more information on our services, visit the contact us page or read our privacy policy.