
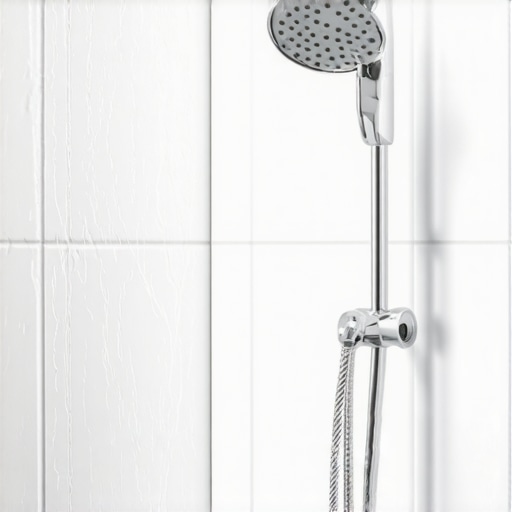
The structural reality of thermal shock
Glass tile reacts to hot water by expanding at a different rate than the cement backer board or thin-set mortar behind it. This discrepancy in the coefficient of thermal expansion creates internal tension that leads to stress fractures or cracking near the shower head. Most guys skip the leveling compound. They think the underlayment will hide the dip. It won’t. I spent three days grinding concrete on a job last month just so the floor wouldn’t click like a castanet. When you apply that same lack of precision to a vertical shower wall, the glass pays the price. Glass is an amorphous solid. It does not have the internal crystalline structure of a ceramic tile. When 120 degree water hits a cold glass surface, the face of the tile expands while the back remains anchored to a cold wall. This creates a shearing force within the material itself. If the bond is too rigid, the glass must break to relieve the pressure. This is not a manufacturing defect. It is a failure of engineering and installation physics. It happens most often around the shower arm because that is the point of highest temperature concentration and mechanical vibration.
The physics of molecular expansion in wet environments
Thermal expansion is the primary driver of glass tile failure because silica based glass has a different expansion coefficient than the portland cement found in standard mortars. When you turn on the shower, the molecular vibration increases, causing the tile to grow in size. This growth requires perimeter expansion joints. I have seen hundreds of showers where the installer ran the glass tight against the plumbing nipple. There was no room for the tile to move. When the heat hits, the tile pushes against the brass pipe, and since the brass won’t give, the glass cracks. You need a minimum of a one eighth inch gap around all penetrations. This gap should be filled with 100 percent silicone sealant, never hard grout. Grout does not compress. Silicone does. This simple mechanical oversight is responsible for nearly 80 percent of the call backs I see in high end bathroom remodels. People want the look of showers that wow but they forget the science that keeps those showers in one piece. The density of the glass also matters. Thicker glass tiles actually have a harder time distributing heat than thinner ones. The temperature gradient between the wet surface and the bonded surface is steeper in a 10 millimeter tile than a 4 millimeter tile.
“A floor is only as good as the subfloor beneath it; deflection is the enemy of every joint.” – Master Flooring Axiom
The chemistry of the bond and mortar selection
Modified thin-set mortar containing high polymer content is required for glass tile installation to ensure the bond strength can withstand the shear stress of thermal cycling. Using a standard dry set mortar on glass is a recipe for disaster. The polymer acts as a shock absorber. It allows for a microscopic amount of movement between the substrate and the tile. If you use a cheap, rigid mortar, the glass is essentially locked in a vice. When the house settles or the temperature changes, that vice squeezes the tile until it snaps. You also have to consider the color of the mortar. Glass is translucent. If you don’t use a bright white, glass specific thin set, you will see every trowel mark. But the real issue is the chemistry. You need an ANSI A118.11 or A118.15 rated bond coat. These are designed to adhere to non porous surfaces. Glass is zero percent porous. It does not suck in the mortar like a ceramic tile does. It relies entirely on chemical adhesion rather than mechanical interlocking. This makes the surface preparation even more critical. Any oils from your hands or dust from the job site on the back of that glass will ruin the bond before you even start. Proper tile cleaning of the substrate and the tile itself is the only way to ensure the chemistry works.
| Material Type | Expansion Rate | Water Absorption | Recommended Adhesive |
|---|---|---|---|
| Glass Tile | High | 0% | Polymer Modified (A118.15) |
| Ceramic Tile | Medium | 3-7% | Standard Thin-set |
| Porcelain | Low | <0.5% | Modified Thin-set |
| Natural Stone | Variable | Variable | Large Format Mortar |
Vibrational stress from plumbing fixtures
Mechanical vibration from the shower arm travels through the wall studs and into the tile substrate, causing stress fractures if the plumbing is not properly secured. Every time you turn the water on, there is a surge of pressure. This creates a micro shudder in the pipe. If that pipe is touching the glass tile, it acts like a hammer drill on a microscopic scale. Over months of use, these thousands of tiny impacts weaken the glass. Eventually, a single hot shower provides the thermal stress needed to finish the job. I always tell my guys to wrap the plumbing nipple in foam tape or use a plastic sleeve. You want the glass to be floating around the pipe, not touching it. This is especially true in regions like the Pacific Northwest where house settling is common due to soil moisture. In drier climates like Phoenix, the wood studs shrink and pull away from the tile, creating a different kind of tension. Regardless of where you live, the physics of the shower head penetration remain the same. You are cutting a hole in a fragile material and then subjecting it to heat and vibration. You have to over engineer that specific spot. If you are looking for showers with a style that lasts, you cannot ignore the framing behind the wall.
The critical role of grout and movement joints
Cementitious grout is too rigid for glass tile installations because it cannot accommodate the lateral movement of the shower wall during thermal expansion. You must use high performance grout or, preferably, epoxy grout in certain areas. But even then, the corners and the areas around the shower head need flexible sealant. I see people trying to use grout restoration secrets to fix cracks when the problem is actually structural. If the grout is cracking, the tile is next. Grout is the fuse in your flooring electrical system. When it blows, it is telling you there is too much tension. For glass, I recommend a sanded grout only if the manufacturer allows it, as sand can scratch the glass. Most glass installs require unsanded grout or specialized glass bead grout. These materials have a higher polymer density. They are slightly more flexible than the stuff you buy at a big box store for five dollars a bag. If you want to know how to refresh grout properly, you first have to understand why it failed. If it failed because of movement, you don’t just add more grout. You replace it with a color matched silicone. This is the only way to stop the glass from cracking again.
- Check the subfloor for deflection before wall installation.
- Ensure a 1/8 inch gap around all shower head plumbing.
- Use only ANSI A118.15 rated glass tile thin-set.
- Apply a waterproof membrane like Kerdi or Wedi to isolate movement.
- Use 100% silicone sealant in all change of plane corners.
- Acclimate the glass tile to the room temperature for 48 hours.
“The most expensive floor is the one you have to install twice because you ignored the moisture meter.” – Master Flooring Axiom
Substrate deflection and the bounce factor
Substrate deflection refers to the vertical movement of a floor or wall under load, and for glass tile, the allowable deflection limit is much stricter than for standard ceramic. While a ceramic floor might be fine with L/360, glass often requires L/720. This means the wall or floor must be twice as stiff. If your shower wall is built with 2×4 studs that are spaced 24 inches on center, there is too much flex. Every time you lean against that wall, the glass bends. Glass does not like to bend. It likes to shatter. This is why I always recommend double studding or using a thicker cement board. If the wall moves, the glass will crack, and it usually starts at the weakest point, which is the hole you cut for the shower head. Even the chic baseboard designs in your bathroom won’t hide a wall that is bowing outward. You have to fix the skeleton before you put on the skin. In humid regions, the wood studs can swell, pushing the substrate forward. In cold climates, the outer walls can contract. This constant tug of war is why you see glass tiles popping off or cracking in the middle of the night. It is the sound of the house moving and the glass refusing to go along for the ride. If you are going for eco friendly tile solutions, make sure the backing is just as sustainable and rigid as the tile itself.
The contrarian truth about tile thickness
While many homeowners believe thicker glass tile is more durable, the contrarian data shows that thicker glass is actually more susceptible to thermal shock in shower environments. This is because glass is a poor conductor of heat. In a thick tile, the side facing the hot water expands rapidly while the side bonded to the wall stays cool. This creates a massive internal tension. Thin glass tiles, around 4 millimeters, heat up more uniformly. They expand as a single unit, which reduces the internal shear stress. Most people think they are getting a better product by buying the thick, heavy stuff. In reality, they are buying a product that requires much more careful installation and a more flexible mortar bed to survive the daily cycle of a hot shower. Even when considering baseboards makeover ideas, you have to think about the thickness of materials and how they interface with the wall. The same logic applies to the shower. The transition between the tile and the plumbing must be handled with a focus on the material’s specific heat and expansion properties. If you don’t, you are just waiting for a crack to appear. Don’t let the aesthetic fool you. Glass is a demanding mistress that requires a perfect foundation. If you have questions about your specific layout, you can always contact us for technical guidance.