
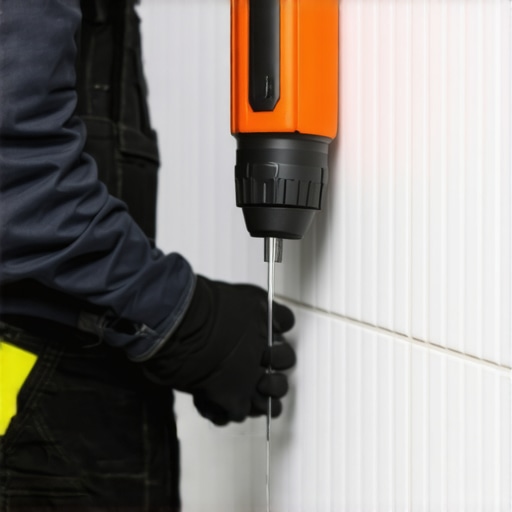
I remember standing in a high-end penthouse bathroom where the homeowner had just spent five figures on large-format Italian porcelain. The plumber, a guy who had been around but maybe didn’t keep up with modern material science, pulled out a standard carbide masonry bit. He leaned into the drill. Within four seconds, a sharp, metallic crack echoed through the room. A hairline fracture had shot six feet across three separate tiles. That mistake cost more than his entire week of labor. Most installers treat tile like stone, but porcelain is a different beast entirely. It is a vitreous material, fired at temperatures exceeding 2,200 degrees Fahrenheit, making it denser and harder than most natural stones. If you approach it with the wrong tools or too much ego, it will break every single time. Drilling through this material is not about force, it is about controlled abrasion and thermal management. You are essentially grinding a hole through a glass-like surface while fighting the physics of heat expansion. One wrong move and you turn a pristine shower wall into a puzzle of broken ceramic.
The lie of the multi-purpose bit
To drill porcelain tile without cracking it, you must use a diamond-tipped core bit and maintain a constant cooling flow of water to manage the extreme heat generated during the process. Standard carbide or masonry bits are designed for softer materials and will fail to penetrate the surface of high-quality porcelain. Attempting to use these tools leads to overheating, which causes the tile to expand locally and shatter under the pressure of the drill. Most big-box stores sell bits they claim are universal. They lie. Porcelain is rated 7 or 8 on the Mohs scale of mineral hardness. A standard steel or low-grade carbide bit simply cannot bite into that surface. It will spin, generate friction, and glow cherry red before it ever makes a dent. You need industrial-grade diamonds, either vacuum-brazed or electroplated to a steel shank, to actually erode the material at a molecular level. This is not drilling in the traditional sense, it is high-speed sanding. When you look at a showers that wow project, every single hole for the mixer valve and the handheld wand was likely done with a diamond hole saw, not a pointed bit.
“A floor is only as good as the subfloor beneath it, deflection is the enemy of every joint.” – Master Flooring Axiom
Physics of the porcelain fracture
Porcelain tiles fail during drilling because of thermal shock and mechanical vibration. When the bit spins at high RPM, the friction turns into heat energy instantly. Because porcelain has a very low water absorption rate, often less than 0.5 percent, it is incredibly dense. This density means it does not dissipate heat well. The area directly under the bit becomes a hot spot while the rest of the tile remains cool. This temperature differential creates internal stress. Eventually, the stress exceeds the tensile strength of the material, and it snaps. You also have to worry about the subfloor or the wall backing. If there is a void in the thin-set behind the tile, the pressure of the drill will flex the porcelain into that void. Since porcelain is brittle and has no flexibility, it will crack under the localized pressure. This is why I always tell guys that the installation quality of the tile itself dictates how easy it will be to drill later. If you have a solid bed of mortar, the tile has the support it needs to resist the downward force of the drill motor.
| Bit Type | Material Compatibility | Recommended RPM | Cooling Method |
|---|---|---|---|
| Carbide Tipped | Ceramic Only | 300-500 | Dry/Air |
| Diamond Core Bit | Porcelain, Glass, Granite | 600-900 | Constant Water Flow |
| Vacuum Brazed Diamond | Hard Porcelain, Quartz | 1500-3000 | Wax or Water |
The diamond bit and the heat problem
Choosing the right diamond bit is the difference between a clean hole and a ruined wall. You have two main choices, wet-use diamond bits and dry-use vacuum-brazed bits. Wet bits have a hollow core that allows water to reach the cutting edge. Dry bits often have a wax core that melts as you drill to provide some lubrication, but in my experience, water is always superior. The diamonds on these bits are not sharp like a knife. They are jagged crystals that tear away micro-shards of the porcelain. As the bit spins, these shards, or fines, need to be cleared away. If they stay in the hole, they increase friction and heat. This is why a pulsing motion is sometimes effective, though a steady, light pressure is usually the professional standard. I prefer vacuum-brazed bits because the diamonds are bonded more securely to the steel. They last longer and can handle the higher temperatures of dense porcelain. When you are working on showers with a style that uses thick, through-body porcelain, you cannot afford to go cheap on your bits. A cheap bit will lose its grit halfway through the first hole, leaving you with a half-drilled mess that is even harder to finish.
Water is not optional
If you see smoke, you have already failed. Water serves two purposes, it keeps the diamond grit cool so the bonding agent doesn’t melt, and it flushes the porcelain dust out of the cut. Without water, the dust becomes a polishing paste that actually slows down the cutting process. There are several ways to manage water. You can use a dedicated pressurized spray bottle, a sponge held against the bit, or a plastic guide with a built-in water reservoir. If I am drilling a hole for a grab bar, I usually have an assistant slowly trickle water over the site with a sponge. You have to be careful with power tools and water, obviously. Use a cordless drill and keep the battery end high. The goal is a steady stream that keeps the bit and the tile surface cool to the touch. If you touch the tile and it feels hot, stop. Let it cool down naturally. Never pour cold water on a hot tile, as that thermal shock is a guaranteed way to cause a fracture. This attention to detail is the same reason why tile cleaning tips always emphasize avoiding harsh chemicals that can degrade the surface over time. Professionalism is about respecting the material properties at all times.
The 1/8 inch that ruins everything
The most dangerous part of drilling is the start. A drill bit wants to walk across the smooth surface of the porcelain. If the bit slips, it will scratch the glaze, and those scratches are permanent. Some people use masking tape to give the bit some grip, but I find that a dedicated drill guide is better. You can make a simple guide by drilling a hole in a scrap piece of 1/2 inch plywood. Clamp or hold the plywood against the tile. This prevents the bit from wandering and ensures your hole is exactly where it needs to be. Another technique is to start the bit at a 45-degree angle. Once the edge of the bit creates a small crescent-shaped groove, you slowly pivot the drill up to a 90-degree angle. This allows the bit to seat itself into the material. You must use a light touch. Do not lean your body weight into the drill. Let the diamonds do the work. If you are pushing hard, you are just generating heat and risking a blowout when the bit finally breaks through the back of the tile. This is especially important when your tile meets the floor or walls, where chic baseboard designs might be nearby, you don’t want any stray scratches or cracks to ruin the transition.
- Select a diamond core bit specifically rated for porcelain.
- Create a template or guide to prevent bit walking.
- Ensure the drill is in standard mode, never hammer mode.
- Apply water continuously to the drilling site.
- Start at a 45-degree angle to create a pilot groove.
- Maintain a consistent speed between 600 and 900 RPM.
- Use light, steady pressure without forcing the bit.
- Clear out porcelain dust frequently to prevent friction.
Subfloor deflection and the hidden dangers
You can do everything right with the drill and still have the tile crack if the substrate is garbage. If you are drilling into a floor tile, and that tile was installed over a bouncy subfloor, the vibration of the drill can cause the tile to flex and snap. The National Tile Contractors Association (NTCA) has strict standards for subfloor stiffness for a reason. For porcelain, you generally want a deflection rating of L/360. If the floor is moving more than that, the tile is under constant tension. When you introduce a hole, you are creating a point of weakness where that tension can release. It is like a crack in a windshield, it starts small and grows. I always check the grout lines before I drill. If I see any existing cracks in the grout restoration areas, I know I have to be extra careful. It tells me the floor is moving. In those cases, I might spend more time cooling the bit and use even less pressure, effectively taking twice as long to finish the hole just to be safe.
“Porcelain is a glass masquerading as a stone; treat it with the same caution you would a mirror.” – Tile Surgeon Handbook
The finish and the breakthrough
The most critical moment is when the bit is about to emerge from the back of the tile. This is when blowouts happen. As the material gets thinner, it becomes more fragile. If you are pushing hard, the bit will punch through the last millimeter of porcelain rather than cutting it, leaving a jagged, cratered mess on the back side. This can cause a spider-web crack to form. When you feel the resistance change, back off the pressure even more. Let the bit almost hover as it finishes the cut. Once the hole is through, you need to clean out the slurry. The wet porcelain dust turns into a thick mud that will harden like concrete if you leave it. Wipe it down immediately. If you have to install a fixture, ensure the wall behind the hole is also prepped. If you are going through the tile into a stud, switch to a standard wood bit once you have cleared the porcelain. Do not use your expensive diamond bit on wood or metal, it will dull the diamonds instantly. This careful transition is how you maintain the integrity of baseboards makeover projects and wall installations alike.
Managing the aftermath and grout care
After the hole is drilled and the fixture is installed, people often forget about the seal. A hole in a shower tile is a direct path for water to get behind the wall system. Use a high-quality 100 percent silicone sealant around the hole before you put the escutcheon plate on. This prevents moisture from reaching the backer board and causing mold. If you noticed the grout around the tile was disturbed by the vibration, you might need to look into how to refresh grout to ensure the entire area remains waterproof. Drilling is a violent process for the tile, even when done correctly. The microscopic vibrations can loosen the bond between the tile and the grout. Always do a final inspection. Look for those tiny, hairline shadows that indicate a crack. If you find one, it is better to replace the tile now than to wait until the customer calls you back in six months because the shower is leaking. It is all about the longevity of the installation. A floor or a wall should be a permanent structural element, not a temporary cosmetic fix.