
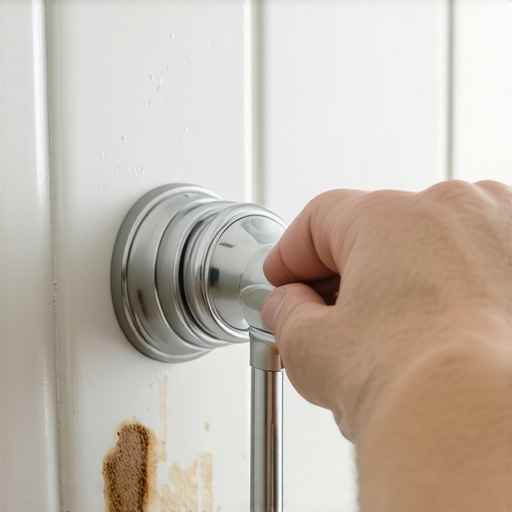
I spent three days grinding concrete on a job last month just so the floor would not click like a castanet. That is the kind of detail most guys skip because they think the underlayment will hide the dip. It never does. I bring that same obsession to every part of a bathroom, especially when a homeowner complains that their shower handle feels like it is welded shut. You cannot just yank on a stiff valve. You have to understand the mechanical friction and the mineral buildup happening inside that wall. Most of the time, a shower valve becomes hard to turn because of cartridge failure or calcification from hard water. If you ignore it, you eventually snap the plastic stem or crack the pipe behind the tile. I have seen it happen. A simple repair turns into a full wall demolition because someone did not respect the mechanics of the plumbing. Fixing this requires a surgical approach to the cartridge and a deep understanding of the chemistry inside your pipes.
The friction behind the handle
Fixing a stiff shower valve requires addressing mineral deposits or worn O-rings inside the cartridge assembly. When water sits in the valve body, calcium and magnesium ions precipitate out, creating a gritty scale that increases resistance. This friction eventually degrades the factory lubricant and leads to a seized handle or a broken internal stem. I have pulled cartridges out of high end showers that wow only to find they were completely choked with lime. It does not matter how much you spent on the trim if the guts are corroded. You are looking at a mechanical system that operates under constant pressure and fluctuating temperatures. That expansion and contraction cycle is brutal on rubber seals. Over five or ten years, those seals swell or dry out, making the simple act of turning on the water a workout for your shoulder. You have to get in there and strip the thing down to the brass.
Mineral buildup and the chemistry of scale
Hard water minerals like calcium carbonate create a physical barrier that prevents the shower valve from rotating smoothly. These deposits act like sandpaper inside the tight tolerances of a ceramic disc or pressure balance cartridge. As the water evaporates, it leaves behind a crust that eventually binds the moving parts together. This is not just a cosmetic issue. The scale can actually pit the metal surfaces of the valve body. If you live in a region with high mineral content, you are fighting a losing battle unless you use the right lubricants. I always keep a tube of food grade silicone grease in my kit. Petroleum based products are a disaster because they cause the rubber O-rings to swell and disintegrate. You need the right chemistry to fight the chemistry of the water. While you are working on the hardware, it is often a good time to look at the surrounding surfaces. If your tile is looking as rough as your valve, you might need some tile cleaning tips for a sparkling bathroom to get everything back to professional standards.
“A floor is only as good as the subfloor beneath it; deflection is the enemy of every joint.” – Master Flooring Axiom
Cartridge failure and the mechanical lifespan
A shower cartridge usually lasts between seven and twelve years depending on water quality and frequency of use. The internal components, whether they are plastic, brass, or ceramic, eventually succumb to the friction of thousands of rotations. When the internal balancing spool gets stuck, you lose the ability to regulate temperature, and the handle becomes incredibly difficult to move. This is the heart of the machine. If the spool is stuck on the hot side, you risk scalding. If it is stuck on the cold side, you are taking a polar plunge. I have seen homeowners try to force these handles with pliers, which is the fastest way to turn a thirty dollar fix into a three thousand dollar catastrophe. You are dealing with thin wall copper or PEX tubing behind that tile. If you apply too much torque, you will twist the lines and start a leak that you won’t see until the ceiling below starts to sag. Precision matters more than power here.
Valve Component Comparison
| Component Type | Material Composition | Typical Lifespan | Failure Mode |
|---|---|---|---|
| Pressure Balance | Brass and Plastic | 8 to 10 Years | Stuck Spool |
| Thermostatic | Brass and Wax Element | 12 to 15 Years | Calibration Drift |
| Ceramic Disc | Kiln Fired Ceramic | 15+ Years | Cracking or Pitting |
The 1/8 inch rule for plumbing clearances
A successful shower valve repair depends on having at least 1/8 inch of clearance between the tile edge and the valve body. If the tile installer crowded the valve, you will struggle to get a socket or a cartridge puller onto the nut. This is where I get grumpy. I see guys slap tile right up to the brass because they think the escutcheon plate will hide the mess. It hides the mess, sure, but it also hides the access. If I have to chip away at your expensive porcelain just to change a washer, everyone is having a bad day. You need that gap to allow for the natural expansion of the plumbing when the hot water hits it. If the valve is bound tightly by the grout and tile, the stress has nowhere to go but the joints. This can lead to hairline cracks in the wall. If you find yourself in this situation, you might need grout restoration secrets to fix the damage caused by a poorly planned installation. Structural integrity is not just for the floor, it is for every penetration in the wet area.
Step by step repair for the stubborn valve
To fix a hard to turn shower valve, you must shut off the water, remove the handle, and extract the cartridge for cleaning or replacement. Do not skip the water shutoff. I have seen guys think they can swap a cartridge under pressure and end up with a high pressure geyser in their face. Once the water is off, open a lower faucet to drain the lines. Remove the handle screw, which is usually hidden under a small cap. Then, pull the escutcheon plate. You will see a retaining clip or a large nut holding the cartridge in place. Remove that carefully. If the cartridge is stuck, use a dedicated cartridge puller tool. Do not just pry at it with a screwdriver. Once it is out, inspect the inside of the valve body for debris. Flush the lines for a second to blow out any sand or scale. Grease the new O-rings with silicone and slide it back in. It should move like butter. While the plate is off, check the moisture behind the wall. In humid places like Houston, any small leak will rot your studs in a matter of months. If things look messy, you might want to learn how to refresh grout without replacing it to ensure a tight seal around that hardware.
Essential Tools for Valve Repair
- Hex key set for handle removal
- Phillips and flat head screwdrivers
- Needle nose pliers for the retaining clip
- Cartridge puller tool for the specific brand
- Plumber’s silicone grease
- Small wire brush for cleaning the valve body
Why your subfloor is lying to you
A stiff shower valve can often be a symptom of larger structural shifting that affects the plumbing alignment and tile integrity. If the floor beneath the shower pan is flexing, it puts stress on the vertical riser pipes. This slight movement can cause the valve to sit at an angle, increasing the internal friction of the handle. I always check the subfloor before I even look at the plumbing. If you have bouncy floors, your valve is going to have a hard time staying aligned. This is why I advocate for rigid subfloor systems and proper joist spacing. If the house is moving, the plumbing is moving. That movement translates into those tiny cracks in your grout and those stiff handles that feel like they are fighting you. If you are updating the bathroom, do not forget the finishing touches like the baseboards makeover ideas that help tie the whole room together after the structural work is done. A floor that is solid as a rock makes for plumbing that stays quiet and smooth for decades.
When to call a professional for valve issues
You should call a professional if the cartridge is seized so badly that the brass valve body begins to flex or if you see signs of water damage behind the wall. There is no shame in knowing your limits. If you snap that cartridge off inside the valve, you are looking at a much more expensive bill. A master plumber or an experienced installer has the feel for how much torque is too much. They also know how to spot the difference between a simple scale problem and a failing pressure balance spool. Sometimes the issue is not the valve at all but a clogged showerhead or a pinched supply line. If you are working on a small bathroom, the tight quarters make this even harder. Do not try to be a hero and end up floodng your house. I have seen $20,000 hardwood floors ruined because a homeowner thought they could handle a simple valve swap and forgot to tighten the retaining nut. Respect the pressure, respect the chemistry, and keep your tools sharp.