
The silent creep of capillary action
A bulging baseboard indicates that the wood fibers have absorbed liquid, causing the cellulose to expand beyond the capacity of the fasteners. To fix this, you must identify the leak source, remove the damaged trim, dry the wall cavity to under 12 percent moisture, and install moisture-resistant replacements. Most guys skip the leveling compound. They think the underlayment will hide the dip. It won’t. I spent three days grinding concrete on a job last month just so the floor wouldn’t click like a castanet. I have spent twenty five years with a moisture meter in one hand and a level in the other. I have seen the same story play out in a thousand bathrooms across the country. A tiny leak behind the toilet or a hairline crack in the showers pan goes unnoticed for months. Water does not just sit there. It travels through the path of least resistance, often following the subfloor and wicking up into the porous structure of your baseboards. This is not a cosmetic issue. It is a structural warning sign that the integrity of your flooring system is compromised. When wood fibers absorb water, the lignin softens and the internal cells swell. In a baseboard, this pressure has nowhere to go but out, resulting in that ugly, warped bulge that ruins your wall profile. I smell like sawdust and floor wax today, and I am here to tell you that if you do not address the moisture content of the wall studs before you nail up new trim, you are just wasting your time and my oxygen.
Why your subfloor is lying to you
Subfloors often appear dry on the surface while holding significant moisture deep within the plywood or OSB layers. A moisture meter is the only tool that can confirm if the environment is ready for new baseboards or if you are trapping rot behind the walls. I have seen installers slap new trim over damp drywall because it felt dry to the touch. That is a rookie mistake. Wood is hygroscopic. It wants to reach an equilibrium with the surrounding air. If your bathroom leak was significant, the bottom plate of your wall framing is likely saturated. If you install new baseboards over a wet bottom plate, you are creating a petri dish for mold. I always look for a moisture reading below 12 percent before I even think about opening a box of trim. If I see 16 percent, I am bringing in the industrial dehumidifiers. We are talking about the molecular movement of water molecules through the grain. Capillary action can pull water several inches up a wall, far beyond the initial puddle. This is why you often see chic baseboard designs that transform rooms in 2025 ruined because someone did not wait for the structural lumber to breathe. You can check out chic baseboard designs that transform rooms in 2025 for ideas on what to install once your site is actually dry. Do not trust your eyes. Trust the meter. If the subfloor is concrete, we have to worry about hydrostatic pressure and vapor emissions. A slab that looks gray and dry can still be pumping out pounds of water vapor every thousand square feet.
“A floor is only as good as the subfloor beneath it; deflection is the enemy of every joint.” – Master Flooring Axiom
The ghost in the expansion gap
The expansion gap is a mandatory space left between the flooring material and the wall to allow for natural movement caused by temperature and humidity changes. When water causes a baseboard to bulge, it often fills this gap and puts pressure on the floor. I once walked into a house where a walnut floor was cupping so bad it looked like a potato chip. The homeowner thought the wood was defective. The reality was that a slow leak in the bathroom had swollen the baseboards so much they were pinned tight against the hardwood. The floor had nowhere to grow, so it went up. This is physics. You cannot argue with it. When you are fixing a bulging baseboard, you must ensure that the new installation maintains a proper 1/4 inch to 3/8 inch gap. This gap is the lungs of your floor. If you choke it with trim or, heaven forbid, fill it with grout, the floor will eventually fail. I see guys cramming tile right up to the drywall. That is a death sentence for the installation. Proper showers require a waterproof transition, but the floor itself needs to float or expand. For those looking to upgrade their bathroom aesthetic while fixing these issues, showers that wow modern designs for 2025 offers great insight into how to manage these transitions properly. A floor that cannot move is a floor that will buckle. It is that simple.
The 1/8 inch that ruins everything
Accuracy in leveling is the difference between a high-end finish and a DIY disaster where the baseboards do not sit flush with the floor. A deviation of just 1/8 inch over ten feet can create visible gaps that require excessive caulking. I do not use caulk to hide my sins. I use a grinder and a level to make sure the sins never happen. If your bathroom floor is uneven, your baseboard will not sit flat. This creates a pocket where moisture from daily cleaning or minor spills can collect. Over time, this moisture wicks into the bottom of the baseboard, and you are right back to square one with a bulging board. This is especially true with Medium Density Fiberboard (MDF). MDF is basically a compressed sponge made of sawdust and glue. Once it gets wet, it is done. It expands and never shrinks back. If you are doing a baseboards makeover ideas to elevate your space, consider using solid PVC or primed finger-jointed pine in bathrooms. You can find more at baseboards makeover ideas to elevate your space. Pine handles moisture better than MDF, and PVC is practically bulletproof in wet environments. I have spent too many hours pulling out mushy MDF that smelled like a damp basement because a homeowner wanted to save fifty cents a foot on the material. It is a bad trade.
| Material Type | Moisture Resistance | Expansion Potential | Best Use Case |
|---|---|---|---|
| MDF (Fiberboard) | Very Low | High | Dry Bedrooms Only |
| Solid Pine | Medium | Moderate | General Living Areas |
| PVC (Composite) | High | None | Bathrooms and Laundry |
| Engineered Wood | High | Low | Kitchens and Basements |
Anatomy of a bathroom leak and the grout connection
Grout is porous by nature and acts as a conduit for moisture if it is not properly sealed or if it has begun to crack. Once water gets behind the tile, it travels to the nearest wood component which is almost always the baseboard. Most people think tile is waterproof. Tile is waterproof, but tile installations rarely are. The grout lines are the weak point. If you have cracks in your floor grout, every time you step out of the shower, water is being pushed into the subfloor. I tell my clients that maintenance is not optional. You have to look at tile cleaning tips for a sparkling bathroom in 2025 and grout restoration secrets for long-lasting results to keep that barrier intact. If the grout fails, the baseboard is the first thing to show it. It acts like a warning light on a dashboard. When I see a bulge, I start looking at the tile and the showers. I check the corners where the walls meet the floor. If there is no 100 percent silicone caulk in those change-of-plane joints, water is getting in. The TCNA is very clear about this. You need flexibility at those joints. Hard grout will crack because the house moves. When it cracks, the water wins. It is a slow, invisible war happening under your feet every morning.
Chemical warfare in the adhesive layer
Adhesives used in flooring and trim can undergo a chemical breakdown called saponification when exposed to high pH moisture from concrete or leaking water. This causes the bond to fail and can lead to a foul odor. If you pull up a bulging baseboard and find a sticky, smelly mess, that is the adhesive failing. In bathrooms, the high humidity can also affect the grout. If you are trying to figure out how to refresh grout without replacing it, you have to ensure the underlying thin-set hasn’t been compromised by constant saturation. A floor is a system. The adhesive, the underlayment, the tile, and the trim all have to work together. If the showers are leaking, the whole system is under attack. I use modified thin-sets with high polymer content for a reason. They resist moisture better. But even the best chemistry has its limits. If you have a bathroom with a style that includes showers with a style trendy ideas for small bathrooms, you should look at showers with a style trendy ideas for small bathrooms to see how modern waterproofing membranes like Kerdi or Wedi are used. These systems create a literal bathtub under your tile so the water has nowhere to go but the drain. That is how you protect your baseboards long term. You stop the water before it ever touches the wood.
“Waterproofing is not a suggestion; it is a requirement for the survival of the finish carpentry.” – National Wood Flooring Association (NWFA)
Step by step removal and assessment
- Shut off the main water supply if the leak is active and ongoing.
- Score the caulk line at the top of the baseboard with a sharp utility knife to prevent drywall tearing.
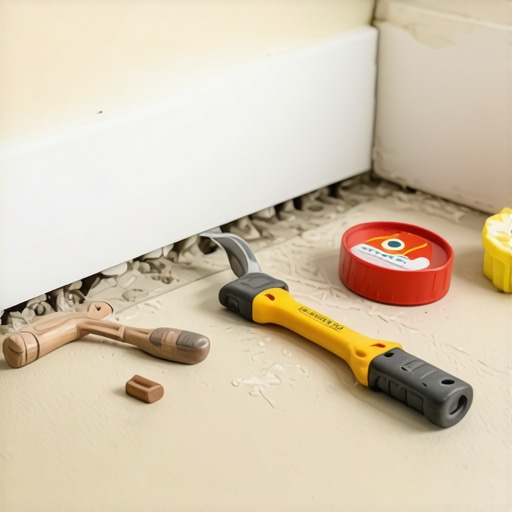
- Use a wide pry bar and a wood block to gently pop the baseboard away from the studs.
- Inspect the drywall for soft spots and the presence of black or green mold colonies.
- Remove any rusted finish nails using end-cutting pliers from the back of the board.
- Set up high-velocity air movers and a dehumidifier to extract deep-seated moisture from the framing.
- Test the moisture levels daily until the area reaches the local equilibrium moisture content.
The final inspection of the repair site
Once the area is dry, you can look into eco-friendly tile solutions for sustainable homes in 2025 to finish the space. You can find these at eco-friendly tile solutions for sustainable homes in 2025. When you install the new baseboards, do not nail them into the floor. Nail them into the studs. Leave that 1/8 inch gap at the bottom and fill it with a bead of high-quality silicone if you are worried about splashes. This creates a flexible, waterproof seal that still allows for the minor movement every house experiences. If you need professional help or have a leak that is beyond a simple trim fix, you should contact us immediately. Ignoring a bulge is just inviting a larger demolition project down the road. I have seen five hundred dollar repairs turn into twenty thousand dollar mold remediations because someone waited. Don’t be that homeowner. Take the trim off. Dry it out. Do it right the first time. Your subfloor will thank you, and your baseboards will stay straight and true for decades. Check our privacy policy for more information on how we handle your data when you reach out for flooring advice. The physics of your home do not care about your schedule. Water will always find the dip. It will always swell the wood. Your job is to be the architect of a dry environment. That starts with the grout and ends with the trim.