
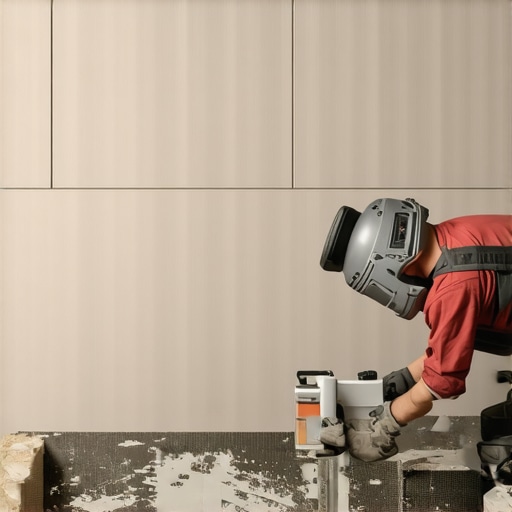
Most guys skip the leveling compound. They think the underlayment will hide the dip. It won’t. I spent three days grinding concrete on a job last month just so the floor wouldn’t click like a castanet. This lack of prep is exactly what causes heavy wall tiles to fail in showers across the country. I once walked into a luxury bathroom where a two thousand dollar slab of stone had simply slid off the wall because the installer did not understand the chemistry of the bond. He treated the mortar like mud, but it is actually a complex structural adhesive that requires precision. If you do not respect the physics of the mix, gravity will win every single time. Flooring is not about the visible surface, it is about the engineering happening in the three eighths of an inch behind it. When you are dealing with massive porcelain panels or heavy natural stone, the margin for error disappears. You are not just sticking a tile to a wall, you are creating a mechanical and chemical bridge that must withstand thermal expansion, structural vibration, and the relentless pull of the earth. This is the reality of the trade that most weekend warriors and low-bid contractors ignore.
The ghost in the mortar bed
The chemical bond of wall tile depends on the precise hydration of Portland cement and the activation of polymer resins within the thinset. When you mix these components incorrectly, you create a weak crystalline structure that cannot support the weight of heavy wall tiles or Large Format Tile (LFT). These tiles are often heavier than fifteen pounds per square foot, meaning the mortar must have high sag resistance to keep them in place while the cure occurs.
“A floor is only as good as the subfloor beneath it; deflection is the enemy of every joint.” – Master Flooring Axiom
This principle applies to walls just as much as floors. If the wall substrate has any flex, or if the thinset is too watery, the bond will shear. You need a mix that feels like heavy peanut butter, not pancake batter. The consistency determines whether the tile stays where you put it or begins a slow, invisible descent that ruins your layout before the morning comes. We call this the ghost in the mortar bed because the failure often happens slowly, long after you have left the job site.
The molecular dance of polymer chains
Polymer-modified thinset uses synthetic resins to improve flexibility and adhesion to non-porous surfaces like porcelain or waterproof membranes. These polymers act as bridges between the cement crystals and the back of the tile, allowing for slight movements without cracking the bond. When you add too much water, you dilute these polymers and prevent them from forming a cohesive network. The result is a brittle bed that will eventually release. I have seen grout lines crack within six months because the installer over-watered the mix to make it easier to spread. You cannot sacrifice structural integrity for ease of application. The water-to-powder ratio is the most important number on the job site. You must use a graduated measuring bucket to ensure you are hitting the exact specifications of the manufacturer. Most LFT mortars require between five and six quarts of water per fifty-pound bag. Guessing is the fastest way to a callback. You are looking for a mix that holds a ridge when you pull a notched trowel through it, standing tall without slumping or skinning over too quickly.
Why water ratios dictate your success
Maintaining a strict water-to-powder ratio ensures the thinset achieves its rated PSI strength and prevents excessive shrinkage during the drying phase. If the mix is too dry, the cement will not fully hydrate, leading to a powdery, weak bond. If it is too wet, the evaporation of excess water leaves microscopic voids in the mortar, which drastically reduces the surface area contact between the tile and the substrate. This is especially vital in showers where moisture can penetrate through grout and sit in those voids, eventually leading to mold growth or bond failure. You must also consider the temperature of the water. Using ice-cold water in the winter or lukewarm water from a garden hose in the summer changes the chemical reaction time. Aim for room temperature water to ensure the pot life and open time stay within the manufacturer’s parameters. This is not just a suggestion, it is a requirement for meeting ANSI A118.15 standards, which is the gold standard for heavy, high-performance installations.
| Mortar Type | Pot Life | Slaking Time | Best Use Case |
|---|---|---|---|
| Unmodified | 2 Hours | 10 Minutes | Saltillo or small ceramic |
| Polymer Modified | 4 Hours | 10 Minutes | Most porcelain wall tiles |
| LFT / Medium Bed | 3 Hours | 5 to 10 Minutes | Heavy stone or 12×24 tiles |
The slaking period is a non-negotiable law
Slaking is the process of letting the mixed thinset sit undisturbed for ten minutes to allow the polymers and chemicals to fully saturate with water. During this time, the chemical reaction begins and any dry clumps of powder absorb the moisture they need to activate. If you skip this step, the thinset will feel gritty and will likely stiffen up in the bucket within twenty minutes. After the slaking period, you must remix the mortar for one minute without adding any additional water. Adding water after the slake is known as re-tempering, and it is a cardinal sin in the flooring world. It breaks the chemical chains that have already begun to form and results in a significantly weaker product. You will know you have done it right when the mixture has a smooth, creamy texture that sticks to your trowel even when you turn it upside down. This is the physical proof that the polymers are working and the mix is ready to fight gravity on a vertical surface. Professionals never rush the slake because they know it is the difference between a lifetime bond and a temporary fix.
The mechanical grip of the notched trowel
Selecting the correct trowel notch size ensures that you achieve at least 95 percent mortar coverage on the back of the tile in wet areas. For heavy wall tiles, a half-inch by half-inch square notch or a specialized LFT trowel is usually required. The goal is to create ridges that are high enough to collapse and fill the entire space between the tile and the wall. You must also back-butter the tile, which means spreading a thin layer of mortar on the back of the tile itself before pressing it into the ridged wall. This ensures a full mechanical bond. If you see air pockets when you pull a tile back to check your work, your trowel is too small or your mix is too stiff. In many showers with a style trendy ideas for small bathrooms, the use of large tiles is common to minimize grout lines, but this requires even more attention to the trowel technique to prevent lippage. A flat wall is a prerequisite, as thinset is an adhesive, not a leveling agent. If the wall is bowed, you must fix it with shims or a topical leveler before the first tile ever touches the mortar.
The mixing protocol checklist
- Measure the exact amount of clean water into a clean five gallon bucket first.
- Slowly add the powder while mixing with a low speed drill under 300 RPM.
- Mix for three minutes until there are no visible lumps or dry spots.
- Wait ten minutes for the slaking process to complete its chemical cycle.
- Remix for sixty seconds without adding any more water or powder.
- Check the consistency by performing a ridge test with your trowel.
Environmental stressors and the drying curve
Ambient temperature and humidity levels directly impact how fast the thinset skins over and loses its ability to transfer to the back of the tile. In a dry climate like Phoenix, you might only have ten minutes of open time before the mortar forms a dry crust on the surface. In a humid environment, the cure time will be significantly extended. You must adjust your workflow to match the environment. This means mixing smaller batches when it is hot and ensuring the room is climate controlled whenever possible. If the thinset skins over, you must scrape it off and apply fresh mortar. Never try to refresh it by spraying water on it. This only creates a layer of weak slurry that will fail.
“A floor is only as good as the subfloor beneath it; deflection is the enemy of every joint.” – Master Flooring Axiom
This wisdom extends to the environment. If the room is too cold, the hydration stops, and the mortar will never reach its full strength. Keep the site above fifty degrees Fahrenheit for at least forty eight hours after installation to ensure the chemical bond is locked in.
Managing the weight of large format porcelain
Large format tiles require specialized LFT mortars that contain high concentrations of methylcellulose to prevent the tile from sagging under its own weight. These mortars are designed to be applied in thicker beds, up to half an inch, without shrinking. This is vital when you are installing heavy panels that might be four feet long. You need the mortar to act as a structural support while it cures. If you use standard thinset for these tiles, you will find that by the time you reach the top row, the bottom rows have compressed or shifted. This ruins the alignment of your baseboards and makes the entire installation look amateur. Using a lippage tuning system or leveling clips can help, but they are no substitute for a high-quality LFT mortar mixed to the correct consistency. When you are planning your layout, consider how the tile meets the floor and the ceiling. A well-mixed mortar allows you to make micro-adjustments without the tile sliding out of place, giving you the precision needed for those high-end finishes.
The intersection of tile and baseboards
The transition between wall tile and floor trim requires a stable bond to prevent vibration from the floor from cracking the bottom row of tiles. This is why the bottom gap should be filled with a color-matched 100 percent silicone sealant rather than hard grout. The silicone allows for the minor movement that occurs when people walk across the floor. If you are looking for baseboards makeover ideas to elevate your space, consider how a taller baseboard can hide the expansion gap required for the flooring while still providing a clean finish against the wall tile. The bond of the tile must be rock solid at the base to ensure that the trim does not put pressure on the tile edges. A common mistake is resting the tile directly on the floor. Always leave a sixteenth of an inch gap to be filled with caulk. This small detail prevents the tile from cracking if the house settles or the subfloor flexes. It is the difference between a job that lasts five years and one that lasts fifty.
The final bond and grout preparation
Before applying grout, you must ensure the thinset has fully cured and that the joints are free of excess mortar. This usually takes twenty four to forty eight hours depending on the humidity. If you grout too early, you trap moisture in the mortar bed, which can cause efflorescence or mineral staining on your grout lines. Once the thinset is hard, the tiles are locked into a single monolithic structure. This is when the beauty of the installation starts to show. For those looking for grout restoration secrets for long-lasting results, the secret is actually the quality of the thinset bond underneath. If the tile is loose, the grout will always crack. No amount of sealer or high-end grout will fix a bad mortar mix. You must get the foundation right first. If you have questions about specific substrates or need advice on a complex layout, you should contact us for expert guidance. We have seen every mistake in the book, and most of them start at the mixing bucket. Respect the chemistry, follow the ratios, and your heavy wall tiles will stay exactly where you put them for decades to come.