
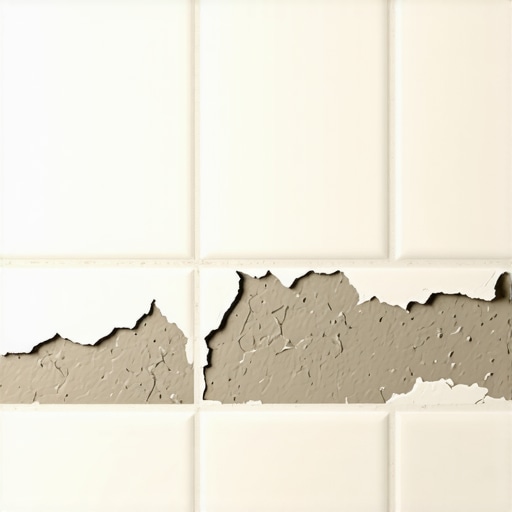
Most guys skip the leveling compound. They think the underlayment will hide the dip. It won’t. I spent three days grinding concrete on a job last month just so the floor wouldn’t click like a castanet. I have seen countless homeowners and amateur contractors stare at a crumbling grout line with a look of pure betrayal. They spent thousands on high-end tile and custom showers but the material is literally turning to powder beneath their feet. When grout falls out of a joint, it is rarely the fault of the grout itself. It is a symptom of a systemic failure in the structural engineering of the floor. You are likely dealing with subfloor deflection, improper hydration, or a total lack of movement joints. I have spent 25 years fixing these disasters and I can tell you that the physics of a floor do not care about your aesthetic goals. If the substrate moves, the grout breaks. It is as simple and as brutal as that.
The structural reality of subfloor deflection
Grout falls out of joints because of subfloor deflection which occurs when the joists or subflooring material flexes beyond the L/360 limit required for ceramic and porcelain tile installations. This movement creates vertical shear stress that the rigid crystalline structure of Portland cement cannot absorb. When you walk across a floor that has too much bounce, the tile stays rigid while the joint is squeezed and pulled. This cycle of compression and tension eventually pulverizes the bond between the grout and the tile edge. This is why understanding the 1/8 inch that ruins everything is vital for any long-term installation. If your joist spacing is too wide or your plywood is too thin, no amount of high-dollar grout will save you. You are building on a trampoline.
“A floor is only as good as the subfloor beneath it; deflection is the enemy of every joint.” – Master Flooring Axiom
The chemistry of the failed bond
The molecular reality of grout involves a process called hydration where water molecules react with cement particles to create a calcium silicate hydrate gel. This gel hardens into a matrix that locks into the microscopic pores of the tile edge. If the installer uses too much water during the mixing or cleanup phase, they effectively wash away the binder. This leaves behind a soft, chalky substance that has no structural integrity. I see this most often in showers that wow in photos but fail in reality within six months. The installer gets impatient and wipes the joints with a soaking wet sponge too early. This pulls the pigment and the Portland cement out of the top of the joint, leaving only sand behind. Sand does not stick to tile. Sand falls out.
Why your subfloor is lying to you
You might think a concrete slab is a stable surface. It is not. Concrete is a porous sponge that is constantly breathing moisture vapor. If you do not test the moisture vapor transmission rate (MVTR) before you thin-set your tile, you are asking for a failure. High moisture levels in a slab can interfere with the curing of the thin-set and the grout. This creates a hydrostatic pressure that pushes against the bottom of the grout joint. Over time, this pressure breaks the mechanical bond. Even in installations featuring eco-friendly tile solutions for sustainable homes, the laws of physics regarding moisture remain the same. You need a vapor barrier or a topical waterproofing membrane to isolate the tile assembly from the slab’s volatile moisture levels.
The ghost in the expansion gap
A floor is a living breathing thing. It expands and contracts with changes in temperature and humidity. If you butt your tile tight against the wall or fail to include movement joints in a large field of tile, the assembly has nowhere to go. This leads to tenting or the grout being squeezed out like toothpaste. This is why your chic baseboard designs must be installed with a gap at the bottom that allows the floor to move. According to TCNA EJ171 standards, you need an expansion joint every 20 to 25 feet in each direction for interior installations. If you ignore this, the grout will be the first thing to crack. It is the weakest link in the chain.
| Grout Type | Flexibility Rating | Best Use Case | Vulnerability |
|---|---|---|---|
| Sanded Grout | Very Low | Joints wider than 1/8 inch | Cracks under minimal deflection |
| Unsanded Grout | Very Low | Narrow joints and polished stone | High shrinkage if mixed wet |
| Polymer Modified | Medium | General residential use | Chemical sensitivity to acid cleaners |
| Epoxy Grout | High | Commercial kitchens and showers | Difficult installation and high cost |
How moisture vapor destroys the joint
In wet areas, the problem is often the lack of a proper pre-slope or a failing waterproof membrane. If water gets trapped under the tile, it creates a saturated environment where mold and bacteria can thrive within the grout matrix. This organic growth weakens the structure of the grout from the inside out. If you are noticing your grout turning dark and soft, you likely have water sitting in your mud bed. This is common in older showers with a style that relied on old-school lead pans without proper drainage. When the grout stays wet forever, it never reaches its full hardness. It remains in a state of semi-solidity until it eventually washes away.
“Movement joints are not optional; they are the pressure release valves of a ceramic assembly.” – TCNA Handbook Rule EJ171
The 1/8 inch that ruins everything
Precision is not a suggestion in flooring. If your tiles are spaced too closely together, the grout cannot penetrate deep enough into the joint to create a secure anchor. It becomes a thin veneer that sits on top of the spacers. This is why I always tell people to check the depth of their joints before grouting. If thin-set has oozed up into the joint more than halfway, the grout will not have enough mass to stay in place. You have to scrape those joints clean. It is a miserable, dusty job, but if you do not do it, you will be looking at grout restoration secrets within a year just to keep the floor together. Most failures are the result of laziness during the prep phase.
- Verify the subfloor meets L/360 or L/720 for natural stone.
- Ensure all thin-set is cleared from the joints to at least 2/3 of the tile depth.
- Never use a drill at high speeds to mix grout as it introduces air bubbles.
- Always use distilled water if your local tap water is high in minerals or chlorine.
- Maintain a consistent sponge dampness during the wash phase to prevent pigment washout.
Refining the final surface
Once you have addressed the structural and chemical issues, you must maintain the surface properly. Using harsh acidic cleaners will eat away at the Portland cement binder in the grout. Over time, this etching leads to a loss of material. For those looking at tile cleaning tips for a sparkling bathroom, it is essential to use pH-neutral cleaners. If the grout has already started to fail, you might need to learn how to refresh grout without replacing it, but remember that topical fixes are just a bandage. If the subfloor is moving, the new grout will fall out just like the old grout did. Address the bones of the floor first, or you are just wasting your time. A floor is a structural engineering challenge that happens to look pretty when it is finished correctly.