
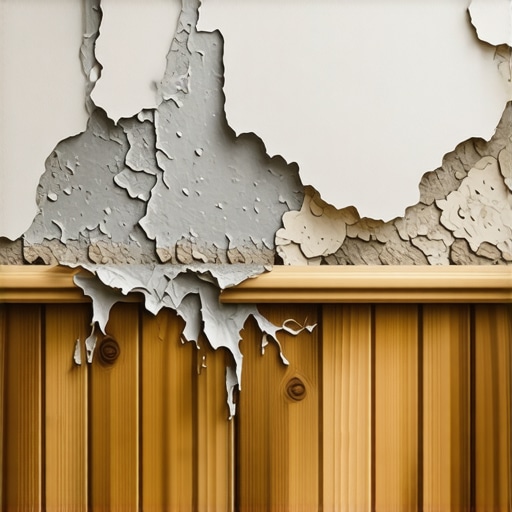
I spent three days grinding concrete on a job last month just so the floor wouldn’t click like a castanet. Most guys skip the leveling compound. They think the underlayment will hide the dip. It won’t. I have seen the same negligence with bathroom baseboards. You see a little paint peeling and you think it is just a cheap paint job. It is not. It is a fundamental failure of the structural environment. Most homeowners look at their bathroom and see a place to get clean. I look at a bathroom and see a high-pressure humidity chamber designed to destroy organic materials. When your baseboards start to flake, the house is telling you that the boundary between the wet zone and the dry structure has been breached. It is a slow-motion car crash of physics and chemistry.
The ghost in the expansion gap
The primary reason bathroom baseboards peel and flake is capillary action drawing moisture from the floor into the porous core of the trim material through an unsealed bottom edge. This moisture moves through the expansion gap. It travels vertically against gravity. Most installers leave the bottom edge of the baseboard raw and unprimed. This raw edge acts as a wick for every drop of water that hits the floor. It does not matter if you have showers that wow modern designs for 2025 if the water from those showers is soaking into your trim. The water enters the wood or MDF and begins to break down the lignin or the resins holding the fibers together. As the material swells, the paint loses its bond. The paint cannot stretch as much as the wood expands. The result is the unsightly flaking you see at the floor line.
“A floor is only as good as the subfloor beneath it; deflection is the enemy of every joint.” – Master Flooring Axiom
The structural failure of pressed sawdust
Medium Density Fiberboard or MDF is the most common culprit for peeling baseboards because its hygroscopic nature allows it to absorb water at a rate significantly higher than solid wood. MDF is essentially sawdust and glue. When it gets wet, it does not just swell. It delaminates. It turns back into sawdust. If you are looking for a baseboards makeover ideas to elevate your space, you must consider the material first. In a bathroom, MDF is a ticking time bomb. Even the humidity from steam can trigger the swelling process. Once the swelling starts, the paint film is pushed outward. This creates a pocket where even more moisture can collect. It is a feedback loop of destruction. I always tell my clients to use PVC or solid finger-jointed pine that has been back-primed. If you use MDF in a bathroom, you are betting against the laws of thermodynamics. You will lose that bet every single time.
Why your shower steam is an invisible wrecking ball
High humidity levels in a bathroom create a vapor pressure differential that forces moisture into the smallest cracks in your baseboards and paint. When you take a hot shower, the air becomes saturated. This moisture seeks out any surface that is cooler than the air. The baseboards, sitting against the cold subfloor, are the perfect target. The moisture condenses on the surface. If the paint is not a high-quality semi-gloss or gloss with proper moisture resistance, the vapor will penetrate the film. I have seen bathrooms where the showers with a style trendy ideas for small bathrooms did not include a powerful enough exhaust fan. Without airflow, that steam sits. It settles in the corners. It finds the gaps where the baseboard meets the floor. It sits there until it finds a way in. This is why you see peeling even in areas that never get splashed.
How cracked grout feeds the rot
Cracked or porous grout lines near the perimeter of the bathroom allow standing water to seep under the baseboard and attack the material from behind. Many people focus on the front of the trim. They forget about the back. If your tile installation is failing, your baseboards will fail too. Water travels under the tile and sits on the thin-set. It then moves toward the walls. If you do not know how to refresh grout without replacing it, you are leaving a door wide open for water. I always recommend a thorough inspection of the perimeter grout. If there are pinholes or cracks, that is where the water goes. Once it gets under the baseboard, it cannot evaporate. It stays dark and wet. This leads to mold and rot. You might think you have a paint problem when you actually have a grout problem.
“The integrity of the tile assembly depends on the management of moisture at the transition points between horizontal and vertical surfaces.” – Master Flooring Axiom
Why your subfloor is lying to you
An unlevel subfloor creates uneven gaps beneath the baseboards that are difficult to seal properly, allowing moisture to accumulate in hidden pockets. When I was grinding that concrete last month, I was preventing this exact issue. If the floor has a dip, the baseboard will bridge over it. This creates a cavern. People try to fill this cavern with caulk. Caulk is great, but it is not a structural fix. Over time, the house settles. The caulk pulls away. Now you have a hidden pocket that traps water. Every time you mop, a little water goes in there. It never comes out. It sits against the bottom of the trim and rots it from the inside out. You need to ensure your floor is flat to within 1/8 inch over 10 feet. If it is not, your trim is doomed.
The 1/8 inch that ruins everything
The small gap between the bottom of the baseboard and the tile surface is the most critical failure point in bathroom moisture management. This gap is necessary for the floor to move, but it must be handled with precision. If it is too small, you cannot get enough caulk in to create a seal. If it is too large, the caulk will sag and fail. I use a 100 percent silicone sealant for this. Do not use painters caulk. Painters caulk is water-based. It will shrink. It will crack. Silicone stays flexible. It creates a waterproof dam. If you want chic baseboard designs that transform rooms in 2025, you have to accept that a thick bead of silicone is part of the aesthetic. It is the only thing standing between your trim and the garbage dump.
| Material | Moisture Resistance | Durability | Best Use Case |
|---|---|---|---|
| MDF | Very Low | Low | Dry closets and bedrooms |
| Finger-Jointed Pine | Medium | Medium | Living areas and hallways |
| Solid Oak | High | High | Luxury spaces with low moisture |
| PVC / Composite | Maximum | Maximum | Bathrooms and laundry rooms |
The chemistry of cleaning agents and paint failure
Harsh cleaning chemicals can break down the resins in bathroom paint, making the baseboards more susceptible to moisture penetration and flaking. I see people use bleach on their floors all the time. Bleach is an oxidizer. It eats through the protective topcoat of your trim. Once that topcoat is gone, the paint becomes porous. You should follow tile cleaning tips for a sparkling bathroom in 2025 to avoid this. Use pH-neutral cleaners. If you strip the wax or the sealant off the paint, the moisture in the air will do the rest. It is a slow chemical burn. Your baseboards look dull, then they look chalky, and then they start to flake off in big chunks. This is preventable. Stop using caustic chemicals near your woodwork.
Restoration and prevention protocols
Properly restoring peeling baseboards requires total removal of damaged material, drying the substrate, and using a high-quality oil-based primer before re-painting. If you just paint over the flakes, you are wasting time. You have to get back to solid material. Sometimes that means replacing the trim entirely. If you are looking for grout restoration secrets for long-lasting results, apply those same principles of cleanliness and preparation to your baseboards. Sand the wood. Use a vacuum to remove all dust. Apply a primer that is specifically rated for high-moisture environments. Look for something that says ‘alkyd’ or ‘oil-modified.’ These primers create a shell that water cannot penetrate.
- Check the bathroom exhaust fan CFM rating to ensure it can clear the room in 10 minutes.
- Apply a bead of 100 percent silicone to the joint where the trim meets the floor.
- Back-prime all new wood trim before installation to prevent rear-side moisture absorption.
- Use stainless steel finish nails to prevent rust spots that can bleed through the paint.
- Maintain the grout lines to prevent water from traveling under the floor tiles.
- Choose eco-friendly tile solutions for sustainable homes in 2025 that offer better non-porous surfaces.
To wrap this up, your bathroom is an ecosystem. If one part fails, the rest follows. The baseboards are the canary in the coal mine. They are telling you that the moisture management in the room is broken. Fix the moisture, fix the seal, and use the right materials. If you don’t, I will be the guy you call in two years to rip it all out and start over. And trust me, my labor rates for a second-time-around job are not cheap. Take the time to do the subfloor work. Take the time to prime the bottom edges. It is the only way to win against the water.