
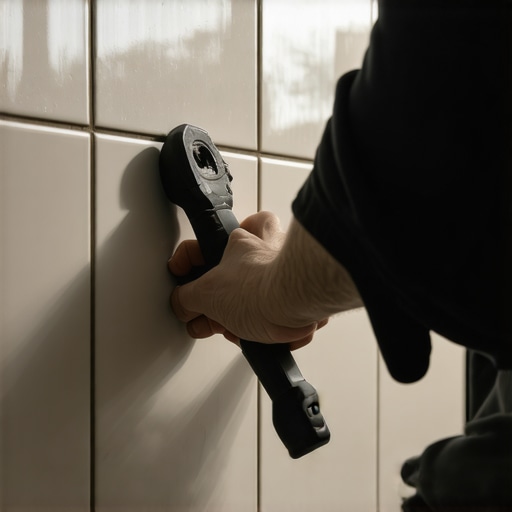
I spent three days grinding concrete on a job last month just so the floor would not click like a castanet. That job taught me that most guys skip the leveling compound because they think the underlayment will hide the dip. It will not. When you transition from floors to vertical surfaces like showers or backsplash areas, the stakes for precision only get higher. I once saw an amateur try to pry a single cracked subway tile off a bathroom wall with a flathead screwdriver. He did not realize that the grout was still fully bonded to the surrounding pieces. One sharp twist and he did not just pop the broken tile. He sent a fracture line through three perfectly good neighbors and ripped a hole in the moisture barrier. It sounded like a gunshot when that ceramic snapped. That is the reality of tile work. Everything is connected. If you do not isolate the problem, the problem expands. You are not just replacing a piece of clay. You are performing surgery on a structural system that relies on chemical bonds and mechanical tension.
Isolation is the primary law of tile repair
Isolating the damaged tile requires the complete removal of grout around the entire perimeter of the piece to prevent vibration transfer and mechanical stress from cracking adjacent tile. You must use a carbide-grit manual scraper or an oscillating multi-tool with a diamond blade to create a physical air gap. This gap ensures that when you begin the extraction process, the energy from your hammer and chisel does not travel through the rigid grout line and shatter the neighboring glaze. I have seen countless DIY projects fail because people think the grout is soft. It is not. After it cures, it is a mineral bridge. If you do not break that bridge, you are essentially hitting every tile on the wall at once. This is especially true in modern showers where the moisture levels might have already compromised the bond of the surrounding pieces. You can find more inspiration for these spaces at showers that wow modern designs for 2025. Before you even touch a hammer, that grout must be gone. I want to see the edges of the neighboring tiles. I want to see the substrate. If you do not see the gap, you are not ready to proceed.
“A floor is only as good as the subfloor beneath it; deflection is the enemy of every joint.” – Master Flooring Axiom
The physics of the ceramic bond and impact energy
Ceramic and porcelain tiles are incredibly strong under compression but extremely brittle under tension or vibration, meaning that impact energy must be managed through micro-shattering the center of the tile first. You do not start prying from the edge. That is how you ruin your baseboards or the wall behind. You take a center punch or a masonry bit and you drill a hole right in the middle of the dead soldier. This creates a release point for the internal tension of the tile. From there, you work from the center outward. You are essentially collapsing the tile in on itself. This is molecular zooming at its finest. You are fighting the bond of the thin-set. Modern polymer-modified mortars create an interlocking crystalline structure with the back of the tile and the substrate. It is a chemical marriage. To divorce them without collateral damage, you need to break the tile into small, manageable shards. If you are working near the floor, be careful not to mar your baseboards makeover ideas to elevate your space. Precision is the difference between a ten-minute fix and a three-day disaster.
| Extraction Tool | Vibration Frequency | Precision Rating | Risk Level |
|---|---|---|---|
| Hammer and Cold Chisel | High | Low | High |
| Oscillating Tool (Diamond) | Medium | High | Low |
| Rotary Drill (Masonry Bit) | Low | Medium | Low |
| Manual Grout Saw | None | Maximum | Zero |
The chemical reality of thin set removal
Thin set mortar removal requires mechanical abrasion to clear the substrate down to the original backing material, ensuring the new adhesive has a flat surface for mechanical interlocking. Once the shards are gone, you are left with a mountain of old, hardened mortar. You cannot just butter the new tile and stick it on top. If you do, that tile will sit proud of the rest of the wall. It will look like a sore thumb. You have to carefully scrape or grind the old mortar away. This is the most dangerous part for the substrate. If you are dealing with a cement board, you have a bit of wiggle room. If it is old-school greenboard or drywall, one wrong move with the chisel and you have a hole that goes straight to the studs. You need a flat, clean surface. I often tell my apprentices that the prep takes 90 percent of the time. The actual setting of the tile is just the victory lap. If your wall is uneven, your tile will be uneven. It is a simple law of physics. For those looking to keep their existing surfaces clean during this messy process, check out tile cleaning tips for a sparkling bathroom in 2025 to manage the dust and debris.
“Proper substrate preparation is the fundamental requirement for tile longevity and aesthetic success.” – TCNA Handbook
Back buttering and the final set
Back buttering the replacement tile with a notched trowel ensures 100 percent coverage and prevents hollow spots that lead to future cracks or de-bonding. You do not just glob it on. You use the flat side of the trowel to burn the mortar into the back of the tile first. This is called wetting out the tile. Then you use the notched side to create ridges. These ridges collapse when you press the tile into the wall, allowing air to escape and creating a vacuum-like bond. If you just put a big ‘cookie’ of mud in the middle, the corners will be weak. One bump from a vacuum cleaner or a heavy shampoo bottle and that tile is going to crack again. You also need to ensure you are using the right chemistry. Do not use mastic in a wet area. Mastic is just organic glue. It turns back into mush when it gets wet. Use a high-quality, polymer-modified thin-set. It costs more, but it stays where you put it. While you are at it, consider looking at grout restoration secrets for long lasting results to make sure the new repair blends in with the old installation.
- Remove all dust from the wall cavity using a vacuum.
- Apply a waterproof membrane patch if the original was pierced.
- Check the depth of the new tile against the existing wall.
- Use spacers to maintain the exact alignment of the original grid.
- Allow at least 24 hours for the mortar to hydrate and cure.
- Mix the new grout to a peanut butter consistency.
The ghost in the expansion gap
The expansion gap is a perimeter void that allows for structural movement and thermal expansion without putting lateral pressure on the tile assembly. Houses move. They breathe. They shrink in the winter and swell in the summer. If your tile is jammed tight against a corner or a bathtub, it has nowhere to go. It will tent or crack. This is often why that single tile cracked in the first place. When you do the replacement, check the perimeter. If there is no gap, create one. Use a 1/16 inch space at the minimum. In corners, do not use hard grout. Use a color-matched 100 percent silicone sealant. Silicone is flexible. Grout is rigid. If you put grout in a change of plane, it will crack within six months. That is a guarantee. I have made a career out of fixing other people’s mistakes in this department. If you want to avoid future issues, you can learn more about keeping things fresh at how to refresh grout without replacing it. It is about working with the physics of the house, not against them. If you fight the house, the house always wins. The 1/8 inch that ruins everything is the one you forgot to leave for movement. Stick to the standards and your repair will outlast the building.