
The silent killer of residential subfloors
I have spent thirty years crawling into damp spaces where the air smells like wet rot and failure. Most people look at their shower and see a place to get clean. I look at it and see a hydraulic system under pressure. When that system fails, it does not happen with a bang. It happens with a whisper. It happens with a microscopic tear in a liner or a hairline crack in a corner. I once walked into a house where a custom travertine shower looked like a masterpiece, but the baseboards in the hallway were starting to swell. The homeowner thought it was just humidity. It was not. I pulled the baseboards and found the bottom plate of the wall was so saturated I could push a screwdriver through it like butter. The installer had skipped the pre-slope, and water was pooling against the studs. This is the reality of the trade. If you ignore the signs, the physics of water will eventually win.
The phantom stain on the plaster
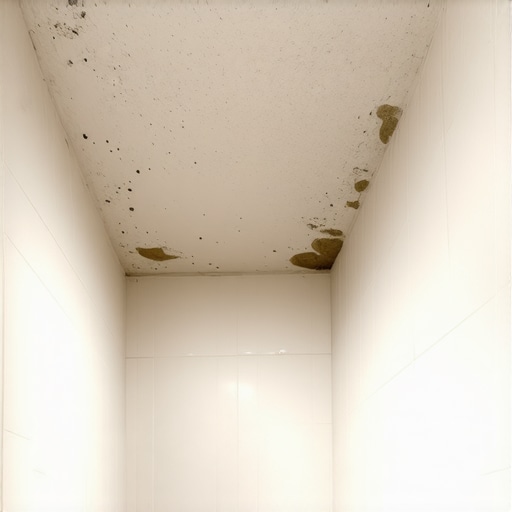
A leaking shower pan often manifests as a damp, yellowing, or brownish circle on the ceiling directly below the bathroom. These stains indicate that water has bypassed the waterproofing membrane and is saturating the floor joists and the drywall paper. You must investigate immediately to prevent structural rot.
When you see a stain, do not just paint over it. The molecular reality of gypsum board is that it acts like a sponge for liquid moisture. Once the water hits the paper backing of the ceiling, it begins to migrate horizontally. This means the actual leak might be six feet away from the visible stain. I always tell my apprentices to look for the high point of the subfloor. Gravity determines the path. If you are dealing with showers on the second floor, the damage is often hidden by insulation which traps the water and accelerates the decay of the wood fibers. You can read more about maintaining these areas in our guide on tile cleaning tips for a sparkling bathroom in 2025 to see how surface care differs from structural integrity.
“A floor is only as good as the subfloor beneath it; deflection is the enemy of every joint.” – Master Flooring Axiom
Physics of a failing pan
The shower pan is a complex assembly consisting of a subfloor, a sloped mortar bed, a waterproofing liner, and a finish layer of tile. Failure occurs when the slope is incorrect, causing water to sit stagnant against the liner until the chemical bonds or physical seams fail completely.
In the world of showers, there is a concept called capillary action. This is where water climbs upward through porous materials like grout or thin-set. If your pan liner is not properly integrated with the drain assembly, water will find its way behind the tile and over the edge of the waterproofing. I have seen guys use a flat subfloor and then build the slope on top of the liner. That is a death sentence for a shower. The NWFA and TCNA standards are clear. The slope must be beneath the liner so that any water that reaches it is directed toward the weep holes. If the weep holes are clogged with mortar, the water stays in the mud bed and becomes a breeding ground for mold. This is why showers that wow modern designs for 2025 focus so heavily on the underlying drainage technology rather than just the aesthetic tile.
Grout is a sieve not a seal
Many homeowners mistakenly believe that grout and tile are waterproof barriers that keep the subfloor dry. In reality, grout is a porous cementitious product that naturally absorbs water and allows it to pass through to the mortar bed beneath the surface.
When you see grout cracking or darkening, it is a sign that the assembly is holding too much water. The chemistry of Portland cement grout is such that it has microscopic voids. Over time, these voids can enlarge if the water is slightly acidic or if the cleaning agents are too harsh. If you are noticing issues, check out our advice on how to refresh grout without replacing it to see if it is a surface issue or something deeper. However, if the grout is soft to the touch, you have a structural saturation problem. Water is sitting in the mud bed too long. This saturates the thin-set and eventually causes the bond to fail. You will hear a hollow sound when you tap the tile. That is the sound of the finish layer detaching from the substrate. This is a red flag that the pan is failing.
Comparing leak indicators and structural risk
| Symptom | Technical Cause | Risk Level |
|---|---|---|
| Darkened Grout | Capillary saturation in mortar bed | Moderate |
| Cracked Baseboards | Subfloor expansion from moisture | High |
| Musty Odor | Anaerobic bacteria in stagnant water | Extreme |
| Peeling Ceiling Paint | Vapor pressure through drywall | Critical |
The curb that kills the joists
The shower curb is the most common point of failure because it requires complex folding of the liner and precise waterproofing at the corners. If the liner is punctured by a nail or screw during the installation of the glass door, the leak will manifest at the floor level.
I have seen more rotted floors caused by the shower curb than by any other factor. Installers often use a wooden curb made of stacked 2x4s. If water gets into that wood, it swells. That swelling puts pressure on the tile, causing it to crack. Once the tile cracks, more water enters. It is a vicious cycle. Modern standards prefer a solid foam or cement curb. If you see water damage on your baseboards near the shower entrance, the curb is likely the culprit. This often leads to a full baseboards makeover but you must fix the water source first. The chemistry of the wood decay is relentless once the moisture content exceeds twenty percent. At that point, fungal growth begins to consume the lignin in the wood, and your home’s structure is compromised.
“Waterproofing must be a continuous, monolithic barrier; any penetration is a point of total system failure.” – TCNA Technical Handbook
The 1/8 inch that ruins everything
Precision is everything when it comes to the height of the drain and the slope of the floor. A variation of even one eighth of an inch can cause a birdbath where water pools and eventually seeps through the tile and grout to the subfloor below.
When I am on a job, I use a digital level to ensure I have a consistent two percent slope toward the drain. Anything less and the water will not move fast enough to clear the surface tension. Most people don’t realize that the thin-set used to stick the tile down can also interfere with drainage if it is applied too thick. The polymer strands in modified thin-set are designed to be water resistant but they are not a substitute for a membrane. If you are thinking about eco-friendly tile solutions for sustainable homes in 2025, make sure you are looking at the recycled content of the mortar too. But remember, the greenest shower is the one that doesn’t have to be demolished and rebuilt in three years because it leaked.
The moisture meter checklist
To catch a leak before it causes a ceiling collapse, you must perform regular inspections using your senses and a few basic tools. Do not wait for a puddle to appear on the floor.
- Check for soft spots in the floor immediately outside the shower.
- Look for discoloration in the grout that does not go away after the shower has been dry for 24 hours.
- Inspect the interface where the shower meets the baseboards for any signs of swelling or paint bubbling.
- Smell the drain area for a metallic or earthy scent which indicates mold growth.
- Verify that the shower door seals are not allowing water to spray onto the drywall at the perimeter.
If you catch these signs early, you might save yourself a ten thousand dollar renovation. Often, a simple grout restoration can buy you time if the leak is localized. But if the subfloor is already deflecting, it is time to tear it out and do it right. Use a moisture meter to check the walls surrounding the shower. If the meter reads over fifteen percent, you have water moving behind the tiles. This usually means the vapor barrier was either skipped or installed incorrectly. In humid climates, this problem is even worse because the wood never has a chance to dry out. The final word on structural integrity is that water always finds the easiest path. Your job is to make sure that path leads to the drain, not your kitchen ceiling.