
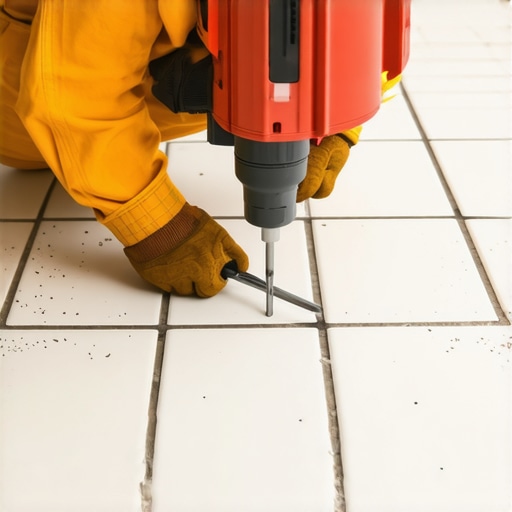
The unforgiving nature of vitrified surfaces
Porcelain tile is a dense and non-porous material created through extreme heat and pressure, often exceeding 2,200 degrees Fahrenheit during the firing process. This industrial metamorphosis results in a material that is significantly harder and more brittle than standard ceramic. When you attempt to penetrate this surface with a drill, you are not just making a hole. You are managing thermal stress and vibration in a structural layer that has zero flexibility. I spent three days grinding concrete on a job last month just so the floor wouldn’t click like a castanet, and that same level of obsession with the substrate is required here. If there is a void in the thin-set mortar beneath the tile, any pressure from a drill bit will cause the porcelain to spiderweb. It is not just about the tile. It is about the physical bond between the clay and the slab. Most guys skip the leveling compound and think the underlayment will hide the dip. It won’t. When you drill into a hollow spot, the tile collapses into the cavity. This is why a proper installation is a prerequisite for any post-install modifications. For those looking at showers with a style, remember that every fixture you mount requires a surgical approach to the wall board behind the tile. You are essentially performing a localized demolition under controlled conditions. I have seen fifteen thousand dollar wide-plank installations ruined by poor moisture planning, and porcelain is no different. It requires respect for the physics of the material.
“A floor is only as good as the subfloor beneath it; deflection is the enemy of every joint.” – Master Flooring Axiom
The diamond bit advantage and thermal management
Selecting a diamond tipped core bit is the only acceptable method for penetrating porcelain without catastrophic fracture. Standard masonry bits rely on a hammering action that will shatter vitrified clay instantly. A diamond bit works through abrasion, slowly grinding away the silicates and minerals. Heat is the primary enemy of the diamond bond. If the bit gets too hot, the industrial diamonds will glaze over or the metal matrix will melt, rendering the tool useless. You must use a constant water feed or a wet sponge to keep the interface cool. This cooling process also suppresses crystalline silica dust, which is a major respiratory hazard on any job site. I keep a bottle of WD-40 in my kit for the tools, but for the tile, it is strictly H2O. The water acts as a lubricant and a heat sink. You should maintain a low RPM, usually between 400 and 600, to prevent the bit from skating across the surface. If you are working near baseboards, be mindful of the expansion gap. Drilling too close to the perimeter can compromise the edge strength of the tile. I always tell my apprentices that the drill is a scalpel, not a sledgehammer. You let the weight of the tool do the work. If you find yourself leaning into the drill, you have already lost the battle. The pressure should be consistent and light, allowing the diamonds to do their job of molecular erosion.
| Bit Type | Material Suitability | Recommended RPM | Cooling Method |
|---|---|---|---|
| Carbide Tipped | Ceramic Only | 800-1000 | Dry/Air |
| Diamond Core | Porcelain/Stone | 400-600 | Constant Water |
| High Speed Steel | Wood/Plastic | 1500+ | None |
The subfloor secret and the myth of waterproof vinyl
A tile is only as strong as the compression strength of the thin-set mortar and the rigidity of the subfloor slab. When homeowners ask why their floors are cracking, the answer is almost always deflection. If you are drilling through tile on a plywood subfloor, the slight bounce of the wood can cause the tile to snap the moment the bit breaks through the back of the porcelain. This is why we use cement backer units or uncoupling membranes. On a concrete slab, you have more stability, but you must be wary of expansion joints. Never drill into a control joint in the concrete. The movement of the slab will eventually shear your fastener. If you are installing accessories in modern showers, ensure you are hitting the studs or using toggle bolts that can expand behind the backer board. I once saw a guy try to drill into a floor that hadn’t cured for more than twenty-four hours. The moisture in the mortar turned to steam from the friction of the drill, blowing a chunk of the glaze right off the tile. It was a mess. You need to understand the chemistry of the bond. Modified thin-set uses polymers to create a bridge between the tile and the substrate. If that bridge is weak, your drilling project is doomed. After the hole is successfully bored, you might notice some dust migration into the surrounding areas. Using proper tile cleaning tips will ensure that no abrasive grit remains to scratch the surface when you install your fixtures. Cleanliness is not about aesthetics. It is about preventing secondary damage.
A step by step guide to precision boring
Follow these technical steps to ensure a clean penetration through the hardest porcelain surfaces available today. This protocol is designed to minimize vibration and maximize the life of your diamond tools. Any deviation from this sequence increases the risk of a tension crack that could run the entire length of the floor. If you are working on a project involving grout restoration, do your drilling before the final sealing to avoid contaminating the new seal with slurry. Mixing these tasks requires a clear order of operations. Use the checklist below to prepare your workstation. I have spent decades on my knees with a moisture meter and a level, and I can tell you that the preparation takes twice as long as the actual drilling. If you rush the setup, you will spend the afternoon replacing a cracked tile.
- Apply a double layer of masking tape over the drill site to prevent the bit from walking.
- Mark your center point clearly on the tape with a fine-point permanent marker.
- Create a cooling reservoir using a ring of plumber’s putty around the mark.
- Fill the reservoir with water to submerge the cutting edge of the bit.
- Start the drill at a 45-degree angle to create a pilot notch before leveling to 90 degrees.
- Apply light, rhythmic pressure and pulse the drill to allow water to flush out the slurry.
This method ensures that the friction heat is dissipated immediately. Once the bit has passed through the porcelain, you will feel a change in resistance. This is the transition to the substrate. If you are hitting concrete, you may need to switch to a masonry bit for the final depth, but only after the porcelain hole is significantly wider than the masonry bit to avoid edge contact. For more information on maintaining your project, you can contact us for expert guidance on flooring structural integrity.
Managing the perimeter and final structural integrity
The edge of a tile is its most vulnerable point, and drilling within two inches of a corner requires extreme caution. The internal stresses of a fired tile are concentrated at the edges. When you introduce a hole, you create a new point for stress to unload. If you are installing new baseboard designs and need to secure them through a tile floor, always pre-drill the tile. Never attempt to drive a nail or screw directly through the surface. The impact of a hammer or the torque of a screw will shatter the porcelain. I have seen countless DIY jobs where the homeowner tried to ‘self-tap’ into a tile. It never works. The sheer density of the material makes it impossible. You also need to be aware of the moisture barrier. If you are drilling in a wet area, you must inject 100 percent silicone sealant into the hole before inserting your anchor. This prevents water from migrating behind the tile and rotting the subfloor or causing mold growth. It is these small, technical details that separate a master installer from a handyman. A floor is a performance surface. It has to handle foot traffic, moisture, and the structural shifts of the house. Treat every hole you drill as a potential point of failure and reinforce it accordingly. If you find your grout is cracking near the hole, you may need to look into how to refresh grout to maintain the seal. Every step you take after the tile is laid must respect the original engineering of the floor. The slab is the foundation, but the porcelain is the shield. Do not let a simple drill bit compromise that protection. Use the right tools, keep them cool, and never underestimate the hardness of a well-fired tile. Your tools should smell like WD-40 and your work area should be clear of oak dust before you start this surgical process.