
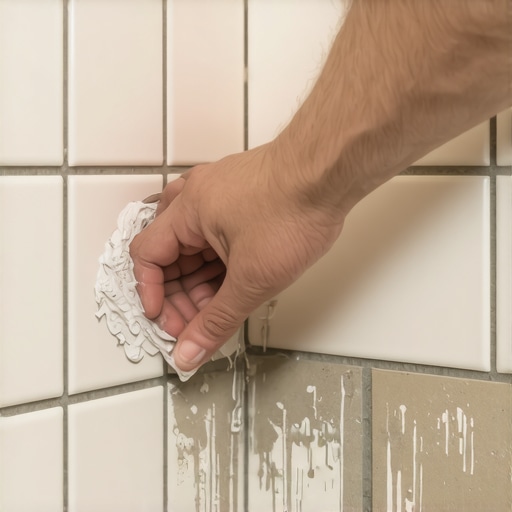
Most guys skip the leveling compound. They think the underlayment will hide the dip. It won’t. I spent three days grinding concrete on a job last month just so the floor wouldn’t click like a castanet. When it comes to grout repairs, the same laziness ruins the job. You cannot just shove some white paste into a crack and expect it to hold. Grout is a complex mixture of Portland cement, graded aggregates, and chemical pigments that must interact perfectly with the substrate to survive the humid environment of a bathroom.
The physics of the grout joint and why it fails
Grout failure in showers and tile floors usually stems from subfloor deflection or improper moisture management. When a subfloor moves even a fraction of an inch, the rigid grout joint cannot absorb the energy, leading to hairline fractures. These cracks allow water to infiltrate the mortar bed, eventually rotting the subfloor from the inside out. In my twenty five years of fixing these messes, I have learned that matching the old grout is fifty percent chemistry and fifty percent forensic investigation. You are not just looking for a color. You are looking for the aggregate size and the binder type that was used a decade ago. If you use a high-polymer grout in a joint originally filled with standard cementitious material without proper cleaning, the bond will fail within weeks.
“A floor is only as good as the subfloor beneath it; deflection is the enemy of every joint.” – Master Flooring Axiom
The identification of aggregate size and binder type
To match old grout, you must first determine if you are working with sanded or unsanded material by measuring the joint width. Sanded grout is used for joints wider than one eighth of an inch because the sand acts as a structural reinforcement to prevent shrinkage. Unsanded grout is reserved for thin joints between wall tiles or polished stone where sand would scratch the surface. If you see a gritty texture, it is sanded. If it is smooth like dried toothpaste, it is unsanded. You can find out more about maintaining these surfaces at tile cleaning tips for a sparkling bathroom in 2025. The sand itself has a specific sieve size, and if you use a coarse sand to patch a fine sand joint, the repair will stand out like a sore thumb under the LED lights of a modern bathroom.
| Grout Type | Joint Width Requirement | Common Application | Durability Level |
|---|---|---|---|
| Sanded Grout | 1/8 inch to 1/2 inch | Floor tiles and large wall tiles | High structural integrity |
| Unsanded Grout | Less than 1/8 inch | Polished marble or glass tile | Low shrinkage |
| Epoxy Grout | Any width | Commercial kitchens and steam showers | Chemical and stain proof |
The color science of aged pigments and moisture
Matching grout color requires accounting for years of mineral deposits, soap scum, and UV fading that have altered the original pigment. Even if you find the exact same brand and color code from the original install, the new grout will look brighter and more vibrant than the aged section. To fix this, you must clean the existing grout thoroughly using an alkaline cleaner to see the true current color. Check out grout restoration secrets for long lasting results for better cleaning protocols. Once cleaned, you might need to blend two different dry powders to hit that perfect off-beige or muted gray that only time can create. I often keep a dozen different samples on my truck just to play chemist on the job site. You mix small batches, let them dry completely, and compare them under the actual lighting of the room.
Mechanical removal of the damaged material
The secret to a repair that lasts is the depth of the removal, as you must carve out at least two thirds of the joint depth. Many DIY homeowners try to skim coat a new layer of grout over the old one. This is a massive mistake. The new layer will be too thin to have any structural strength and will flake off like old paint. I use a carbide-tipped grout saw or a high-speed oscillating tool with a diamond blade. You have to be steady. One slip and you have chipped a tile that might be out of production, which leads to a full replacement. You need to expose the sides of the tile to ensure the new grout has a clean, vertical surface to bond with. If the baseboards are in the way, you might need to look into chic baseboard designs that transform rooms in 2025 to see if a full trim upgrade is necessary during the repair.
The checklist for a successful grout match repair
- Identify if the grout is sanded or unsanded by measuring the gap.
- Deep clean the existing grout to reveal the true current color.
- Remove the old grout to a depth of at least two thirds of the tile thickness.
- Vacuum all dust and debris from the joint to prevent bond interference.
- Mix the new grout to a peanut butter consistency and let it slake for ten minutes.
- Apply with a rubber float at a 45 degree angle to pack the joint tight.
- Wipe with a damp, not dripping, sponge to avoid washing out the pigment.
The chemistry of the bond and water ratios
Controlling the water-to-powder ratio is the most overlooked aspect of grout matching because excess water dilutes the pigment and weakens the crystalline structure. If you add too much water, the grout will dry lighter than intended and will be porous. This porosity is an invitation for mold to grow in your showers. When working on showers that wow modern designs for 2025, I always use a distilled water or a liquid polymer additive instead of tap water. Tap water has minerals that can cause efflorescence, which is that white crusty powder that ruins dark grout jobs. The polymer additive makes the grout more flexible, which is vital if your bathroom is on a second floor with a plywood subfloor that flexes when you walk on it. Flexibility is the difference between a one-year fix and a ten-year solution.
Why your subfloor is lying to you
A subfloor might look solid, but the microscopic movement under the weight of a person is what causes grout to pop out in small chunks. If you find yourself repairing the same spot every few months, the grout isn’t the problem. The subfloor is. Most modern homes use OSB or thin plywood that meets the bare minimum code. For tile, you need a deflection rating of L/360 or better. If you have a bouncy floor, no amount of grout matching will save you. You might need to look at how to refresh grout without replacing it as a temporary cosmetic fix, but the real solution is often stiffening the joists from below. A floor is a system, and the grout is just the most vocal part of that system when things go wrong. If the tile is loose, you have to pull the tile, fix the mortar, and then address the grout. Anything else is just putting a bandage on a broken leg.
“Grout is not a structural adhesive; it is a filler that demands a stable foundation to remain intact.” – Tile Industry Standard
The 1/8 inch that ruins everything
Precision in the joint width is what separates a professional repair from an amateur patch. If your tiles have shifted over time, the joint width might have changed. When you go to match the grout, you have to be mindful of these micro-adjustments. I have seen guys try to jam sanded grout into a 1/16 inch gap and it looks like a disaster. It becomes a jagged, messy line. If the gap is too small, you must use unsanded grout regardless of what is elsewhere, or use a color-matched caulk for areas where the floor meets the wall. For those looking to upgrade their aesthetics while fixing these issues, baseboards makeover ideas to elevate your space can provide a fresh look that hides expansion gaps at the perimeter. Remember that the perimeter of a bathroom floor should never be grouted. It should be caulked to allow the floor to expand and contract with the seasons.
The ghost in the expansion gap
Expansion gaps at the floor-to-wall transition are the most common places for grout to crack, and they should never have been grouted in the first place. Change of plane requires a flexible sealant. If you see grout cracking where the floor meets the tub or the baseboard, don’t put more grout there. Use a 100 percent silicone caulk that is color-matched to your grout. This allows the bathroom to breathe as the house settles and the humidity changes. You can find more about these small bathroom details at showers with a style trendy ideas for small bathrooms. A rigid grout joint in a corner will always fail because the two surfaces move in different directions. By using silicone, you create a waterproof, flexible bridge that looks like grout but performs like a gasket. This is how you avoid coming back to fix the same crack next year.