
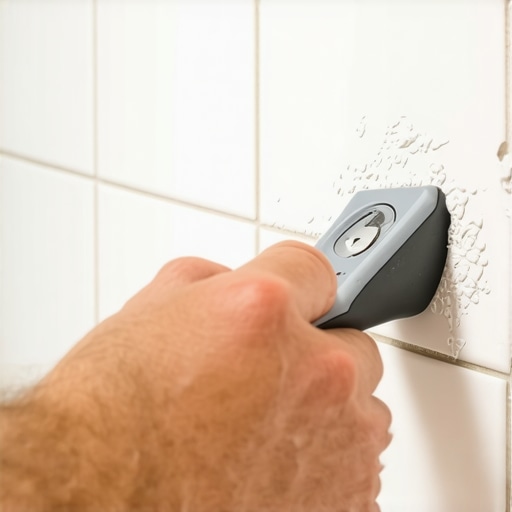
Look at your tile. If you see a milky film or stubborn gray chunks that feel like concrete, you are dealing with a failure of timing. I have got grout under my cuticles that has been there since the nineties. I spent three days grinding concrete on a job last month just so the floor would not click like a castanet, and that same level of obsession applies to grout. If the installer did not wash the tile face correctly during the initial set, you are left with a chemical bond that rivals the strength of the tile itself. Removing this residue without shattering the glaze of your expensive porcelain requires more than just muscle. It requires an understanding of the hydration process and the right abrasive hierarchy. You cannot just go at it with a screwdriver. You need a systematic approach that respects the chemistry of the material.
The nightmare of the cured haze
The best tool for removing hardened grout from tile faces is a combination of a white nylon abrasive pad and a sulfamic acid solution. This method focuses on chemical softening of the portland cement while using non-marring physical agitation to lift polymer-modified residues without scratching the vitreous surface of the ceramic or porcelain tile. Most people reach for metal scrapers, but that is a mistake that leads to permanent scarring of the installation. If the grout is thick, a plastic putty knife is the first line of defense before moving to chemical agents.
I once walked into a job where a guy tried to use a wire brush on high-gloss subway tile. He ruined twenty square feet of material in ten minutes. The grout was gone, sure, but so was the finish. He did not understand that grout is essentially a liquid stone that undergoes a molecular change. When you mix water with that bag of powder, you start a clock. Once that clock stops, the grout is part of the floor. To win this fight, you have to understand the bond. Modern grouts are packed with polymers and latex. These additives make the grout flexible and waterproof, but they also make it act like a superglue once it dries on the surface. You are not just fighting sand and cement anymore. You are fighting plastic resins that are designed to stay put forever.
“A floor is only as good as the subfloor beneath it; deflection is the enemy of every joint.” – Master Flooring Axiom
The chemical bond and why it sticks
Grout haze is the result of the evaporation of water leaving behind a thin layer of cement and polymers. On a microscopic level, tile surfaces are not perfectly flat. Even the smoothest porcelain has pores and microscopic undulations where the grout particles wedge themselves. When you wait too long to perform the final wipe, the water that was supposed to keep the grout mobile disappears. The hydration process completes, and the cement crystals interlock with the texture of the tile. This is why a simple wet rag does nothing after twenty four hours. You are trying to wipe away a rock. You have to break those crystals apart without breaking the tile. This is where pH levels come into play. Cement is highly alkaline. To break it down, you need an acid. But you cannot just use any acid. Muriatic acid will eat your lungs and the color of your grout lines. Sulfamic acid is the professional choice because it is effective yet controllable.
The hierarchy of removal tools
You need a toolkit that scales with the severity of the problem. If you start with the most aggressive tool, you will regret it. We follow a specific order of operations in the trade. We start soft and move to hard. This prevents unnecessary damage to the tile and the surrounding chic baseboard designs that might be nearby. You should always test your tool in a small, inconspicuous corner before you tackle the middle of the room. This is the difference between a pro and a hack. A hack just starts scrubbing. A pro evaluates the hardness of the tile versus the hardness of the tool.
| Tool Type | Specific Tool | Best Use Case | Risk Factor |
|---|---|---|---|
| Abrasive | White Nylon Pad | Light to Medium Haze | Very Low |
| Mechanical | Plastic Putty Knife | Large Chunks and Globs | Low |
| Chemical | Sulfamic Acid Crystals | Old, Cured Residue | Moderate |
| Aggressive | Carbide Grout Saw | Joint Removal Only | High |
The physical advantage of nylon pads
Why white nylon? Because color matters in the world of abrasives. In the flooring industry, green and black pads are impregnated with heavy grits that will sand down your tile finish. White pads are designed to be non-abrasive to the surface while still being stiff enough to grab onto the texture of the grout haze. When you use a white pad, you are using thousands of tiny plastic fingers to pry the cement out of the tile pores. You must use plenty of water. Water acts as a lubricant and a carrier for the particles you dislodge. If you scrub dry, you are just moving the dust around and potentially creating scratches. For more on maintaining surfaces, see tile cleaning tips for a sparkling bathroom in 2025 to keep things looking sharp.
The danger of the metal blade
I see it every week. A homeowner gets frustrated and grabs a razor blade or a flathead screwdriver. They think they can just pop the grout off. Metal is harder than the glaze on most ceramic tiles. Even if you do not see a scratch immediately, you are creating microscopic tracks that will trap dirt and bacteria later. This is especially true in showers that wow where the water will eventually highlight every single mistake you made with a metal tool. If you must use a blade, it should only be a plastic one. A plastic scraper has enough rigidity to flick off a large chunk of grout but will yield before it digs into the tile glaze. It is a sacrificial tool. If the plastic blade wears down, that is a good sign. It means your tile is winning the battle of hardness.
Chemical intervention for aged grout
When mechanical force fails, you turn to chemistry. Sulfamic acid is a mild acidic descaler. It works by reacting with the calcium carbonate in the cement. It dissolves the bond that holds the grout to the tile. You mix the crystals with warm water, apply it to the haze, and let it sit for a few minutes. You will see it start to bubble slightly. That is the sound of victory. That is the acid eating the mistake. However, you must be careful. If the acid sits on the actual grout joint too long, it will eat that too. You are performing a surgical strike. You want to hit the haze on the face of the tile without damaging the structural grout in the lines. This is why we use a targeted application with a sponge or a small brush.
“Cementitious grout requires a specific hydration window; once closed, mechanical and chemical synergy is the only path to restoration.” – TCNA Installation Handbook Supplement
The vertical challenge in showers
Removing grout from the walls of showers with a style is twice as hard as floors. Gravity is your enemy. When you apply your acid solution, it wants to run down the wall and pool at the base. This can lead to uneven cleaning and potential damage to the floor tiles or the drain cover. For vertical surfaces, you need a gel-based cleaner or you need to work in very small sections. I like to use a thick sponge to keep the area saturated. You have to keep the surface wet. If the acid dries on the tile, you have just created a new kind of haze that is even harder to remove. Work from the bottom up to prevent streaking. It sounds counterintuitive, but it prevents the clean water from running over the dirty areas and leaving permanent marks.
Why vinegar is a waste of time
People love to recommend white vinegar for everything. It is a weak acid. While it might work for very light haze on a DIY Saturday, it is useless against professional grade, polymer-modified grout that has cured for a week. Vinegar does not have the strength to break the polymer chains. You will spend six hours scrubbing with vinegar to achieve what sulfamic acid does in ten minutes. Time is money on a job site. I do not have time to smell like a salad dressing for three days while making no progress. Use the right chemicals for the right job. If you are worried about the environment, look into eco-friendly tile solutions for sustainable homes in 2025, but understand that even eco-friendly cleaners need to be formulated specifically for cement removal.
The transition to baseboards
Once you have cleaned the tile, you often realize the grout has migrated to the edges. It gets stuck in the gap between the tile and the wall. This is a mess. If you have already installed your baseboards makeover ideas, you now have grout stuck to the wood or MDF. This is much harder to remove because you cannot use acid on painted wood. You have to use a very careful hand with a plastic tool. This is why I always tell guys to pull the baseboards before tiling. It gives you a clean expansion gap and prevents the grout from ruining your trim work. If the grout is already there, you might need to use a damp microfiber cloth and a lot of patience. Do not use the white pad on the baseboards; it will dull the paint.
Grout removal checklist
- Assess the tile type (Porcelain, Ceramic, or Natural Stone)
- Clear the area of furniture and protect adjacent surfaces
- Vacuum the floor to remove any loose grit that could cause scratches
- Mix sulfamic acid solution according to manufacturer specs
- Apply solution to a small test area first
- Dwell time of 2 to 5 minutes but do not let it dry
- Scrub with a white nylon pad using circular motions
- Rinse with clean water and a fresh sponge
- Neutralize the area with a slightly alkaline wash or plenty of clear water
- Check for remaining haze once the tile is dry
The final word on the job site
Removing hardened grout is a test of character. It is a slow, methodical process that cannot be rushed. If you try to take a shortcut, you will end up replacing tiles, which is a much bigger headache. Use the white pad. Use the sulfamic acid. Stay away from the metal scrapers. If you find that the grout is too far gone and the haze has become a permanent part of the landscape, you might need to look into how to refresh grout without replacing it or even grout restoration secrets for long lasting results. A floor is a massive investment. Treat it with the respect that structural engineering deserves. If you have questions about a specific situation, you can always contact us for expert advice. Keep your pads clean and your water fresh. That is the only way to get a professional finish on a botched installation.
{“@context”:”https://schema.org”,”@type”:”HowTo”,”name”:”How to Remove Hardened Grout from Tile Faces”,”step”:[{“@type”:”HowToStep”,”text”:”Identify the tile and grout type to ensure chemical compatibility.”},{“@type”:”HowToStep”,”text”:”Apply a sulfamic acid solution to the tile face and let it sit for several minutes without drying.”},{“@type”:”HowToStep”,”text”:”Scrub the surface using a white non-abrasive nylon pad in circular motions.”},{“@type”:”HowToStep”,”text”:”Rinse the area thoroughly with clean water to neutralize the acid and remove loosened particles.”}],”totalTime”:”PT1H”}