
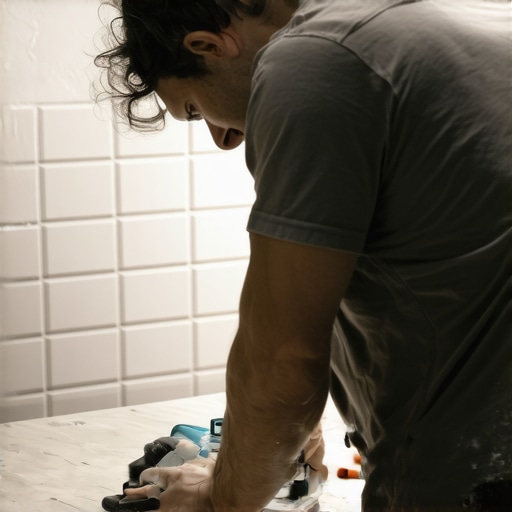
The best way to cut subway tiles for a shower niche
Most guys skip the leveling compound. They think the underlayment will hide the dip. It won’t. I spent three days grinding concrete on a job last month just so the floor wouldn’t click like a castanet. When it comes to a shower niche, that same laziness kills the job. I once walked into a remodel where the niche was so out of level that the subway tile looked like a set of crooked teeth. The installer tried to hide the gaps with a massive bead of caulk. It looked like trash. If the framing is not perfectly square, your cuts will never look right. You can buy the most expensive showers that wow modern designs for 2025, but if your cuts are jagged, the whole room is a failure. You have to treat the niche as the focal point of the entire wall because the human eye is drawn to the geometric perfection of those small returns.
The physics of the diamond blade
To cut subway tiles for a shower niche, you must use a continuous rim diamond blade on a high-quality wet saw with a clean water supply. The diamond grit interacts with the glass or ceramic glaze at a molecular level, creating heat that must be dissipated immediately to prevent chipping. I prefer a blade with a high concentration of synthetic diamonds. When that blade hits the surface at 3,450 RPM, it is not actually cutting in the traditional sense. It is grinding away the material. If you use a segmented blade, you will vibrate the glaze right off the ceramic biscuit. That vibration creates micro-fractures that will eventually lead to cracks after the tile cleaning tips for a sparkling bathroom in 2025 are applied. The water acts as both a lubricant and a coolant. If your slurry gets too thick, the friction increases, and your cuts will start to smoke and chip. Keep that water tray clean and change the water every fifty cuts to maintain the integrity of the diamond matrix.
“A floor is only as good as the subfloor beneath it; deflection is the enemy of every joint.” – Master Flooring Axiom
Why your wet saw is lying to you
Checking the squareness of your wet saw table against the blade is the only way to ensure your niche corners meet at a perfect ninety degree angle. Most of these plastic saws from the big box stores have tables that wiggle. If that table wiggles by even a sixteenth of an inch, your mitered edge will have a visible gap. I always use a speed square to calibrate the fence before I make the first cut. You have to listen to the saw. A healthy cut sounds like a high-pitched hum. A struggling cut sounds like a grinding growl. If you hear that growl, you are pushing too hard. Let the diamonds do the work. Subway tile is notoriously brittle because of the high silica content in the glaze. If you force the tile through the blade, the back of the tile will blowout, leaving a jagged edge that no amount of grout restoration secrets for long-lasting results can fix. Take it slow and use a dressing stone on your blade every few cuts to expose fresh diamonds.
The geometry of the niche return wall
Measuring the depth of your niche must account for the thickness of the thin-set, the tile itself, and the waterproofing membrane. People forget that the Schluter or Wedi board adds thickness. I always dry fit the entire niche before I even open a bag of mortar. If you are doing a wrap-around pattern, the grout lines must align perfectly from the back wall to the side walls. This is where the math gets hard. You have to subtract the width of two grout joints from your horizontal measurements. I use a manual snap cutter for the straight cuts on the back wall, but for the returns, it is wet saw or nothing. If you want that high-end look from showers with a style trendy ideas for small bathrooms, you should consider a mitered edge on the outside corner. It is a pain to cut, but it eliminates the need for bulky metal trim or bullnose tiles that never quite match the color of the field tile.
| Tile Material | Janka Hardness (Relative) | Blade Type | Cooling Requirement |
|---|---|---|---|
| Ceramic Subway | Moderate | Continuous Rim | Medium Flow |
| Porcelain Subway | High | Fine Mesh Diamond | High Flow |
| Glass Subway | Low / Brittle | Specialty Glass Blade | Constant Immersion |
| Marble Subway | Variable | Soft Bond Diamond | Low Flow |
The 1/8 inch that ruins everything
Expansion gaps are required at every change of plane within a shower niche to prevent the tile from tenting due to thermal expansion. If you butt the tiles tight against the corners, the house will move and the tile will crack. It is a physical certainty. You need a minimum of an eighth of an inch gap at every internal corner. This gap must be filled with 100 percent silicone sealant, not cementitious grout. Grout is rigid. Silicone is flexible. I have seen beautiful modern showers ruined in six months because the installer grouted the inside corners of the niche. When the wood studs behind the wall swell with the summer humidity, they push against the tile. Without that flexible joint, the tile has nowhere to go but out. Use spacers even in the niche. Do not eyeball it. Your eyes are lying to you after eight hours on a job site.
The molecular bond of modified thinset
Using a high-polymer modified thin-set ensures that your subway tiles stay adhered to the vertical surfaces of the niche without sagging. The chemistry of the mortar is just as important as the precision of the cut. You want a mortar that has a high suction or non-sag rating. If the tile slides down even a millimeter while the mortar is wet, your perfectly cut miter will be ruined. I mix my thin-set to the consistency of peanut butter. If it is too runny, the moisture will seep into the ceramic biscuit and weaken the glaze bond. If it is too dry, it won’t wet out the back of the tile, leading to hollow spots. In regions like the humid Southeast, the drying time is doubled. In the dry air of the high desert, you might need to damp the back of the tile so it doesn’t suck the moisture out of the mortar too fast. This is why pros get paid the big bucks. We understand the weather.
“Tile is a permanent finish that requires a temporary mind for the installation process; check your work at every step.” – TCNA Installation Handbook
Essential tools for niche tile cutting
- Wet saw with a sliding table for precise linear travel
- Variable speed angle grinder with a 4 inch diamond blade for notches
- Diamond sanding pads (200 and 400 grit) for smoothing cut edges
- Stainless steel square for checking niche framing
- Microfiber towels for immediate removal of tile slurry
- High-quality spacers to maintain the 1/8 inch expansion gap
The ghost in the expansion gap
Visible edges of cut subway tiles must be polished with a diamond hand pad to remove the factory micro-bevel that was lost during the cut. When you cut a tile, you leave a sharp, square edge. The factory edges have a slight radius. If you put a cut edge next to a factory edge, the light will hit them differently and the cut edge will look dark. This is the ghost in the gap. I take a 400 grit diamond pad and give the cut edge a quick swipe at a forty five degree angle. This mimics the factory bevel. It makes the transition between the niche return and the face wall look like it was made in a factory. It is these small details that separate a handyman from a master installer. If you are working on baseboards makeover ideas to elevate your space, you know that the transition is everything. The same applies to the niche.
Final checks for the master installer
Before you apply the grout, you must clean every single joint with a utility knife and a vacuum to ensure full depth penetration. If there is thin-set taking up half the joint, your grout will be thin and will flake out within a year. I spend as much time cleaning joints as I do laying tile. If the grout fails, moisture gets behind the tile. Even with a waterproof membrane, constant moisture will lead to mold growth in the mortar bed. This is how you end up needing how to refresh grout without replacing it guides. Do it right the first time. Check the pitch of the bottom shelf of the niche. It must slope toward the shower floor by at least a sixteenth of an inch. If water stands in the niche, it will eventually eat through the silicone and the grout. Physics always wins. Gravity must be your partner, not your enemy. Once the tile is set and the grout is cured, use a high-quality sealer to protect the porous ceramic biscuit from the harsh chemicals of modern soaps.