
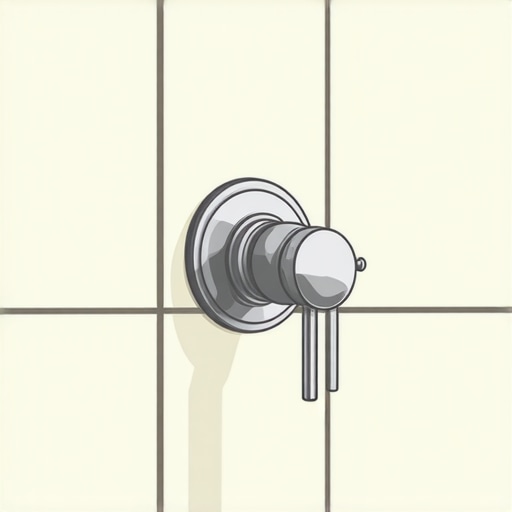
The substrate failure that ruins luxury bathrooms
To tile around a shower valve handle successfully, you must ensure the substrate is perfectly level and waterproofed with a liquid membrane or bonded sheet. A precise hole cut using a diamond grit hole saw is the only way to maintain the structural integrity of the ceramic or porcelain assembly. Most guys skip the leveling compound. They think the underlayment will hide the dip. It won’t. I spent three days grinding concrete on a job last month just so the floor wouldn’t click like a castanet. That same philosophy applies to your shower walls. If your cement board is waving like a flag in the wind, your tile will crack at the weakest point. The weakest point is almost always the hole you cut for the valve. When you are looking at showers that wow modern designs for 2025, you are looking at precision engineering, not just pretty colors. The valve handle is the mechanical heart of the system. It vibrates. It experiences thermal expansion as hot water rushes through the copper. If your tile is tight against that valve, the vibration will eventually cause a hairline fracture that spreads across the entire wall. You need a 1/8 inch gap. That gap is the difference between a lifetime installation and a callback in six months.
The hidden failure of unsealed substrates
Substrate preparation requires a minimum of two coats of ANSI A118.10 compliant waterproofing membrane applied over a stable cementitious backer unit. This creates a monolithic barrier that prevents capillary action from drawing moisture into the wall cavity behind the valve handle. You have to understand the chemistry of the bond. When you apply a modified thin-set, you are relying on polymer chains to grip the microscopic pores of the tile and the substrate. If there is dust from your hole saw on the back of the tile, that bond fails. I see it every week. A guy cuts a perfect hole, gets excited, and slaps it on the wall. Three years later, the tile pops off because the dust acted as a release agent. You need a wet sponge. Wipe the tile. Wipe the wall. The moisture in the thin-set needs to stay in the thin-set to cure properly. In dry climates like Phoenix, the wall will suck the water out of your mortar before the crystals can grow. This leads to a soft, chalky bond that cannot support the weight of heavy porcelain. For those working with showers with a style trendy ideas for small bathrooms, every square inch of bond strength matters because the tiles are often large format and heavy.
“A floor is only as good as the subfloor beneath it; deflection is the enemy of every joint.” – Master Flooring Axiom
The tool selection that defines the pro
Using a diamond hole saw with a water cooling system prevents thermal shock and edge chipping during the tile cutting process. Avoid using grinders for circular cuts as they create jagged edges that concentrate stress and lead to eventual tile failure under thermal load. I have seen people try to use tile nippers to nibble a hole for a shower valve. It looks like a rat chewed through the ceramic. Not only is it ugly, but those jagged edges are structural liabilities. A smooth, circular cut distributes pressure evenly. When the shower valve heats up and expands, it needs that even distribution. If you are using a grinder, you are creating micro-fractures you can’t even see. Then, a year later, the homeowner hears a pop while taking a hot shower. That is the sound of your mistake. You also need to consider the RPM of your drill. Too fast and you burn the diamond bit. Too slow and you catch the edge and snap the tile. It is a dance of physics and patience. This level of detail is what separates a mechanic from a handyman.
| Tool Type | Precision Level | Risk of Cracking | Best Use Case |
|---|---|---|---|
| Diamond Hole Saw | High | Low | Standard Valve Stems |
| Angle Grinder | Medium | High | Large Mixing Valves |
| Tile Nippers | Low | Very High | Emergency Small Trims |
| CNC Waterjet | Extreme | None | Custom Mosaic Slabs |
The chemistry of the modified thin-set bond
Modified thin-set mortars contain powdered polymers that increase shear strength and flexibility, allowing the tile to withstand the vibration of the plumbing fixtures. ANSI A118.4 standards dictate the minimum performance requirements for these adhesives in wet environments. When you mix your mortar, you aren’t just making mud. You are triggering a chemical reaction. If you over-mix it, you entrain too much air and weaken the structure. If you under-mix it, the polymers don’t hydrate. I always tell the new guys to let it slake. Let it sit for ten minutes so the chemistry can happen. Then remix it without adding more water. If you add water after it starts to set, you kill the strength. It becomes a glorified paste. Around a shower valve, you need maximum grab. The tile is often small and has more cut surface area than solid surface. This makes it prone to slipping. Use a 1/4 inch by 3/8 inch notch trowel to ensure you get at least 95 percent coverage. In a wet area, anything less than 95 percent coverage is a violation of TCNA standards. Air pockets behind the tile collect condensation. That condensation turns into mold. That mold eats your grout restoration secrets for long-lasting results before you even have a chance to enjoy the bathroom.
- Measure the distance from the edges of the neighboring tiles to the center of the valve.
- Mark the tile with a wax pencil, accounting for the 1/16 inch grout joint.
- Secure the tile to a piece of scrap plywood to prevent vibration during the cut.
- Submerge the drill bit in water or use a continuous spray to keep the diamonds cool.
- Ease the drill into the tile at a 45 degree angle to start the groove before leveling out.
- Clean the back of the tile thoroughly to remove all slurry before back-buttering.
The ghost in the expansion gap
Maintaining a clear expansion gap between the tile edge and the plumbing fixture is required to prevent pressure-induced cracking. This gap must be filled with 100 percent silicone sealant rather than cementitious grout to allow for movement. Grout is rigid. It does not move. If you grout right up to the valve, the first time that valve turns, it will push against the grout, which pushes against the tile. Something has to give. It is usually the tile. I have spent years fixing floors and walls where people thought grout was a universal filler. It isn’t. You need movement joints. This is especially true if you are integrating chic baseboard designs that transform rooms in 2025 nearby. The transition from the wall to the floor needs that same flexibility. Use a silicone that matches your grout color. It provides a waterproof seal that moves with the house. If you use cheap caulk, it will shrink and pull away in six months. Then you have water getting into your wall, rotting out the studs. I once pulled a shower apart where the studs were so soft I could poke a screwdriver through them. All because the guy didn’t leave a gap at the valve. It is a small detail with massive consequences.
“The assembly is a system, and failure in one component is a failure of the whole.” – TCNA Handbook Principle
Why your subfloor is lying to you
Even vertical walls rely on the stability of the subfloor and the floor-to-wall transition to prevent grout cracking and tile delamination. If the floor joists have too much deflection, the vertical tile stack will eventually buckle or shear at the lowest point. People think because they are working on a wall, the floor doesn’t matter. They are wrong. The weight of the tile stack rests on that first row. If the floor flexes, that weight shifts. It creates a domino effect. If you are doing a full renovation, you better check the L/360 deflection rating of those joists. If you are putting down heavy stone, you might even need L/720. I have seen beautiful tile jobs destroyed because the installer didn’t want to crawl into the basement and sister a few joists. They think the how to refresh grout without replacing it guide will save them later. It won’t save a structural failure. You have to build from the bottom up. That means a solid foundation, a level substrate, and a waterproof envelope. Only then do you worry about the aesthetic of the tile. Don’t be the guy who builds a mansion on a swamp. Check your levels. Grind your high spots. Fill your low spots. It is boring work, but it is the work that lasts.