
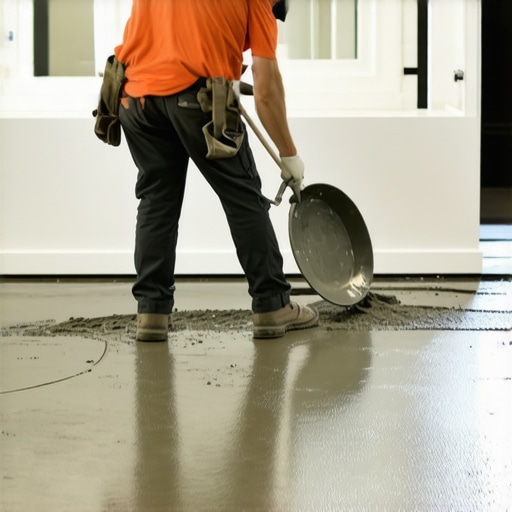
Most guys skip the leveling compound. They think the underlayment will hide the dip. It won’t. I spent three days grinding concrete on a job last month just so the floor wouldn’t click like a castanet. I have spent twenty five years on my knees, smelling like WD-40 and oak dust, and I can tell you that a bathroom floor is a structural engineering project, not a weekend craft session. If you think you can just slap down some tile because the room is small, you are setting yourself up for cracked grout and snapped locking tabs. The physics of a small bathroom are actually more demanding than a large living room because the concentrated weight of fixtures like toilets and vanities puts immense pressure on every square inch of that substrate.
The myth of the flat enough bathroom floor
Self leveling underlayment is a specialized hydraulic cement designed to create a perfectly flat plane by using gravity and liquid flow. It is not a cosmetic filler. In small bathrooms, it compensates for the natural dips in plywood or the uneven humps in old concrete slabs to prevent tile failure. Most homeowners believe that because a bathroom is only forty or fifty square feet, a little slope toward the drain is fine. It is not. If your subfloor is out of level by more than an eighth of an inch over ten feet, your tile will lippage. That means one edge of the tile sits higher than the neighbor. In a small space, you will trip on it every time you step out of the shower. I have seen fifteen thousand dollar wide plank walnut floors cup like potato chips because the installer ignored the humidity and the subfloor prep. In a bathroom, the moisture is your primary enemy. You need a rock solid base that does not move, does not flex, and does not allow water to pool under the surface. This is why self leveling compound is a requirement, not an option.
“A floor is only as good as the subfloor beneath it; deflection is the enemy of every joint.” – Master Flooring Axiom
The chemical reality of your bathroom subfloor
Underlayment chemistry involves a complex balance of Portland cement, calcium aluminate, and high performance polymers that determine the bond strength. The water to powder ratio must be exact to ensure the mixture achieves the necessary compressive strength of at least 3,500 pounds per square inch. When you mix a bag of self leveler, you are initiating a hydration reaction. If you add too much water, the polymers will float to the top and create a chalky, weak surface that will flake off the moment you try to apply thinset. If you use too little, the product will not flow, leaving you with a lumpy mess that requires a concrete grinder to fix. I always use a measured bucket and a high speed drill with a specialized mixing paddle. You want the consistency of a heavy cream. In small bathrooms, the perimeter is your biggest hurdle. You must install foam expansion strips around the edge. If the leveler touches the drywall directly, it will wick moisture into the studs and create a bridge that transfers vibration from the floor to the walls. This leads to those annoying squeaks every time you walk past the sink.
| Property | Standard SLU | High Flow SLU | Fiber Reinforced |
|---|---|---|---|
| Compressive Strength | 3500 PSI | 4500 PSI | 5000+ PSI |
| Cure Time for Tile | 24 Hours | 4 Hours | 12 Hours |
| Maximum Thickness | 1 Inch | 2 Inches | 1.5 Inches |
| Best Use Case | General Floors | Deep Dips | Plywood Subfloors |
Why primers are non negotiable for a lasting bond
Primer acts as the bridge between your old subfloor and the new leveling layer to prevent the leveler from drying too quickly. It seals the pores of the wood or concrete to stop air bubbles from rising and creating pinholes in your finished floor surface. I have walked onto too many jobs where the guy before me just poured the leveler onto dry plywood. The wood sucked the moisture out of the cement instantly. The result was a brittle layer that cracked into a thousand pieces within a month. You must use a high solids acrylic primer. Apply it with a soft bristle broom or a roller. It should look like a thin coat of white glue. Wait for it to become tacky. If it dries completely, you have to reapply. In the world of high end bathroom design, such as those found in showers with a style trendy ideas for small bathrooms, the precision of this bond is what determines if your shower threshold remains waterproof or becomes a leak point. You are building a foundation. Do not cut corners on the glue that holds it all together.
The one eighth inch that ruins everything
Flatness is measured by a ten foot straightedge where no gap greater than one eighth of an inch should exist between the tool and the floor. This precision is required to ensure that large format tiles sit flush and do not crack under point loads. Most people assume that a small room does not need this level of scrutiny. They are wrong. When you install a toilet, you are bolting a heavy ceramic object to the floor. If the floor is not flat, the toilet will rock. That rocking breaks the wax ring seal. Once that seal breaks, sewer gas and water start leaking into your subfloor. This is how rot starts. I have replaced entire bathroom floors because a quarter inch dip under the toilet flange was ignored during the prep phase. We use leveling pins, which are small plastic sticks that you cut to the height you need. You scatter them across the floor, and you pour the liquid until the heads of the pins disappear. It is the only way to be sure you are dead level. This level of detail is why professionals charge more. It is about the things you will never see, like the structural integrity of the bond.
“Substrate preparation is the most critical component of a successful tile installation; failure to address flatness will lead to bond failure.” – Master Flooring Axiom
Strategic prep for modern bathroom fixtures
Modern bathroom fixtures require a substrate that is both level and structurally rigid to support high weight densities. This involves checking for joist deflection and ensuring the subfloor thickness meets the minimum requirements of the Tile Council of North America. If you are planning a renovation with showers that wow modern designs for 2025, you are likely looking at heavy glass doors and stone bases. These items do not tolerate movement. If your subfloor flexes, your grout will turn to powder. I always tell my clients that the pretty tile is just the skin. The underlayment is the bone. If the bones are weak, the skin will sag and tear. You should also consider the height of your transition. A thick layer of self leveler might raise the floor high enough that you need to trim your door or rethink your chic baseboard designs that transform rooms in 2025 to hide the gap. Managing the height at the doorway is a technical skill that separates the pros from the amateurs.
- Test the subfloor for moisture before pouring anything.
- Seal all holes in the subfloor with spray foam or caulk to prevent the leveler from leaking into the ceiling below.
- Use a gauge rake to spread the material evenly across the room.
- Run a spiked roller through the wet mixture to release trapped air bubbles.
- Keep the room temperature between 50 and 80 degrees Fahrenheit for a proper cure.
The relationship between levelers and baseboards
A perfectly level floor creates a tight union between the flooring material and the baseboard for a high end finished look. This eliminates the need for ugly shoe molding or quarter round that often masks poor installation. When the floor is wavy, your baseboards will show huge gaps. I hate seeing a beautiful piece of trim with a quarter inch of caulk stuffed under it because the installer was too lazy to level the slab. If you are looking for baseboards makeover ideas to elevate your space, start with the floor. A flat floor allows the trim to sit flush. This is especially vital in small bathrooms where every detail is magnified. You want the eye to follow the clean lines of the tile into the wall, not get stuck on a messy gap. It also makes cleaning much easier. Dirt and hair love to collect in those gaps under the trim. If you want a floor that stays clean, you need a floor that is flat. You can find more on keeping things tidy with tile cleaning tips for a sparkling bathroom in 2025.
The impact of leveling on grout and maintenance
Proper leveling extends the life of your grout by preventing the individual tiles from moving independently when walked upon. This structural stability prevents the hairline cracks that allow water to penetrate the substrate. Grout is not a structural adhesive. It is a filler. If the tiles are shifting because they are sitting on a hollow spot, the grout will fail. Once the grout fails, you are looking at grout restoration secrets for long lasting results just to keep the floor together. In a bathroom, water is everywhere. A cracked grout joint is a highway for water to reach your plywood. Self leveling underlayment creates a monolithic surface that supports the tile across its entire back. This is why I use a notched trowel and always back butter my tiles. You want one hundred percent coverage. No air pockets. No voids. Just a solid, unyielding mass of stone and cement. That is how you build a bathroom that lasts fifty years instead of five. It is about the grit, the precision, and the refusal to accept anything less than perfection beneath your feet.