
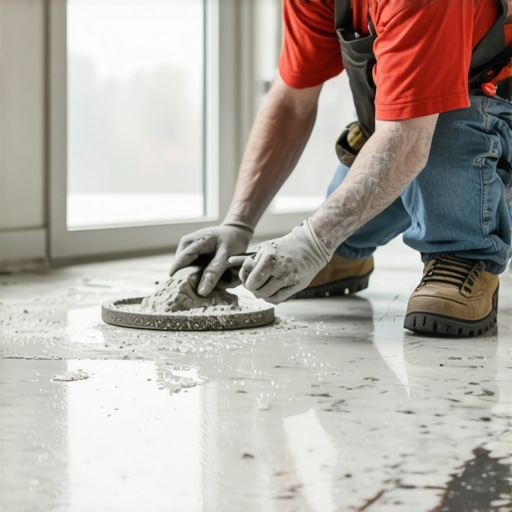
The subfloor secret that determines your marble success
Most guys skip the leveling compound. They think the underlayment will hide the dip. It won’t. I spent three days grinding concrete on a job last month just so the floor wouldn’t click like a castanet. When installing marble in wet areas like showers, the best thinset is an ANSI A118.15 compliant white polymer modified mortar. These premium thinsets provide the necessary bond strength and flexibility to handle the natural expansion and contraction of stone while preventing the moisture related staining that ruins expensive Carrara or Thassos slabs. Using a grey mortar or a cheap unmodified mix is the fastest way to watch your high end investment turn into a muddy, blotchy disaster within six months of the first shower. I have seen it happen too many times. Homeowners spend five figures on stone only to have a contractor use a five dollar bag of mud. It is a tragedy of physics and chemistry. The weight of marble combined with its porous nature requires a mortar that can literally reach into the microscopic pores of the stone and lock on for dear life. You need to understand that marble is not a static object. It is a thirsty, metamorphic rock that breathes. If you do not respect that, the floor will fail. I have walked onto jobs where a beautiful marble floor was literally floating because the installer did not understand the difference between mechanical and chemical bonds. You need both. That is what the high polymer count provides. It creates a bridge between the rigid substrate and the semi rigid stone. This is the foundation of every high quality installation.
“A floor is only as good as the subfloor beneath it, deflection is the enemy of every joint.” – Master Flooring Axiom
The chemistry of a waterproof bond in marble showers
Marble tile in wet environments requires white thinset with high polymer content to prevent staining and ensure a permanent bond. White mortar is mandatory because marble is translucent. If you use grey thinset, the dark minerals will telegraph through the stone, making your white marble look like it has a permanent shadow or a mold problem. This is a common mistake that is impossible to fix once the mortar cures. The polymer modification is equally vital. In a shower, the temperature fluctuates rapidly. The stone expands when the hot water hits it and contracts when it cools. Without high grade polymers, the thinset is too brittle to handle this movement. Eventually, the bond snaps. You might not see it immediately, but you will hear it. That hollow sound when you tap a tile is the sound of a failing installation. For those looking for showers that wow modern designs for 2025, the technical side of the mortar is more important than the aesthetic of the tile itself. You want a mortar that meets the ISO 13007 classification of C2TES1. This indicates a cementitious adhesive with improved bond strength, reduced slip, and high flexibility. It is the gold standard for stone. When you are working in a wet area, you are fighting hydrostatic pressure and constant moisture cycles. The mortar must be able to withstand being saturated without losing its structural integrity. Cheap mortars often emulsify or soften when exposed to constant water, leading to loose tiles and cracked grout. Speaking of grout, you should check out these grout restoration secrets for long lasting results to keep your wet areas looking sharp for decades. The interaction between your thinset and your grout is a symbiotic relationship. If the thinset fails, the grout cracks. If the grout cracks, water gets under the tile and attacks the thinset. It is a cycle of destruction that only quality materials can stop.
| Mortar Type | ANSI Standard | Best Use Case | Flexibility Rating |
|---|---|---|---|
| Unmodified Thinset | A118.1 | Ceramic on concrete only | Low |
| Standard Modified | A118.4 | Porcelain and basic stone | Medium |
| High Performance | A118.15 | Large format marble and wet areas | High |
| Large and Heavy Tile (LHT) | A118.15 H/T | Thick stone slabs on walls | Very High |
Why your subfloor is lying to you
Every subfloor looks flat until you put a ten foot straightedge on it. I have never seen a slab that was ready for marble out of the box. You have to work for it. Marble has zero tolerance for deflection. If your subfloor flexes even a fraction of an inch, the marble will crack. This is why we use the 1/8 inch in 10 feet rule. If there is a dip larger than that, you are asking for trouble. You must use a high quality self leveling underlayment before you even think about opening a bag of thinset. This creates a monolithic surface that supports the weight of the stone. I have spent years explaining to clients why I am charging them an extra thousand dollars for floor prep. It is because I do not want to come back in two years to replace a cracked floor. In places where humidity is high, like the coastal regions of the South, this is even more vital. The moisture in the air can actually affect how the leveling compound cures. You need to monitor the ambient temperature and the humidity of the slab. I use a pinless moisture meter on every single job. If that slab is holding too much water, the thinset will not bond correctly. It is like trying to glue something to a wet sponge. It just does not work. This level of detail is what separates a master installer from a guy with a truck and a bucket. We are engineers of the surface. We are managing the physics of the home. When you are looking at chic baseboard designs that transform rooms in 2025, remember that the baseboard sits on the floor. If the floor is wavy, the baseboard will have gaps. Everything is connected. A bad floor ruins the trim, the paint, and the overall feel of the room.
The hidden danger of thick underlayments
While most people want the thickest underlayment, too much cushion actually causes the locking mechanisms on LVP to snap under pressure, and similar logic applies to stone. You do not want a thick, squishy membrane under marble. You want a rigid, uncoupling membrane. These membranes allow the subfloor to move independently of the tile. If the house settles, the membrane shears, protecting the stone from the stress. But you have to use the right thinset to bond the membrane to the floor and the stone to the membrane. Most manufacturers require a highly modified thinset for this application. If you get this wrong, you have created a sandwich of failure. The layers will delaminate and the whole floor will lift up. It is a nightmare scenario that requires a complete tear out. I always tell people to follow the TCNA Handbook. It is the bible of the industry. It tells you exactly which mortar to use for every substrate. Do not guess. Do not listen to the guy at the big box store who tells you that all thinset is the same. It is not. The chemical composition of a 30 dollar bag of mortar is vastly different from a 15 dollar bag. The cheaper stuff has more sand and less resin. The expensive stuff is packed with polymers that create a rubberized bond. That is what you want for marble. You want that floor to be able to wiggle just a tiny bit without breaking. This is especially true in bathrooms where the floor might be integrated with showers with a style trendy ideas for small bathrooms. The transitions between the shower pan and the bathroom floor are prime spots for cracking. A high performance thinset is your only insurance against those cracks.
- Verify subfloor flatness within 1/8 inch over 10 feet.
- Use only white ANSI A118.15 thinset for all marble.
- Ensure 100 percent mortar coverage on the back of each tile.
- Apply a waterproofing membrane in all wet zones.
- Allow for a 24 hour acclimation period for the stone in the room.
- Check the moisture content of the concrete slab before installation.
The ghost in the expansion gap
You have to leave a gap at the perimeter. I see guys jam marble tight against the wall all the time. This is a death sentence for the installation. The house is going to move. The seasons change, the wood framing swells, and the concrete shrinks. If the marble has nowhere to go, it will tent. It will literally pop off the floor. You need a 1/4 inch gap at every wall. This gap is hidden by your baseboards or your wall tile. It is a simple thing, but it is the difference between a floor that lasts 50 years and one that lasts five. I often suggest people look at baseboards makeover ideas to elevate your space to see how to properly cover these essential expansion joints. It is about the harmony of the build. If you are doing a high end bathroom, you are probably also looking for tile cleaning tips for a sparkling bathroom in 2025 because marble is high maintenance. You cannot use harsh chemicals on it. The same goes for the mortar. You want a mortar that does not have high alkaline levels that could react with the stone. Once the floor is down, the work is not over. You have to seal that marble and you have to maintain the grout. If you need help with existing installations, you can find out how to refresh grout without replacing it to save a floor that was installed correctly but looks tired. But for a new installation, start with the best thinset. It is the only way to sleep at night. If you have questions about specific stone types or regional moisture issues, feel free to contact us for expert advice. We have seen every mistake in the book and we know how to avoid them. For more information on our standards, visit our privacy policy page. Marble is a legacy material. Treat it with the respect it deserves by using the right chemistry and the right technique from day one.