
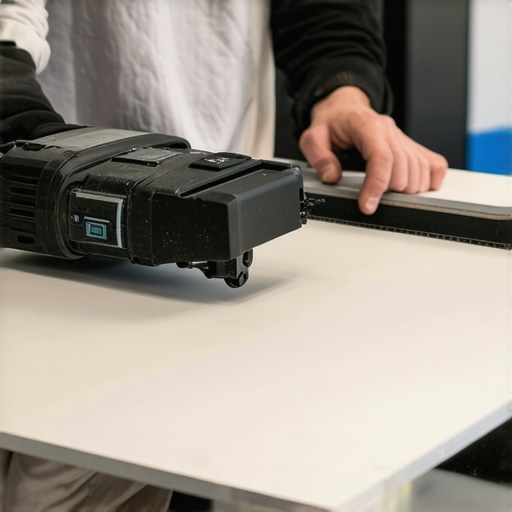
The subfloor secret that precedes the cut
Cutting large format tiles without a wet saw requires a high quality manual snap cutter and a steady hand with a diamond blade grinder. Success depends on understanding that porcelain is a dense, vitrified material that responds better to tension and scoring than it does to the abrasive heat of a dry saw. By using a professional grade manual cutter, you achieve cleaner lines without the slurry mess of water. I spent three days grinding concrete on a job last month just so the floor wouldn’t click like a castanet. Most guys skip the leveling compound. They think the underlayment will hide the dip. It won’t. If your subfloor has a 1/8 inch deviation over 10 feet, those large format tiles will lip or crack regardless of how perfect your cut was. You can find more about preparing your space in our guide on chic baseboard designs which often hide the final expansion gaps. I have seen fifteen thousand dollar projects ruined because an installer thought they could bridge a low spot with extra thinset. It does not work that way. The physics of large format tile demand a substrate that is flatter than a billiard table. When you are dealing with pieces that are 24 by 48 inches, every micro-ripple in the concrete becomes a fulcrum for a future fracture.
The physics of a clean break
A manual snap cutter works by creating a score line that acts as a controlled fault line in the tile structure. When pressure is applied via the breaking bar, the tension travels through the porcelain body along that microscopic scratch. This is often superior to a wet saw for straight cuts because it prevents the edge chipping caused by blade vibration. You need to ensure your scoring wheel is sharp. A dull tungsten carbide wheel will skip, creating jagged edges that no amount of grout can hide. If you are working on showers that wow, you know that clean edges are the difference between a master finish and a hack job. The mechanics of the snap are about leverage. You aren’t muscling the tile. You are persuading it to fail at a specific point. If the tile is particularly thick, you might need to score it twice, though most pros advise against this to avoid double tracking. Double tracking leads to a messy break that requires excessive sanding with a diamond pad. I always tell my apprentices that the snap cutter is a surgical tool, not a sledgehammer. It requires a certain finesse and an ear for the sound of the score. A good score sounds like a crisp zipper, not a grinding stone.
“A floor is only as good as the subfloor beneath it; deflection is the enemy of every joint.” – Master Flooring Axiom
Why your subfloor is lying to you
Subfloor deflection and unevenness are the primary reasons large format tiles fail during or after installation. You must check the L/360 standards for floor joist deflection to ensure the structure can handle the weight of heavy porcelain. If the floor bounces, the tile will snap. I have walked onto jobs where the homeowner was convinced the subfloor was level, only to find a half inch dip in the center of the room. We had to haul in bags of self-leveler and wait for the moisture levels to stabilize before even thinking about a layout. This prep work is tedious but mandatory. When you finally get to the cutting, you will realize that a flat floor makes the cutting process irrelevant if the tile cannot sit flat. For those looking to finish their edges properly, checking out baseboards makeover ideas can help you plan your perimeter cuts. Large format tile is unforgiving. If you have a hump in the floor, the tile will rock. If you apply pressure to one end while the other is unsupported, you will get a diagonal crack that ruins a sixty dollar piece of stone. The subfloor is the foundation of your reputation. Treat it with the respect it deserves, or it will bite you during the final punch list.
| Tile Property | Manual Cutter Result | Wet Saw Result | Grinder Result |
|---|---|---|---|
| Edge Smoothness | Very High | Moderate | Low |
| Dust Production | Zero | Wet Slurry | Extreme |
| Intricate Notches | Impossible | Limited | High |
| Setup Time | Seconds | 15+ Minutes | Minutes |
The diamond blade dance for intricate notches
When you cannot use a snap cutter for L-cuts or U-cuts, a 4.5 inch angle grinder with a continuous rim diamond blade is your best alternative. You must use a dry cut blade specifically rated for porcelain to manage the heat buildup without water cooling. The secret is to cut from the back of the tile first for about 20 percent of the depth, then flip it and finish from the face to prevent surface blowouts. This is especially important when fitting tiles around plumbing in showers with a style that uses large slabs. The grinder is a beastly tool that produces clouds of silica dust. Wear a respirator. I have seen old timers coughing up dust for weeks because they thought they were too tough for a mask. The grinder allows you to navigate around heat vents and door jambs where a snap cutter is useless. You must maintain a high RPM and let the blade do the work. Never force it. If the blade starts to glow red, you are moving too fast and will likely crack the tile from thermal shock. It is a slow, methodical process that requires patience and a very steady hand. Once the cut is made, use a 200 grit diamond sanding pad to smooth the edge so it looks factory fresh.
Managing the expansion gap ghost
Every large format installation requires a minimum 1/8 inch expansion gap at the perimeter and consistent grout joints to manage thermal expansion. Failing to provide this gap will cause the tiles to tent or buckle as the house shifts and the temperature fluctuates. This is why properly installed baseboards are so important, as they cover this necessary structural void. I once saw a floor pop up like a tent in the middle of a summer heatwave because the installer had pushed the tiles tight against the drywall. There was nowhere for the energy to go. You also need to consider the type of grout you use. For large tiles, a high performance, polymer-modified grout is often required to handle the stresses of the large surface area. If you find your old joints are failing, you might need to look into grout restoration secrets to fix the damage. Movement joints are not optional. They are an engineering requirement. The Tile Council of North America recommends movement joints every 20 to 25 feet in each direction for interior installations. Ignore this, and you are just waiting for a disaster to happen. The ghost in the expansion gap is the silence of a floor that stays where it belongs.
- Always use a high density foam underlayment for sound dampening.
- Ensure the scoring wheel is lubricated with light machine oil.
- Use a suction cup handle to move large format tiles safely.
- Check for 95 percent mortar coverage to avoid hollow spots.
- Acclimate the tile to the room temperature for 48 hours.
The 1/8 inch that ruins everything
Precision in measurement is the difference between a professional layout and a chaotic mess of sliver cuts. When working with large format, a laser level is your best friend to ensure that your first row is perfectly square. If you start just a fraction of an inch off, by the time you reach the other side of a large room, your gap will have grown to an unmanageable size. This is particularly true when you are trying to maintain thin grout lines. If your tiles are not perfectly rectified, meaning their edges are not ground to an exact size, you will have to increase your joint width to hide the size variations. If your tile edges are messy, learning how to refresh grout won’t save you from a poor layout. I always dry lay a few rows first to see how the pattern falls. You want to avoid having a 1 inch strip at the door. It looks amateurish. Instead, shift your starting line so that you have a substantial cut on both sides. This balanced look is what separates the masters from the apprentices. Precision is not just about the cut, it is about the plan. You spend three hours planning and one hour cutting. That is the ratio for success in this business. Keeping your tiles clean during the process is also vital, and you can find advice on that in our tile cleaning tips section. Quality is found in the details that most people never see.
“A floor is only as durable as the bond between the substrate and the tile body.” – TCNA Standard Handbook
The chemistry of the bond
Large format tiles require Medium Bed Mortar rather than standard thinset to support the weight and prevent the tile from sinking into the bed. This mortar has different chemical properties that allow it to be applied thicker, up to 3/4 of an inch, without shrinking as it cures. This shrinkage is what causes lippage, where one edge of a tile is higher than its neighbor. You must use the back buttering technique, applying a thin layer of mortar to the back of the tile as well as the floor, to ensure 100 percent coverage. This is especially true in wet areas like modern showers where any void behind the tile can collect water and lead to mold or bond failure. The adhesive bond is a chemical reaction. If you mix your mortar too thin, it loses its structural integrity. If you mix it too thick, it won’t wet out properly on the tile surface. I always use a mixing paddle and a high torque drill to ensure the consistency is like peanut butter. Let it slake for five minutes, then remix. This allows the polymers to fully activate. If you skip the slake, your mortar will be brittle. For those looking for more ecological options, check out eco-friendly tile solutions that utilize low VOC adhesives. Your floor is a massive chemical sandwich. Each layer must be perfectly prepared for the whole thing to hold together for the next fifty years.