
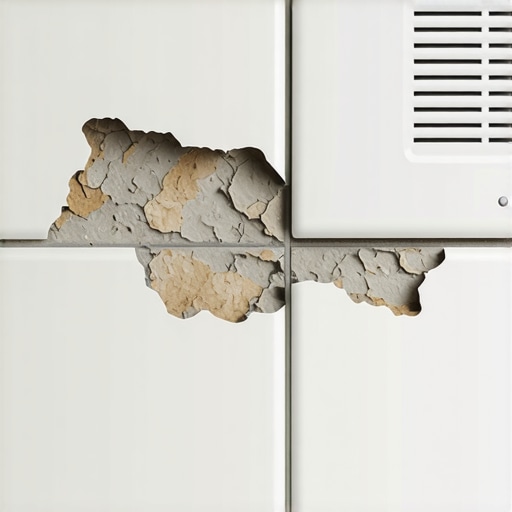
I have spent twenty five years on my knees with a moisture meter and a level. I have smelled every type of adhesive and grinded every grade of concrete. Most guys skip the leveling compound. They think the underlayment will hide the dip. It won’t. I spent three days grinding concrete on a job last month just so the floor wouldn’t click like a castanet. That job taught me that floors are not decorations. They are structural engineering challenges. When a homeowner calls me because their bathroom tiles are clicking or popping near a heating vent, they expect a simple fix. They want a bit of glue and a prayer. But the reality is found in the physics of thermal expansion and the chemistry of hydration. Your floor is failing because it is fighting a war against your HVAC system. Tile and grout are rigid. Heat is a catalyst for movement. When those two forces meet at a metal vent boot, the bond usually loses. I have seen fifteen thousand dollar wide plank walnut floors turn into potato chips because of humidity, and I have seen ceramic tiles shatter because a vent was installed without a thermal break. This is about more than just aesthetics. This is about the fundamental integrity of your home substrate.
Thermal expansion destroys the bond near heat sources
Bathroom tiles loosen near heating vents because the rapid temperature fluctuations cause the tile and subfloor to expand at different rates. This creates shear stress that breaks the chemical bond of the thin set mortar. Rigid ceramic materials cannot absorb the movement of a shifting wooden subfloor or a metal vent boot. The constant cycle of heating and cooling creates a fatigue point where the adhesive eventually fails. This is not a defect in the tile itself. It is a failure of the installation system to account for the local climate of the room. When the furnace kicks on, the air coming through that vent is significantly hotter than the ambient floor temperature. This creates a localized heat zone. The tile expands. The wood subfloor beneath it, which reacts differently to heat and humidity, moves in its own way. Without an isolation membrane, that tile has nowhere to go but up. I have seen entire rows of tile lift because the installer did not leave a proper expansion gap at the perimeter. They tucked the tile tight against the metal boot. That is a rookie mistake. You need a buffer. You need to understand that materials grow when they get hot.
“A floor is only as good as the subfloor beneath it; deflection is the enemy of every joint.” – Master Flooring Axiom
The physics of subfloor register cuts and structural deflection
Subfloor integrity is compromised whenever a hole is cut for a heating register which increases local deflection. This extra bounce in the floor causes the grout to crack and the tile to lose its grip on the mortar bed. A bathroom floor needs to be stiff, following the L over 360 standard for ceramic installations. When you cut a four by ten inch hole in a sheet of plywood for a vent, you weaken that specific area. If there is no blocking between the joists, that vent area becomes a diving board. Every time you step near it, the floor flexes. Tile does not flex. It snaps or it lets go. I have pulled up hundreds of loose tiles where the thin set was still perfectly stuck to the tile but had completely released from the plywood. Why? Because the wood moved and the tile stayed still. You have to ensure that the subfloor around the vent is reinforced. I often tell guys to install 2×4 blocking underneath the vent hole to stop the bounce. If the subfloor moves even a fraction of an inch, the bond is toast. You can use the most expensive tile in the world, but if your subfloor is soft, your floor will fail. This is especially true in older homes where the floor joists are undersized or the subfloor is only a single layer of planking. You need a solid foundation before you even think about opening a bag of mortar.
Dehydration of the mortar bed near forced air
Heating vents cause premature desiccation of the thin set mortar during the installation process which prevents a full chemical cure. If the heat is running while the tile is being laid, the forced air sucks the moisture out of the adhesive before the cement crystals can grow and lock into the tile. This results in a soft, chalky bond that will fail within months. Many installers do not understand the chemistry of Portland cement. It does not dry, it hydrates. It needs that water to form a crystalline structure. If the vent is blowing hot, dry air across the wet mortar, the hydration process is cut short. This is why you often see the tiles closest to the vent failing first. They never had a chance to bond properly. You have to shut off the HVAC during the install and for at least twenty four hours after. I have walked onto jobs where the heat was cranked to eighty degrees to help the grout dry. That is the fastest way to ruin a floor. You want a slow, controlled cure. If the moisture leaves too fast, the bond strength is reduced by more than fifty percent. I have seen guys try to fix this by pouring more grout into the cracks, but that is just a bandage on a broken leg. The problem is the bond, not the surface.
Grout cracks and capillary action near the register
Grout around heating vents often turns to powder or cracks because the heat removes the internal moisture needed for structural stability. Once the grout fails, moisture from the shower or cleaning can seep under the tile and further degrade the adhesive. This creates a cycle of failure that is hard to stop. If you notice your grout needs restoration, it is often a sign that the tile is already moving. The heat from the vent makes the grout brittle. Brittle grout cannot handle the micro-movements of the house. You might think you can just learn how to refresh grout without replacing it, but if the tile is loose, new grout will just crack again in a week. I always recommend using a high performance epoxy grout or a polymer modified grout in high heat areas. These materials have a higher modulus of elasticity. They can handle a bit of the vibration and thermal swing. Standard sand and cement grout is just too stiff for a vent area. It is like putting glass between two moving plates. Eventually, the glass is going to shatter. You need something with a little bit of give. You need a product that can stand up to the dry heat of a furnace.
| Factor | Standard Thin-set | Polymer-Modified Thin-set | Epoxy Adhesive |
|---|---|---|---|
| Flexural Strength | Low | Medium-High | Very High |
| Thermal Resistance | Poor | Good | Excellent |
| Bond to Subfloor | Mechanical | Chemical and Mechanical | Chemical |
| Cure Time | 24 Hours | 24-48 Hours | 12-24 Hours |
Baseboards and perimeter movement at the wall
Baseboards often hide the fact that there is no expansion gap between the tile and the wall near the vent. Without a gap, the expanding tile hits the wall and buckles at its weakest point which is usually the vent cut out. A professional installer knows to leave at least a quarter inch gap at every vertical obstruction. You can cover this gap with chic baseboard designs, but the gap must exist beneath the wood. If you jam the tile tight against the wall, you are creating a ticking time bomb. In the winter, when the heat is blasting, that tile wants to grow. If it hits the wall, it has nowhere to go but up. This is the same logic used for baseboards makeover ideas. You have to consider the functionality of the transition. I see this all the time in small bathrooms. The space is tight, and the installer wants it to look clean, so they skip the expansion joint. Then the homeowner wonders why the floor is tenting in the middle of February. It is physics. You cannot argue with the expansion of solids. Use a color matched 100 percent silicone caulk in the perimeter joints instead of hard grout. Silicone is flexible. Grout is not. That small change can save an entire floor from failure.
“Tile requires a substrate that is both dimensionally stable and free of concentrated thermal stress.” – TCNA Technical Bulletin
The myth of the waterproof bathroom floor
Many homeowners believe that tile and grout are naturally waterproof but they are actually porous materials that allow vapor to migrate. Near a heating vent, this vapor can be driven into the subfloor by the heat, causing wood rot and further tile loosening. This is why high quality modern showers require a dedicated waterproofing membrane. If you do not have a moisture barrier under your bathroom floor, the humidity from the shower gets trapped. When the heat kicks on at the vent, it turns that moisture into steam. That steam pressure can actually help delaminate the tile. I have seen bathrooms where the subfloor was literally mush because the vent boot leaked moist air into the joist cavity. You have to seal your grout and you have to seal the area around the vent boot. Use a high quality silicone to bridge the gap between the metal vent and the tile. Do not let water get down into that hole. If you are designing trendy small bathrooms, do not forget the plumbing and HVAC penetrations. Those are the places where failures start. A floor is a system. If one part of the system lets water in, the whole thing eventually rots from the inside out.
Checklist for securing loose tiles near a vent
- Remove all old mortar and grout from the subfloor and the back of the tile.
- Vacuum the area to ensure no dust remains as dust acts as a bond breaker.
- Check the subfloor for deflection and reinforce with blocking if it bounces.
- Use a polymer-modified thin-set with high flexibility ratings.
- Back-butter the tile to ensure 100 percent adhesive coverage.
- Maintain a quarter inch expansion gap between the tile and the vent boot.
- Seal the joint between the tile and the vent with 100 percent silicone caulk.
- Wait at least 48 hours before turning the heating system back on.
Fixing the loose tile trap for good
The only way to permanently fix a loose tile near a heating vent is to address the movement and the adhesive quality simultaneously. You cannot just squirt some glue in the crack. You have to remove the tile and clean the substrate down to the bare wood or concrete. Use a diamond cup wheel to grind away the old thin set. This creates a mechanical profile that the new mortar can grab onto. I recommend using a liquid anti-fracture membrane in that area before relaying the tile. This membrane acts like a rubber gasket, absorbing the stress of the thermal movement so the tile does not have to. It is an extra step that most cheap contractors skip. But if you want a floor that lasts twenty years instead of twenty months, you do the work. Also, check the vent itself. Sometimes the metal boot is not secured properly and it vibrates. That vibration is like a jackhammer on your grout lines. Screw that boot down tight. If you follow these steps, you will not be calling me in two years to fix the same three tiles. You have to treat the cause, not just the symptom. Use a good tile cleaning routine once the repair is cured to keep the new grout looking sharp, but the real work is what happens underneath the surface. It is the grit, the grinding, and the chemistry that makes a floor stand the test of time. Don’t be the guy who thinks he can skip the prep. The subfloor always wins in the end.