
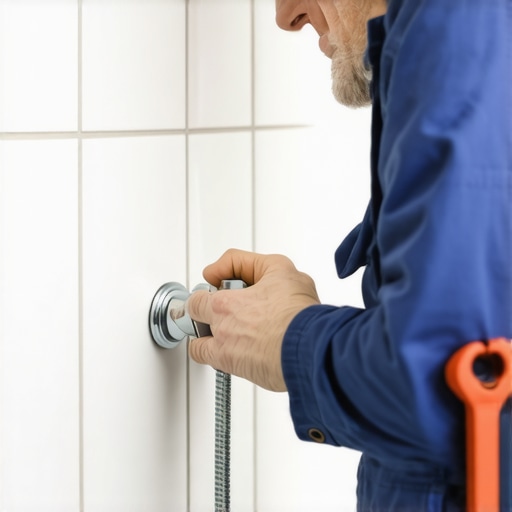
I spent three days grinding concrete on a job last month just so the floor wouldn’t click like a castanet. That experience taught me one thing. Precision in the sub-structure is the only thing that saves the finish. Most guys skip the leveling compound. They think the underlayment will hide the dip. It won’t. The same logic applies to your shower. I once walked into a house where a slow drip inside the wall rotted out the subfloor before the homeowner even saw a puddle. They thought the tile was a shield. It was not. Water is a persistent enemy. It finds every micro-fracture in your grout. When a shower valve starts leaking, your first instinct might be to grab a sledgehammer. Stop. You do not need to destroy your custom tile work to fix a valve. You need a surgical approach and the right engineering mindset. This is about the physics of the valve body and the chemistry of the seals.
The strategy of the remodel plate
Fixing a leaking shower valve without removing tile requires the use of a remodel plate or oversized escutcheon to provide access. This stainless steel hardware covers a larger hole cut into the shower wall substrate, allowing the cartridge replacement or valve repair without disturbing the surrounding porcelain or ceramic tile layout or waterproofing membrane.
A shower valve is a mechanical assembly buried in a masonry sandwich. When it fails, it is usually the cartridge or the O-rings. The industry does not want you to know that you can access these components from the front. If you have a small opening, you can enlarge it. The secret is the remodel plate. It is a large, decorative piece of metal that sits behind your handle. It covers the ugly hole you need to cut to get your tools inside. This plate must be sealed properly. If you do not seal the perimeter of that plate with a high-grade silicone, you are just inviting water to bypass your tile and rot your studs. In the humid environments like Houston, this rot happens fast. The wood becomes a sponge. Then the mold takes over. You need to understand the mechanical bond between the valve body and the cartridge. Most of these are held in by a retaining clip. If that clip is corroded, you are in for a fight. I always keep a pair of needle-nose pliers and a specific cartridge puller in my kit. These tools are non-negotiable.
The physics of the cartridge seal
Plumbing cartridges fail because of mineral calcification and rubber degradation over time. The O-rings lose their elasticity and the ceramic discs within the valve assembly become pitted from hard water minerals, leading to a constant drip that can erode the valve seat or damage the subfloor structure beneath the shower pan.
When we look at a valve cartridge under a microscope, we see a battleground. Hard water minerals like calcium and magnesium act like sandpaper. Every time you turn the handle, those minerals grind against the rubber seals. Eventually, the rubber tears. This is why your shower drips. The chemical bond of the lubricant also breaks down. You must use a silicone-based grease. Never use petroleum-based products on rubber seals. They will cause the rubber to swell and fail. This is the same reason why cheap underlayments fail in flooring. They use the wrong materials that react poorly to the environment. In a shower, the temperature fluctuations are extreme. The expansion and contraction of the brass valve body can be measured in microns, but those microns matter. If the cartridge is stuck, do not use brute force. You will snap the copper lines behind the wall. Then you really will be tearing out the tile. I have seen guys do this. They get frustrated. They pull too hard. The solder joint breaks. Now you have a flood inside the wall.
“A shower system is a managed environment where the interface of moisture and substrate must be absolute.” – Master Plumbing Axiom
Accessing the valve from the rear wall
Rear access plumbing repair involves cutting through the drywall of the room adjacent to the shower enclosure to reach the valve body. This method preserves the tile aesthetics and grout integrity while providing a clear workspace for soldering new connections or replacing the entire valve without impacting the bathroom finish or baseboards.
If your shower shares a wall with a closet or a hallway, you have hit the jackpot. Drywall is cheap. Tile is expensive. I would rather patch a hole in a bedroom wall than try to match 10-year-old grout. When you cut through the back, you can see the whole picture. You can see if the leak has traveled down to the chic baseboard designs in the next room. Water travels. It does not just sit there. It follows the line of the floor joists. By opening the back wall, you can also inspect the structural integrity of the studs. If they are wet, you need to dry them out with a fan before you seal it back up. This is the difference between a hack job and a master repair. You are looking for the “ghost in the expansion gap.” In flooring, we leave gaps for movement. In plumbing, we look for where the movement has caused a joint to fail. If you see green corrosion on the copper pipes, you have a slow leak. That is calcification at work.
| Component | Failure Mode | Repair Action |
|---|---|---|
| O-Ring | Friction tear | Lubricate with silicone grease |
| Ceramic Disc | Mineral buildup | Vinegar soak or replace |
| Rubber Seat | Compression set | Swap for new washer |
| Valve Stem | Calcification | Mechanical cleaning |
The ghost in the expansion gap
Structural movement in a home causes stress on plumbing joints and tile grout alike. Without a flexible sealant at the change of plane, the grout lines will crack, allowing moisture infiltration that can weaken the subfloor and lead to mold growth behind the baseboards and shower walls.
People think their houses are static. They are not. They are living, breathing things. They shift with the seasons. In the dry heat of Phoenix, the wood shrinks. In the humidity of the South, it expands. This movement puts stress on your shower valve. If the valve is not anchored properly to a 2×4 block, the simple act of turning the handle can stress the pipes. Over time, those pipes will leak. When you are fixing the valve, check the mounting. If it is loose, shim it. Use a piece of rot-resistant wood or a plastic shim. This prevents the mechanical vibration from loosening the seals. This is the same reason why I tell people to watch their baseboards makeover ideas for signs of gaps. A gap in the baseboard often means the floor is moving or the wall is bowing. In a shower, a gap in the grout means water is getting in. You should look at grout restoration secrets to ensure that once the valve is fixed, the wall remains watertight.
Tools for a non-destructive repair
Professional shower repair requires a cartridge puller, needle-nose pliers, and telescoping mirrors to inspect the valve body. Using the correct manufacturer-specific tool prevents stripping the valve stem and ensures the new cartridge seats perfectly against the internal gaskets for a leak-free seal.
- Shut off the main water supply and drain the lines by opening the lowest faucet in the house.
- Remove the shower handle and the escutcheon plate carefully to avoid scratching the finish.
- Identify the cartridge brand and model number stamped on the brass or plastic body.
- Use a cartridge puller to slowly extract the old unit without putting lateral pressure on the copper pipes.
- Inspect the internal valve body for pitting or mineral deposits that could compromise a new seal.
- Apply a generous coating of silicone plumbers grease to all new O-rings before installation.
- Reassemble the unit and test for leaks before replacing the decorative trim and sealing with silicone.
“Deflection in the wall assembly leads to stress on plumbing joints; water always finds the path of least resistance through the grout lines.” – TCNA Installation Standards
Why grout is not a structural sealant
Grout is a porous material designed to fill the joints between tiles, but it is not a waterproofing agent. Without a solid membrane or liquid-applied barrier behind the tile installation, water that escapes from a leaking valve will saturate the backer board and cause catastrophic failure of the shower system.
I have seen homeowners try to stop a valve leak by smearing more grout around the handle. It is a waste of time. Grout is basically sand and cement. It is like trying to stop a flood with a screen door. You need to fix the source. If your tile is looking dingy from all that water, you might want to look into how to refresh grout properly. But do not expect grout to do the job of a rubber gasket. The physics do not work. You have 60 pounds per square inch of water pressure pushing against that valve. A little bit of cement will not hold that back. Once the valve is fixed, make sure you use a high-quality caulk around the escutcheon. Leave a small gap at the very bottom of the plate. This is a weep hole. If the valve leaks in the future, the water will run out into the shower floor instead of being trapped behind the wall. This is a pro trick that most builders skip because they want it to look “seamless.” I hate that word. Nothing in construction is seamless. It is all about how you manage the seams.
Maintaining the shower environment
Long-term shower maintenance involves regular inspections of the caulk lines and grout integrity to prevent moisture damage. Utilizing proper cleaning agents prevents the degradation of seals and keeps the tile surface and baseboards free from mold and mineral buildup.
After you have successfully fixed the valve without tearing out the tile, you need to keep the area clean. Check out tile cleaning tips to find the right chemicals. Avoid harsh acids. They eat the grout and can damage the finish on your new remodel plate. If you are looking at showers that wow, you will notice they all have one thing in common. They are dry. They have good ventilation. Steam is just as dangerous as liquid water. It carries heat and moisture into the smallest cracks. Use your exhaust fan. It protects your baseboards and prevents the paint from peeling. A floor installer like me sees the results of poor ventilation every day. I see the cupping wood and the swollen MDF. It is all preventable. Treat your bathroom like the engineered machine it is. Respect the plumbing and the tile will respect you back. If you have questions about sustainable materials, look into eco-friendly tile solutions for your next project. Just remember. The subfloor is the boss. The valve is the heart. Keep both healthy and you will not have to call me to tear it all out.