
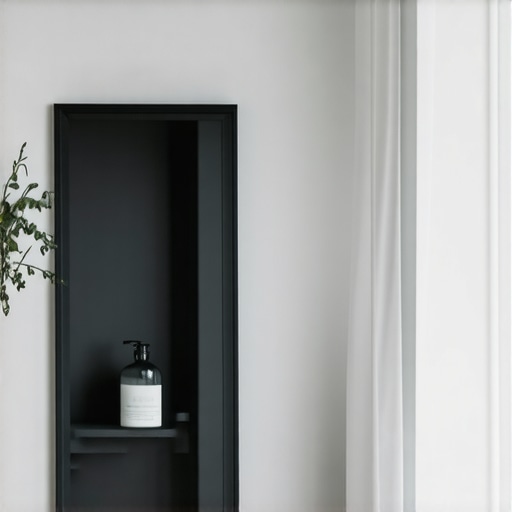
I spent three days grinding concrete on a job last month just so the floor would not click like a castanet, and that same level of obsession applies to every hole you cut in a bathroom wall. Most guys skip the leveling and the proper flashing when they install a recessed cabinet. They think the trim will hide the gaps. It won’t. I once walked into a luxury bathroom where the homeowner spent three grand on a custom mirror cabinet, only to find the drywall inside the cavity was black with mold because the installer did not treat it like a wet zone. You have to treat a recessed cabinet like a mini shower niche or it will fail. Most contractors are lazy. They shove the box into the rough opening, drive four screws into the studs, and walk away. That is a recipe for structural decay. In a high-humidity environment like a bathroom, moisture finds every unsealed edge. If you are not using a moisture meter to check the surrounding wall or a level to ensure the rough opening is not putting stress on the cabinet frame, you are doing it wrong. A recessed mirror is a breach in your wall’s moisture barrier. You have to defend that breach with the same intensity you would use on a subfloor or a shower pan. This guide breaks down the molecular and structural requirements to ensure your cabinet stays dry and your wall stays solid for thirty years.
The physics of bathroom moisture and wall cavities
To waterproof a recessed wall mirror cabinet, you must seal the rough opening with a liquid-applied moisture barrier and use 100 percent silicone sealant at the flange interface. This prevents capillary action from drawing humid air into the wall cavity. Ensure the framing is perfectly plumb to avoid mechanical stress on seals. The air in your bathroom is a transport mechanism for vapor. When you take a hot shower, the pressure in the room increases, forcing that warm, wet air into any opening it can find. If your cabinet is not properly flashed, that moisture condenses on the cold metal or wood of the cabinet box. From there, it drips onto the bottom plate of your wall framing. Over time, this leads to rot that you cannot see until the cabinet literally falls out of the wall. This is why showers and recessed mirrors must be treated as integrated systems. If you want a bathroom that lasts, look at showers that wow modern designs for 2025 for ideas on how to integrate storage without compromising structural integrity. We are talking about microscopic water molecules that can penetrate even the smallest gap in your grout or tile work. You need a continuous barrier from the wall surface into the interior of the recess.
“A floor is only as good as the subfloor beneath it; deflection is the enemy of every joint.” – Master Flooring Axiom
The ghost in the expansion gap
Expansion gaps are not just for floors because cabinets and wall studs also expand and contract with seasonal humidity changes. Use a flexible polyurethane or high-grade silicone sealant at the cabinet perimeter to allow for movement without breaking the waterproof bond. When I see a cabinet caulked with cheap painter’s caulk, I know it is going to fail in six months. That stuff dries brittle. When the house settles or the studs swell in the summer, the caulk cracks. Now you have a direct highway for steam to enter your wall. You need something with at least twenty-five percent movement capability. This is the same principle we use when installing baseboards. If you are curious about how to handle those transitions, read about baseboards makeover ideas to elevate your space. The gap between your cabinet and the tile must be filled with a product that can stretch. I prefer a color-matched 100 percent silicone. It is harder to work with and smells like vinegar, but it will not support mold growth and it stays flexible forever. You also need to consider the grout around the cabinet. If the grout is cracking, moisture will seep behind the tiles. Check out how to refresh grout without replacing it to maintain that seal. A mirror cabinet is essentially a hole in your insulation and vapor barrier. You must treat the interior of the rough opening with a liquid membrane like RedGard or Hydro Ban. Paint it on thick. This ensures that even if moisture gets past the first line of defense, it cannot soak into the wood studs or the backside of the drywall.
Why your subfloor knowledge applies to walls
Applying flooring principles to wall recesses ensures that the weight of the mirror does not cause the waterproof seals to shear over time. The structural framing must be rigid enough to support the cabinet without bowing the surrounding drywall. Most people do not realize that a large mirrored cabinet can weigh fifty pounds or more. If you just screw that into some flimsy 2x4s, the wall will flex every time you open the door. That flex creates micro-fissures in your sealant. You should double up the studs on the sides of the recess. I also recommend using a moisture-resistant backer board instead of standard drywall for the interior of the recess. It is the same stuff we use for showers. If you want a clean look, consider showers with a style trendy ideas for small bathrooms to see how waterproof niches are framed. Below is a comparison of materials you might use for this job.
| Material | Vapor Permeability | Movement Capability | Best Use Case |
|---|---|---|---|
| 100% Silicone Sealant | Low | High (25-50%) | Perimeter Flange |
| Acrylic Latex Caulk | High | Low (5-10%) | Painting only |
| Liquid Membrane | Very Low | Moderate | Rough Opening Lining |
| Polyurethane Sealant | Low | Very High | Structural Joints |
The chemistry of the adhesive bond
The chemical bond between your sealant and the mirror cabinet depends on surface energy and cleanliness. Use denatured alcohol to clean the cabinet flange and the tile surface before applying any waterproof beads. If there is even a hint of dust or finger oil on the surface, the silicone will not stick. It will look fine for a week, then it will peel away like a dead sunburn. I have seen guys try to use grout to fill the gap between the cabinet and the tile. That is a rookie mistake. Grout is porous. It sucks up water like a sponge. If you have old, nasty grout around your existing fixtures, you need grout restoration secrets for long lasting results to get it back to a baseline where it can actually protect your home. You need to understand that the tile itself is waterproof, but the system is only as strong as its weakest link. Usually, that link is the transition point where different materials meet. In the world of flooring, we obsess over the transition from tile to wood. In the bathroom, you must obsess over the transition from the cabinet metal to the ceramic wall. [image_placeholder_1] Use a high-quality sealant that matches the tile color to keep the aesthetic clean while maintaining the structural barrier. If you are using eco-friendly tile solutions for sustainable homes in 2025, make sure your sealants are low-VOC to match that philosophy.
The ten step waterproofing ritual
Follow this exact sequence to ensure a lifetime of moisture protection for your recessed cabinet installation.
- Measure the rough opening and ensure it is 1/4 inch larger than the cabinet box on all sides.
- Verify the framing is plumb and level using a high-grade spirit level or laser.
- Apply two coats of a liquid waterproofing membrane to the interior of the rough opening.
- Allow the membrane to cure for 24 hours until the color shifts.
- Install a shim at the bottom of the opening to prevent the cabinet from sitting directly on the framing.
- Apply a thick bead of 100 percent silicone to the back of the cabinet flange.
- Slide the cabinet into place and secure it with stainless steel screws.
- Wipe away excess silicone immediately with a gloved finger and soapy water.
- Seal the interior screw holes with a dab of silicone to prevent moisture ingress.
- Clean the entire area with tile cleaning tips for a sparkling bathroom in 2025 to remove any residue.
“A floor is only as good as the subfloor beneath it; deflection is the enemy of every joint.” – Master Flooring Axiom
The 1/8 inch that ruins everything
Small gaps are the most dangerous because they create capillary action which pulls standing water into the wall cavity. Ensure every joint is filled completely with no air pockets or voids in the sealant bead. I have seen installers leave a tiny 1/8 inch gap at the top of a cabinet because they thought nobody would see it. That gap becomes a vacuum for steam. Water builds up behind the cabinet and eventually ruins the baseboards below. If you need to fix the lower section of your wall after a leak, look at chic baseboard designs that transform rooms in 2025 for replacement ideas. The goal is a monolithic barrier. You want the entire cabinet assembly to behave as a single, waterproof unit. This requires patience and a steady hand with the caulk gun. Do not rush the curing process. Keep the bathroom well-ventilated and do not use the shower for at least 48 hours after the final seal is applied. This ensures the chemical bonds have time to reach full strength. If you have questions about specific materials or need a custom recommendation, you can always reach out via our contact us page. We take flooring and structural integrity seriously because your home is your biggest investment. Do not let a mirror cabinet be the reason you have to tear out your bathroom walls in five years. Build it right the first time and you will never have to think about it again. Detailed planning and high-quality materials are the only way to beat moisture in the long run. Professional results come from professional habits. Stop treating your bathroom like a DIY project and start treating it like the high-performance engineering environment it is. Your walls will thank you.