
The chemical reality of porous grout
Removing hair dye from grout requires an understanding of porosity and capillary action because grout is essentially a microscopic sponge made of Portland cement and sand that sucks pigments deep into its crystalline structure. To successfully extract a permanent stain, you must use a chelating agent or an oxidizing cleaner that can break the molecular bond between the dye and the cementitious minerals. Most homeowners wait too long, allowing the dye to undergo a secondary oxidation process that permanently alters the color of the grout substrate. I spent three days grinding concrete on a job last month just so the floor wouldn’t click like a castanet, and that experience taught me that the foundation of any surface dictates how it reacts to external stressors. If your grout was not mixed with the correct water-to-powder ratio, it becomes even more absorbent, turning a simple hair dye spill into a permanent architectural flaw. You have to treat the stain before it migrates from the surface into the core of the joint.
“A floor is only as good as the subfloor beneath it; deflection is the enemy of every joint.” – Master Flooring Axiom
I have seen more showers ruined by aggressive cleaning than by the stains themselves. People get desperate and grab the harshest chemicals they can find, not realizing they are eating away at the integrity of the installation. If you are dealing with a spill in the bathroom, the clock is your biggest enemy. You are not just cleaning a surface. You are performing a chemical extraction. The pigment in hair dye is designed to penetrate organic matter, and while grout is inorganic, its physical structure is inviting to those tiny color molecules.
The physics of pigment absorption in cementitious joints
Grout absorbs hair dye through hydrostatic suction where the liquid pigment is pulled into the interstitial spaces between cement particles, making surface-level scrubbing ineffective for deep-set stains. To reverse this, you must introduce a solution with a lower surface tension than the dye itself, allowing the cleaner to penetrate the grout and lift the pigment out. Most people use a scrub brush and a prayer. That is the wrong way to go about it. You need to understand the density of the material you are working with. If you have a high-density epoxy grout, you are in luck. If you have standard cement grout, you are in for a fight. For those looking for long term solutions, you might consider grout restoration secrets for long lasting results to prevent future headaches. The goal is to suspend the dye particles in a liquid medium so they can be blotted away rather than pushed further into the floor.
Why your subfloor affects your grout cleaning success
It might sound strange, but the stability of your subfloor determines how well your grout holds onto stains. If there is any deflection in the floor joists, the grout develops micro-fissures. These tiny cracks act like vacuum tubes for hair dye. When I am out in the field, I see this all the time. A homeowner thinks they just have a dirty floor, but what they actually have is a structural issue that has compromised the seal of their tile. If your baseboards are showing gaps, it might be a sign of settling that has cracked your grout lines. You can learn more about chic baseboard designs that transform rooms in 2025 to see how to properly finish these edges. A solid foundation means tighter grout, and tighter grout means less absorption.
The best cleaning agents for pigment extraction
The most effective way to remove hair dye from grout involves oxygenated bleach or a paste of baking soda and hydrogen peroxide because these substances create a bubbling reaction that physically lifts the dye molecules to the surface. Avoid using straight chlorine bleach as it can weaken the grout structure and damage the surrounding tile cleaning tips for a sparkling bathroom in 2025 protocols. Here is a breakdown of common household items and their effectiveness on grout stains.
| Cleaning Agent | pH Level | Effectiveness | Risk to Grout |
|---|---|---|---|
| Oxygen Bleach | 10.5 | High | Low |
| Vinegar (Acetic Acid) | 2.4 | Medium | High (Etches Cement) |
| Baking Soda Paste | 8.3 | Medium | Very Low |
| Acetone | 7.0 | High (for oil-based) | Medium (Fumes) |
You have to be careful with acids. I have seen guys melt the finish right off a beautiful stone floor because they thought vinegar was a safe natural cleaner. It is not. It eats calcium. Grout is full of calcium. You use vinegar and you are basically dissolving the glue that holds your floor together. Stick to oxygen-based cleaners that use bubbles, not acid, to do the heavy lifting.
Step by step extraction protocol
Cleaning hair dye out of grout requires a methodical approach starting with blotting, followed by a dwell-time application of an alkaline cleaner, and ending with a neutralizing rinse to ensure no chemical residue remains to attract future dirt. If you rush the process, you will leave pigment behind. The chemistry needs time to work. You cannot just spray and wipe. You have to let the solution sit and penetrate the same way the dye did. For those looking to update their space after a disaster, checking out showers with a style trendy ideas for small bathrooms might give you some inspiration for a fresh start.
- Blot the excess dye immediately with a white paper towel. Do not wipe. Wiping spreads the stain.
- Apply a thick paste of hydrogen peroxide and baking soda directly to the grout line.
- Let the paste dwell for at least 30 minutes. This allows the oxygen to break the dye’s chemical bonds.
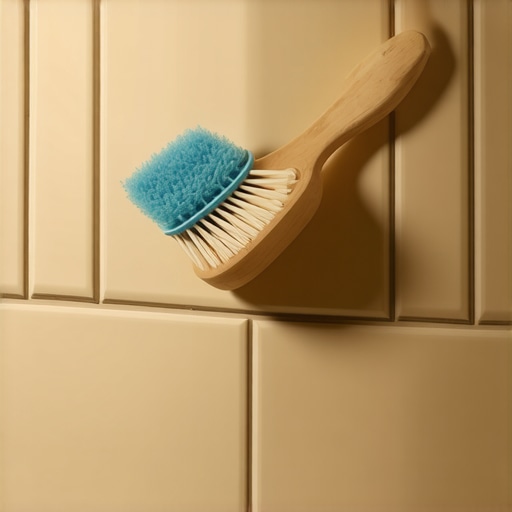
- Scrub gently with a nylon brush. Never use steel wool as it leaves metal particles that will rust.
- Rinse with distilled water and dry the area completely with a microfiber cloth.
The regional humidity factor in grout maintenance
In humid climates like Florida or the Gulf Coast, grout remains hydrated and porous for longer periods, which means hair dye will penetrate deeper and faster than it would in the dry air of Arizona. This environmental variable is often overlooked. If you live in a swampy area, your grout is likely more susceptible to staining because the ambient moisture prevents the sealer from ever fully curing to its maximum hardness. In these regions, I always recommend a high-solids solvent-based sealer. It is a pain to apply, but it is the only thing that stands a chance. If the stain is too deep, you might need to look into how to refresh grout without replacing it to get back that clean look. Most people think a sealer is a permanent shield. It is not. It is a sacrificial layer that needs to be reapplied every year, especially in high-traffic showers.
“Grout is the most vulnerable part of any tile installation; treat it with the respect its chemistry demands.” – Master Flooring Axiom
Why your baseboards are a warning sign
If you see stains migrating toward the edges of the room, pay attention to your baseboards. Often, the gap between the tile and the wall is not properly caulked, allowing moisture and dye to seep under the baseboard and into the subfloor. This can cause the wood to swell and the tile to pop. I always tell my clients that a floor is a system. If one part fails, the whole thing is at risk. You can find some baseboards makeover ideas to elevate your space that incorporate proper waterproofing at the floor line. Never trust a builder who just slaps baseboard over a raw tile edge without a bead of silicone at the bottom. That is where the mold starts. That is where the hair dye hides. It is the details that keep a house standing for a hundred years.
The danger of over scrubbing
While most people want the thickest underlayment, too much cushion actually causes the locking mechanisms on LVP to snap under pressure, and a similar logic applies to grout. If you scrub too hard, you are removing the top layer of the cement, exposing the even more porous interior of the grout joint. This creates a cycle where the grout gets dirtier faster every time you clean it. You are effectively sanding your floor down with every pass of the brush. Use a soft nylon brush. If the stain is not coming out with gentle agitation, the chemical reaction has not happened yet. Add more peroxide and wait. Patience is a tool just like a hammer or a trowel. You cannot force a chemical extraction with brute strength without damaging the structural integrity of the shower floor.
Long term protection strategies
Once you have the dye out, you must reseal the grout using a high-quality penetrating sealer that contains fluoropolymers to repel both water and oil-based contaminants. This is the only way to prevent a repeat of the situation. For those interested in future-proofing their home with better materials, look at eco-friendly tile solutions for sustainable homes in 2025. A properly sealed grout line will cause liquids to bead on the surface rather than soaking in. This gives you time to clean up a spill before it becomes a permanent part of your decor. I have seen floors that are twenty years old look brand new because the homeowner took the time to seal them every twelve months. It is cheap insurance for a very expensive installation.
Final thoughts on floor performance
A floor is a performance surface. It takes a beating every single day. Between the foot traffic, the moisture in the air, and the occasional hair dye accident, your tile and grout are under constant assault. If you treat your floor like a structural engineering challenge rather than a cosmetic choice, you will have fewer problems. Keep the subfloor dry, keep the grout sealed, and never use acidic cleaners on a cement product. If you ever feel overwhelmed by the state of your bathroom, you can always contact us for professional guidance. For more inspiration on modernizing your bathroom, see showers that wow modern designs for 2025. Taking care of the small things like grout lines will ensure your home stays solid and beautiful for decades to come.