
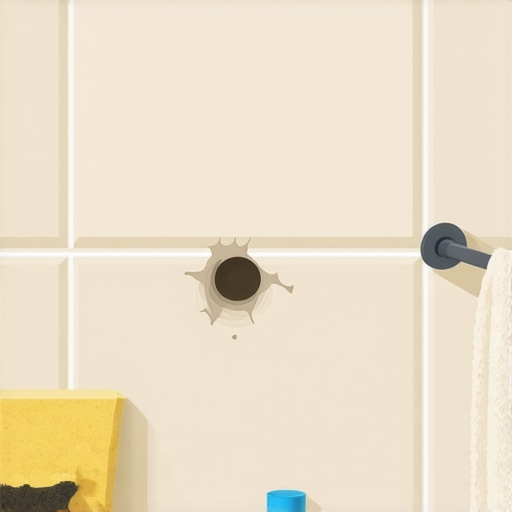
I have spent over two decades with my hands in thin-set and my knees on subfloors. I have seen every shortcut taken by builders who prioritize speed over structural integrity. When a towel bar rips out of a bathroom wall, most people see a simple cosmetic annoyance. I see a failure of the substrate and a fundamental misunderstanding of the physics of tile installation. A floor or a wall is only as strong as the bond between the material and the backing. When that bond is compromised by a heavy towel or a poorly placed anchor, you are left with a gaping hole that exposes the vulnerable layers of your home to moisture. Most guys skip the leveling compound or the proper backing because they think the tile will hide the dip. It won’t. I spent three days grinding concrete on a job last month just so the floor wouldn’t click like a castanet, and walls require the same level of obsession. Fixing a hole in tile requires more than just a bit of putty. You need to understand the chemistry of the grout, the hardness of the ceramic, and the mechanical requirements of the anchoring system that failed in the first place.
The physics of a shattered tile repair
Fixing a hole in tile involves assessing the depth of the substrate damage, cleaning the internal cavity of debris, and selecting a matching epoxy or grout to restore the surface. You must use a carbide-tipped drill bit if the hole needs enlarging for a toggle bolt or a heavy-duty anchor to prevent future wall failure. This process ensures the structural integrity of the tile remains intact while providing a waterproof seal against the humid environment of the bathroom. I once walked into a house where a homeowner tried to use simple wood filler on a tile hole. Within two months, the moisture from the shower had turned that filler into a moldy sponge. This is why we follow the standards set by the Tile Council of North America. We do not guess. We measure. We analyze the moisture. We apply the science of adhesion. The bathroom is a high-stress environment where steam and water are constantly looking for a way to infiltrate your wall studs. A hole from a towel bar is an open invitation for rot.
Why your substrate is the real problem
Substrate integrity is the most frequently ignored aspect of bathroom repairs because most installers rely on drywall rather than cement backer board. When you pull a towel bar out, you often find that the gypsum core of the wall has turned to powder due to mechanical stress. Replacing this with a specialized tile patch or a fiber-mesh reinforced compound is the only way to ensure the new anchor does not pull through the ceramic glazing again. A floor is only as good as the subfloor beneath it, and a wall is only as good as the studs and board. If the original installer used green board instead of a proper cementitious substrate like HardieBacker or Durock, your repair is already starting at a disadvantage. You have to treat the hole as a structural breach. You are not just filling a gap, you are rebuilding a load-bearing point for a bar that will likely hold heavy, wet towels for the next decade. If you want to see how much of a difference the right foundation makes, look at baseboards makeover ideas to elevate your space to understand how transitions and backing define the quality of the finish.
“A floor is only as good as the subfloor beneath it; deflection is the enemy of every joint.” – Master Flooring Axiom
Selecting the right tools for the repair
Professional tile repair requires specialized equipment including diamond-core drill bits, color-matched grout kits, and two-part epoxy resins. You cannot use standard high-speed steel bits because the vibrational frequency will cause micro-fractures in the tile glaze, leading to spider-web cracking across the entire surface. If you are working in showers with a style, you are likely dealing with porcelain, which is far denser and harder than standard ceramic. Porcelain has a water absorption rate of less than 0.5 percent, which means it is incredibly hard. Trying to drill into it with a cheap bit from a big-box store will only result in a burnt-out bit and a ruined wall. You need to keep the bit cool with water to prevent the diamond dust from losing its bond. This is the difference between a mechanic who knows his tools and a handyman who just has a toolbox. I have seen guys try to use a hammer drill on a bathroom wall. That is a guaranteed way to shake the tile right off the thin-set bond. Use a steady hand and a high-speed rotary tool for precision.
The chemistry of grout and epoxy matching
Color matching grout requires a molecular understanding of pigment load and hydration levels during the curing process. Most sanded grouts will shrink as the water evaporates, which means you must overfill the hole slightly and then strike it flush with a damp sponge once the initial set has occurred. For grout restoration secrets for long-lasting results, you should always look at grout restoration secrets for long-lasting results to see how to blend the new with the old. The minerals in your tap water can actually change the color of the grout as it dries. If you have high iron content, your white grout will turn orange. If you have high calcium, it might turn chalky. I always use distilled water when mixing small repair batches to ensure the chemical reaction is clean. We are looking for a polymer-modified bond that can withstand the expansion and contraction of the house. Houses breathe. They move. If your repair is too brittle, it will pop out like a dry cork within a year.
| Material Type | Repair Difficulty | Required Drill Bit | Drying Time |
|---|---|---|---|
| Ceramic Tile | Low | Carbide Tipped | 24 Hours |
| Porcelain Tile | High | Diamond Core | 48 Hours |
| Natural Stone | Medium | Masonry Bit | 24 Hours |
| Glass Tile | Extreme | Diamond Hole Saw | 72 Hours |
Restoring the waterproof barrier in showers
Shower wall repairs must prioritize the moisture barrier located behind the tile surface. If the waterproof membrane has been punctured by the original towel bar anchor, you must apply a bead of 100 percent silicone sealant into the hole before inserting the new anchor or filler material. This prevents capillary action from drawing steam into the wall cavity. I have seen entire bathrooms demolished because a tiny hole from a soap dish or towel bar allowed water to rot the studs over five years. It starts as a small smell of dampness. Then the grout starts to crumble. By the time you see the mold on the baseboards, the damage is done. You can find tile cleaning tips for a sparkling bathroom in 2025 to help maintain the surface, but the real work happens behind the scenes. If you are dealing with showers that wow modern designs for 2025, you probably have a high-tech waterproofing system like Schluter-Kerdi. Puncturing that membrane is a serious issue that requires a specific patch to maintain the warranty. Never just slap some caulk on it and call it a day.
Step by step guide to tile hole restoration
- Remove the remaining hardware and any plastic anchors using needle-nose pliers.
- Vacuum the hole to remove all dust and loose substrate material.
- Determine if the tile is ceramic or porcelain to select the proper drill bit if the hole needs adjustment.
- Apply a waterproof silicone or epoxy filler into the cavity of the wall.
- Mix grout or color-matched resin to the consistency of peanut butter.
- Pack the material into the hole and smooth the surface with a plastic putty knife.
- Let the material cure for at least 24 hours before attempting to re-drill or mount hardware.
- Apply a grout sealer to ensure the repair does not absorb water or stains.
The ghost in the expansion gap
Thermal expansion causes tiles to expand and contract at a different rate than the wooden or metal studs behind them. When you mount a towel bar, you must ensure that the flange does not press too tightly against the tile surface, or the stress will cause the tile to crack as the seasons change. This is the same principle we use when installing floors. You need a gap. If you lock a floor under a heavy island or a wall under a rigid fixture, something has to give. Usually, it is the tile. I have seen $20,000 bathrooms ruined because someone forgot that materials need room to move. While most people want the thickest underlayment, too much cushion actually causes the locking mechanisms on LVP to snap under pressure. The same logic applies to walls. You want a firm, stable connection that allows for the microscopic shifts of the house. If your grout is already looking rough, check out how to refresh grout without replacing it for some professional tricks. Keeping the grout flexible and sealed is the best defense against the mechanical stress of your fixtures.
“Deflection is the silent killer of the ceramic installation; if the wall moves, the tile dies.” – TCNA Handbook Supplement
Advanced anchoring strategies for permanent fixes
Toggle bolts are the preferred method for re-installing hardware into damaged holes because they distribute the weight over a larger surface area behind the backer board. Standard plastic expansion anchors are the leading cause of towel bar failure because they rely on friction against the fragile edges of the tile. When a guest pulls on the towel, that friction fails, and the anchor acts like a wedge, splitting the tile. I always tell my clients to invest in metal butterfly anchors. They are more difficult to install and require a larger hole, but they will never pull out. You are anchoring to the structure, not the decoration. If you are worried about the aesthetics of your bathroom, look at chic baseboard designs that transform rooms in 2025 to see how to balance strength with style. A beautiful bathroom is only beautiful if it stays on the wall. The physics of leverage are against you when it comes to a 24 inch towel bar. It acts as a lever, multiplying the force applied to those two small points of contact. Use the right hardware or you will be doing this repair again next year.
The 1/8 inch that ruins everything
Precision measurement is the difference between a repair that vanishes and one that stands out as a glaring mistake. When drilling new holes, even a 1/8 inch deviation can stress the towel bar and cause the hardware to vibrate loose. You must use a level and a template. Do not eyeball it. I have fixed more DIY mistakes than I have original failures. People think they can just wing it. They can’t. The alignment of the mounting brackets must be perfect to ensure the bar sits neutrally in the cradles. If the brackets are even slightly tilted, the bar will act as a spring, constantly pushing outward against the tile. This leads to the grout cracking around the flange. If you are renovating, consider eco-friendly tile solutions for sustainable homes in 2025 to find materials that are more resilient to this kind of stress. Some modern tiles are manufactured with a higher tensile strength that resists the common cracking associated with hardware mounting. Every millimeter matters. Every degree of the level matters. If you don’t have the patience for that, you shouldn’t be working with tile.
Why your subfloor is lying to you
Even on vertical surfaces, the principles of subfloor preparation apply because gravity and moisture work together to pull tile away from the wall. If you find that multiple tiles are loose around your towel bar, the issue is not the bar, but the adhesive bond of the original installation. You might need to remove the tile entirely and re-set it with high-quality thin-set. Check the back of the tile. If it is clean, the installer didn’t back-butter it. If the thin-set is crumbly, they used too much water in the mix. This is why I am a stickler for the rules. I smell like floor wax and oak dust most days, but I know how to make a surface last. If you want a space that feels cohesive, from the showers with a style trendy ideas for small bathrooms to the transitions at the floor, you have to respect the materials. The final result of a proper repair should be a wall that looks like the hole never existed and a towel bar that you could practically hang from. Anything less is just a temporary patch. Stop looking for the easy way out and start looking at the chemistry and physics of your home. It will save you thousands of dollars in the long run.