
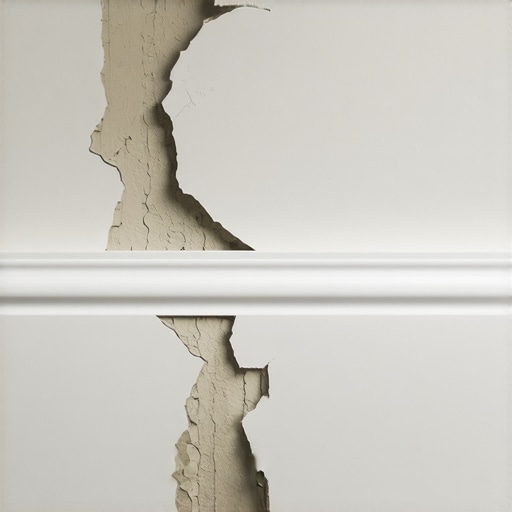
I spent three days grinding concrete on a job last month just so the floor wouldn’t click like a castanet. Most guys skip the leveling compound. They think the underlayment will hide the dip. It won’t. I have seen fifteen thousand dollar wide-plank walnut floors cupping like potato chips because someone forgot to check the crawlspace. But the baseboard is where the real sins of the installer come to light. When you see that white trim pulling away from the drywall, it is not just an aesthetic hiccup. It is a structural failure signaling a fight between your home and the atmosphere.
The phantom gap beneath the trim
Baseboards popping off the wall occur when wood expansion, hydrostatic pressure, and structural settling force trim nails to lose their mechanical grip within the wall studs. This movement is usually triggered by relative humidity fluctuations that cause hygroscopic materials like pine or MDF to swell and contract against a fixed substrate. Most installers fail to find the bottom plate of the wall framing, which leads to fastener failure. I have walked into hundreds of homes where the owner is frustrated by a 1/8 inch gap. That 1/8 inch is the difference between a floor that breathes and a floor that chokes. If you are looking for ways to update these elements, checking out baseboards makeover ideas to elevate your space can provide a starting point for better aesthetics, but beauty won’t save a bad install.
The structural lie of a level floor
Subfloor flatness dictates the vertical alignment of baseboards because deflection in the joist system or dips in the concrete create a void that forces the trim to bridge an unsupported span. When you nail a long piece of molding across a low spot, you are putting that wood under constant tension. It wants to go back to its original shape. Eventually, the elastic modulus of the wood wins and it pulls the brad nails right out of the drywall mud. I always tell my apprentices that a floor is a living thing. If the subfloor is not within 3/16 of an inch over a 10 foot radius, your trim is doomed from day one. People often overlook how chic baseboard designs that transform rooms in 2025 require more than just style, they require a flat foundation. If the floor sinks, the baseboard follows, or it stays put and leaves a gap that looks like a mouth hanging open.
“A floor is only as good as the subfloor beneath it; deflection is the enemy of every joint.” – Master Flooring Axiom
The chemistry of adhesive failure
Construction adhesives often fail because of chemical incompatibility between MDF binders and low-VOC paints or because the surface temperature of the gypsum board was below the dew point during application. If you are relying on Liquid Nails or Power Grab to hold your trim because you cannot find a stud, you are asking for trouble. The molecular bond requires a clean substrate. If there is sawdust or drywall dust on the back of that board, the glue just sticks to the dust. It creates a shear plane where the trim can just slide right off. I have seen guys try to glue trim to tiled walls in bathrooms without scuffing the glaze. It stays for a week then falls over the first time someone slams a door. If you are working in a wet environment, ensuring you have showers that wow modern designs for 2025 means understanding that the tile and the trim must be bonded with the right modified thin-set or epoxy, not just a prayer and some caulk.
Humidity cycles and the 6 percent rule
Acclimation protocols require that solid wood trim reaches a moisture content within 2 percent of the living environment before installation to prevent radial shrinkage. In the Midwest, we see humidity swing from 10 percent in the winter to 90 percent in the summer. If you install your baseboards in July when the wood is fat with water vapor, they will shrink in January. The miters will open up. The caulk will crack. The fasteners will be left holding onto nothing. I keep a pin-type moisture meter in my pocket at all times. If that wood is reading 11 percent and the house is at 6 percent, that wood stays in the garage. We do not touch it. You can look at eco-friendly tile solutions for sustainable homes in 2025 to find materials that move less, but wood is wood. It will move, and if you do not plan for that linear expansion, it will pop.
| Material Type | Expansion Rate | Moisture Resistance | Best Fastener |
|---|---|---|---|
| Solid Oak | High | Moderate | 2-inch Finish Nail |
| MDF (Medium Density) | Low (Linear) | Very Low | 18-Gauge Brad |
| PVC (Vinyl) | High (Thermal) | Excellent | Stainless Screw |
| Finger-Jointed Pine | Moderate | Low | 16-Gauge Finish |
The ghost in the expansion gap
LVP flooring and laminate planks require a perimeter expansion gap of at least 1/4 inch to allow for thermal movement and subfloor shifting. If you jam your baseboards down too tight against a floating floor, you have effectively locked the floor in place. This is a rookie mistake. The floor needs to slide under the trim. When the floor expands and has nowhere to go, it buckles upward. That upward pressure acts like a lever, prying the baseboard off the wall. I have seen entire kitchen islands moved because the floor underneath them was pinned by the trim. You need to leave a breathing room. This is especially true when transitioning between different surfaces like tile and wood. If the grout restoration secrets for long lasting results tell you anything, it is that movement is the enemy of rigidity. Keep the trim slightly above the floor surface to avoid this mechanical prying.
Grout lines and the vertical shift
Tile baseboards often fail because of curing shrinkage in the mortar bed or movement joints that were filled with rigid grout instead of flexible sealant. When porcelain tile is used as a baseboard, people often treat it like the floor. It is not. The wall-to-floor junction is a change of plane. According to TCNA EJ171 standards, every change of plane requires a flexible joint. If you fill that corner with sanded grout, it will crack and pop the tile off the wall within six months. You must use a color-matched silicone. I have spent days scraping out old, cracked grout because some guy wanted to save five dollars on a tube of caulk. If you are looking at how to refresh grout without replacing it, remember that the perimeter is the most vulnerable point. Use the right materials or prepare to do the job twice.
“Every change of plane in a tile installation requires a movement joint to accommodate the inevitable shifting of the structure.” – TCNA Handbook Summary
The 1/8 inch that ruins everything
Fastener depth and angle are the most frequent causes of trim separation, specifically when nails miss the studs and only grab gypsum or air. You have to hit the framing. A 2-inch nail going through 1/2 inch of baseboard and 1/2 inch of drywall only leaves 1 inch of penetration into the wood stud. If you angle the nail poorly, you are only getting 1/2 inch of bite. That is not enough to resist the warping force of a crowned piece of pine. I always use a stud finder and mark the plates. If I can’t find a stud, I cross-nail or miter-lock the pieces. Many people get frustrated when they see gaps in small bathrooms, but if you look at showers with a style trendy ideas for small bathrooms, you will see that precision in the trim work is what makes the space look professional. Do not cut corners on the nailing schedule.
Pre-installation checklist for stable trim
- Check moisture content of the wood and the subfloor using a calibrated meter.
- Locate and mark all wall studs and the bottom plate of the framing.
- Ensure the floor is flat within 3/16 inch over 10 feet to prevent bridging.
- Acclimate the baseboard material in the installation room for at least 72 hours.
- Use a scuff-sanding technique on the back of pre-primed trim for better adhesive bond.
- Apply flexible caulk to the top edge only after the nails are securely set in studs.
- Verify expansion gaps for floating floors are not pinched by the baseboard.
The truth about baseboard thickness
Material density impacts the thermal stability of your trim, with engineered materials like MDF being more dimensionally stable but less moisture resistant than solid timber. While most people want the thickest underlayment for their floors, too much cushion actually causes the locking mechanisms on LVP to snap under pressure and pushes the floor up against the baseboard. This vertical deflection is a silent killer of trim stability. If the floor moves up and down every time you walk on it, it is pumping the nails out of the wall like a claw hammer. You want a firm subfloor. I have seen expensive tile jobs ruined because the installer used a spongy underlayment that wasn’t rated for point loads. Regular tile cleaning tips for a sparkling bathroom in 2025 won’t help if the grout is cracking because the subfloor is bouncing. It is all connected. The physics of the floor dictates the longevity of the wall.
Fixing the pop once and for all
Remediation of popped baseboards requires pulling the fasteners, clearing the debris, and re-securing the trim into solid framing using longer finish nails or trim screws. Do not just caulk the gap. Caulk is not a structural fastener. If you just fill the hole, the wood will keep moving and the caulk will just stretch and tear. You have to solve the mechanical attachment issue. If the wall is bowed, you might need to back-plane the trim or kerf the back of the board to make it flexible enough to follow the contour. Professionalism is about managing physics, not hiding mistakes. If you take the time to level the floor and find the studs, your baseboards will stay where you put them for the next thirty years. Anything less is just handyman work. If you need more info on maintaining your surfaces, check our privacy policy or contact us for expert advice on your next flooring project.