
Most guys skip the leveling compound. They think the underlayment will hide the dip. It won’t. I spent three days grinding concrete on a job last month just so the floor wouldn’t click like a castanet. When it comes to a steam shower bench, the stakes are ten times higher. I remember a job in a high-rise where the bench failed because they didn’t account for vapor drive. The moisture pushed through the tile and into the studs. The mold was so thick you could carve it with a knife. You cannot treat a steam shower like a standard bath. The physics of steam are aggressive. It is not just water, it is gas. Gas finds every microscopic hole in your defense. If you mess up the bench, you are not just looking at a leak. You are looking at a structural failure that can rot the entire subfloor and wall assembly within two years. Building a bench that survives a steam environment requires understanding the molecular movement of moisture and the chemical bond of high-performance adhesives.
The physics of vapor drive in wet environments
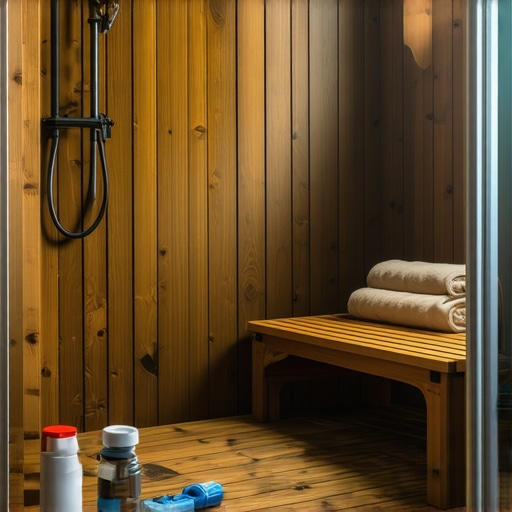
Steam shower waterproofing requires a vapor barrier with a perm rating of 0.5 or lower to prevent moisture from saturating the wall cavity. Unlike liquid water, steam exists as a gas that exerts pressure against every surface in the room. This pressure drives moisture through standard cement board and even through some liquid-applied membranes that are not specifically rated for steam. You need to understand that grout is a sieve. It is not waterproof. Water will get behind the tile. Once it is there, it needs to be stopped by a continuous, impermeable layer. [IMAGE] In a steam room, the heat increases the kinetic energy of the water molecules, making them move faster and penetrate deeper. If your membrane is only rated for a standard shower, the steam will eventually condense behind the membrane, trapping liquid water against the wood or metal studs. This leads to dry rot and catastrophic mold growth. You must select a membrane, usually a sheet-bound product, that is tested to the ASTM E96 Procedure E standard. This is the only way to ensure the bench remains a solid part of the structure rather than a sponge for bacteria.
Why your wooden frame is a ticking clock
Building a shower bench out of dimensional lumber like 2x4s is a recipe for failure because wood expands and contracts significantly when exposed to the high heat and humidity of a steam cycle. When that wood moves, it puts immense stress on the thinset and the tile joints. Eventually, the bond breaks. The bench begins to move independently of the walls. This creates cracks in the grout lines, which then allows more steam to enter the frame. I always tell people to use masonry or high-density foam substrates. If you must use wood, it has to be wrapped in a way that it never sees a drop of moisture or a whiff of steam. This means using a heavy-duty vapor retarder before the cement board and then a topical membrane over the board. But even then, the heat alone can cause the wood to twist. A better way is to use solid concrete blocks or prefabricated high-density EPS foam benches. These materials have a thermal expansion coefficient that is much closer to tile and thinset. This reduces the mechanical stress on the waterproofing layer. You want a static environment. Movement is the enemy of every joint. A stable bench ensures that the grout restoration secrets you learn later are used for maintenance, not for structural repair.
“A floor is only as good as the subfloor beneath it; deflection is the enemy of every joint.” – Master Flooring Axiom
The specific gravity of thinset in wet environments
The thinset used for a steam shower bench must be a high-performance, polymer-modified mortar that meets ANSI A118.15 standards to withstand constant thermal cycling. Many installers use cheap, unmodified thinset because they think the membrane does all the work. That is a lie. The thinset is the bridge between your waterproofing and your finish. In a steam shower, the temperature can swing from 70 degrees to 120 degrees in minutes. This causes the tile to expand. If the thinset is too rigid, it will snap. If it is too weak, it will lose its grip under the weight of the water-saturated tile. You need a mortar with high shear strength. This ensures that the tile stays bonded even when the materials are expanding at different rates. I look for mortars that have a high concentration of powdered polymers. These polymers create a flexible matrix that can absorb the microscopic movements of the shower. When you are applying it, you must use the directional troweling method. Air pockets behind the tile are death. Those pockets will trap steam, which then condenses into water. When the shower heats up again, that trapped water turns back into steam, creating internal pressure that can pop the tile right off the bench. It is basic thermodynamics.
Slope is not a suggestion
Every horizontal surface in a steam shower, especially the bench, must have a minimum slope of 1/4 inch per foot toward the drain to prevent standing water and calcium buildup. I have walked onto countless jobs where the bench was level. Level is wrong. If the bench is level, water will pool. Because steam showers are often enclosed with tight seals, that water will not evaporate quickly. It sits there. It eats at the grout. It creates a slip hazard. Most importantly, it creates a point of constant hydrostatic pressure on your waterproofing. You want the water to move off the bench as soon as it condenses. This slope must be built into the substrate, not achieved with thinset. Some guys try to use extra mortar to create a slope. That is a hack move. The mortar will shrink as it cures, potentially ruining your slope or creating a dip. Build the slope into the framing or the foam block. Check it with a digital level. If it is not 2.1 percent or greater, it is not ready for tile. This is the same logic I use when I talk about modern designs for 2025, where functionality must come before the look. A beautiful bench that smells like a swamp after three weeks is a failure.
Integrating the bench into the wall system
The waterproofing on the bench must be tied into the wall membrane using a shingle-lap method to ensure that any water running down the walls goes over the bench and into the drain. You never want a butt joint at the corner of a bench. The corner is where the building moves. It is where two planes meet. It is the most common point of failure. I use pre-formed outside and inside corners for my membranes. I overlap the joints by at least two inches and seal them with a proprietary adhesive or modified thinset as directed by the manufacturer. This creates a monolithic skin. If you are using a liquid membrane, you must reinforce the corners with fabric tape. Without that tape, the liquid will crack as the house settles. Think of it like a suit of armor. There can be no gaps in the plates. This integration extends to the baseboards makeover ideas you might consider for the rest of the bathroom. The transition from the wet area to the dry area must be handled with a capillary break to stop water from traveling through the thinset into the bedroom carpet.
| Feature | Liquid Membrane | Sheet Membrane | Cement Board Only |
|---|---|---|---|
| Perm Rating | 0.5 – 1.2 | 0.05 – 0.5 | > 10.0 |
| Steam Rating | Limited | Excellent | Fail |
| Crack Isolation | Moderate | High | None |
| Installation Speed | Slow (Cure time) | Fast | Fast |
The ghost in the expansion gap
Expansion joints must be filled with 100 percent silicone sealant rather than grout at all plane changes to accommodate the thermal expansion of the tile. Grout is rigid. Tile is rigid. When the steam hits the shower, everything grows. If the bench is tight against the wall with no room to move, something will crack. Usually, it is the corner grout. Once that grout cracks, you have a direct path for moisture to get behind your system. I see this all the time. People think silicone looks cheap. It does not look as bad as a moldy wall. Use a color-matched silicone. This allows the bench to breathe and move without breaking the seal. This is a non-negotiable step in the TCNA handbook. If you skip this, your warranty is void. It is the same attention to detail required when you refresh grout without replacing it in older installations. You have to understand how materials behave over time. Tile is not a static material. It is a living, moving part of the house.
- Use a 0.5 perm rated membrane for all steam applications.
- Slope the bench 1/4 inch per foot toward the drain.
- Use ANSI A118.15 modified thinset for all tile bonding.
- Install 100 percent silicone in all corner joints.
- Pre-flood the bench for 24 hours before tiling to check for leaks.
Grout is not a waterproof barrier
Cementitious grout is a porous material that absorbs water and must be treated as a decorative element rather than a structural seal. In a steam shower, the grout is under constant assault. The heat opens the pores of the grout, allowing minerals and moisture to penetrate deep into the joint. This is why you see so many steam showers with stained or failing grout. Using an epoxy grout is a better choice for benches. Epoxy is non-porous and chemically resistant. It is harder to install, but it will last forever. If you stay with standard grout, you must seal it, but even then, the sealer will break down in the steam. You need to be prepared for tile cleaning tips that actually work. Don’t use acidic cleaners on your bench. They eat the grout and eventually damage the waterproofing beneath it. Keep it simple. Keep it clean. But most importantly, keep it waterproof from the start.
“Water is the universal solvent; given enough time, it will find a way through any shortcut you take.” – Master Flooring Axiom