
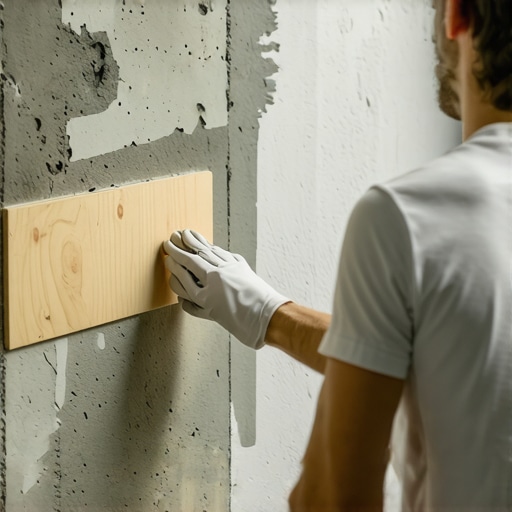
Most guys skip the leveling compound. They think the underlayment will hide the dip. It won’t. I spent three days grinding concrete on a job last month just so the floor wouldn’t click like a castanet. My hands still vibrate from the grinder, and the dust was so thick it felt like I was breathing a quarry. But that is the job. If the subfloor is not flat, your baseboards will never sit right, especially when you are trying to bond them to a concrete wall. I have been doing this for over 25 years, and I can tell you that sticking wood or MDF to masonry is not a matter of luck. It is a matter of understanding the chemistry of the bond and the physics of the substrate.
The subfloor secret that dictates success
The best adhesive for sticking baseboards to concrete is a high-grade polyurethane construction adhesive or a modified silane polymer. These products provide the necessary elasticity to handle the different expansion rates of wood and masonry while maintaining a permanent chemical bond that resists moisture and temperature fluctuations. You cannot use standard white glue or basic wood glue for this. Those are water-based products that will simply soak into the porous concrete and fail within weeks. You need something that creates a mechanical and chemical bridge between the two vastly different materials. When you are looking at chic baseboard designs that transform rooms in 2025, the installation method is the most important factor in whether those designs actually look good a year later.
Why your concrete wall acts like a sponge
Concrete is a porous, alkaline material that is constantly breathing. It absorbs moisture from the ground through capillary action and releases it into the air through evaporation. This is called vapor drive. If you slap a piece of trim over a damp concrete wall with the wrong glue, you are essentially trapping water behind the wood. This leads to mold, cupping, and adhesive failure. The concrete also has a high pH level, which can chemically break down the resins in cheaper adhesives. This is why I always carry a moisture meter. I want to see the relative humidity of that slab before I even open a tube of glue. If the moisture is too high, you are fighting a losing battle. You might need to seal the concrete first with a silane-based primer to close those pores and create a stable surface for the adhesive to grab onto. This is especially true in basements or lower-level rooms where the hydrostatic pressure is higher.
“A floor is only as good as the subfloor beneath it; deflection is the enemy of every joint.” – Master Flooring Axiom
The chemical reality of polyurethane bonds
Polyurethane adhesives are the gold standard for a reason. They do not contain water or solvents that evaporate and cause the bead to shrink. Instead, they cure through a chemical reaction with the moisture in the air and the substrate. This creates a dense, rubbery mass that can stretch and compress. Wood expands and contracts with the seasons, but concrete stays relatively stable. If your adhesive is brittle, it will snap when the wood moves. Polyurethane stays flexible. It has a high shear strength, meaning it can resist the force of the wood trying to pull away from the wall. I prefer the heavy-duty stuff that comes in a cartridge. You want a bead that stays exactly where you put it without sagging. This is the same level of care you should take when looking into baseboards makeover ideas to elevate your space because even the most beautiful trim will look like junk if it pulls away from the wall and leaves a gap.
Preparing for the 1/8 inch that ruins everything
In the world of professional flooring, 1/8 of an inch is a mile. If your wall has a hump or a dip that exceeds 1/8 of an inch over ten feet, your baseboard will not sit flush. You will be left with a gap that no amount of caulk can hide. Before you even touch the glue, you need to take a long straightedge to that wall. If you find high spots, you have to grind them down. I use a diamond cup wheel on a small angle grinder with a vacuum shroud. It is a messy, miserable job, but it is the only way to get a professional finish. If you have low spots, you might need to shim the baseboard or use a more thick-bodied adhesive to bridge the gap. But be careful. Too much glue can actually cause the trim to kick out at the bottom. It is a delicate balance of preparation and application. This precision is just as necessary as knowing the right tile cleaning tips for a sparkling bathroom in 2025 to keep a renovation looking new.
| Adhesive Type | Initial Grab | Cure Time | Moisture Resistance |
|---|---|---|---|
| Polyurethane | Very High | 24 Hours | Excellent |
| Modified Silane | Extreme | 12-20 Hours | Superior |
| Acrylic Latex | Low | 48 Hours | Poor |
| Solvent Based | Medium | 24 Hours | Moderate |
Choosing the right bead for the job
The way you apply the adhesive is just as important as the adhesive itself. I see guys putting a single thin line down the middle of the board. That is not going to hold. You need a serpentine pattern, a zig-zag that covers the top and bottom third of the board. This ensures that the edges are held tight against the wall. You also have to watch your open time. If you apply glue to twenty feet of trim and then spend ten minutes fiddling with a miter cut, the glue might skin over. Once it skins over, it will not bond to the concrete. You have to work in sections. If I am working in a wet area, like a laundry room or near showers that wow modern designs for 2025, I am even more aggressive with the adhesive to ensure no water can get behind the trim and sit against the concrete.
- Scrape the concrete wall to remove any drywall mud or paint overspray.
- Vacuum the bottom of the wall to ensure no dust interferes with the bond.
- Dry fit every piece of baseboard and mark the studs if any exist.
- Apply a 1/4 inch bead of polyurethane adhesive in a serpentine pattern.
- Press the board firmly and use heavy weights or braces to hold it while it cures.
- Clean up any squeeze-out immediately with mineral spirits.
Managing the vertical pressure challenge
Since you cannot easily nail into concrete without a powder-actuated tool or a masonry drill, you have to rely on pressure. I like to use braces made from scrap 2x4s wedged against a heavy object or the opposite wall. This keeps the baseboard pushed tight against the concrete while the adhesive sets. If you leave it to hang on its own, the weight of the board or the slight bow in the wood will cause it to pull away. This is the difference between a DIY job and a master installation. You have to respect the cure time. Most polyurethanes take 24 hours to reach full strength. Do not walk on the floor or bump the trim during this window. If you are integrating tile, you might even be looking at how to refresh grout without replacing it before you set your final trim to ensure the whole room is pristine.
“Adhesion is a molecular handshake; if the surface is dirty, the hands never touch.” – Master Flooring Axiom
The ghost in the expansion gap
Every floor needs an expansion gap at the perimeter. This is the space between the flooring material and the wall that allows the floor to grow and shrink. The baseboard covers this gap, but it should not be pinned to the floor itself. It must be bonded only to the wall. If you glue the baseboard to both the floor and the wall, you are creating a rigid corner. When the floor tries to move, it will either pull the baseboard off the wall or buckle the floor. I have seen $20,000 hardwood floors ruined because the installer glued the baseboards to the planks. Always maintain that 1/4 inch to 1/2 inch gap depending on the manufacturer specifications. If you are dealing with moisture-prone areas, consider eco-friendly tile solutions for sustainable homes in 2025 which often require specific expansion profiles at the wall base.
Dealing with alkaline burn and efflorescence
Fresh concrete is highly alkaline. This alkalinity can eat through the bond of many adhesives. If the concrete is less than 28 days old, do not even think about gluing baseboards to it. It is still off-gassing and curing. Even old concrete can develop efflorescence, which is that white, powdery salt that forms on the surface. You have to scrub that off with a wire brush. If you glue over efflorescence, you are essentially gluing to dust. The salt will eventually flake off, taking your baseboard with it. This is why prep work is eighty percent of the job. I have spent more time with a wire brush and a vacuum than I have with a miter saw on some projects. For those dealing with older installations, you might find grout restoration secrets for long-lasting results helpful as you prepare the surrounding surfaces for new trim.
The final squeeze and clean up
Once the trim is braced and the glue is curing, check your miters. Concrete walls are rarely square. You might need to use a high-quality wood filler or caulk to finish the top edge where the trim meets the wall. But remember, the glue is the structural component. The caulk is just the makeup. If you find you have gaps at the floor, you can add a shoe molding or a quarter round, but the same rules apply. Glue it to the baseboard, not the floor. If you have extra adhesive on your hands or the face of the trim, get it off now. Polyurethane is a nightmare to remove once it hardens. Use a rag dampened with mineral spirits. This attention to detail is what makes a project stand out, much like the precision needed for showers with a style trendy ideas for small bathrooms where every millimeter of space and every seal counts. Work clean, work slow, and respect the chemistry of the materials you are using. “