
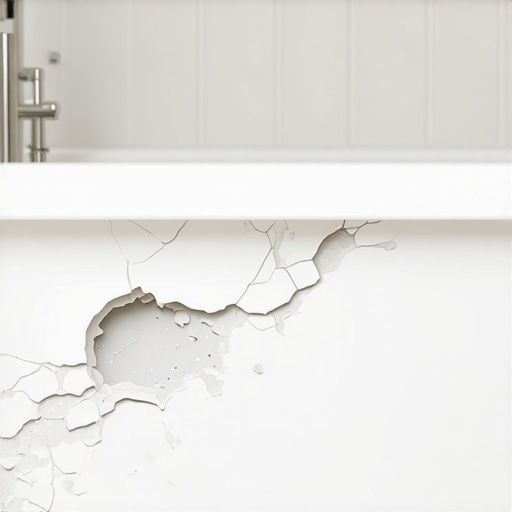
The harsh reality of tub restoration
To patch a chip in a porcelain tub, you must clean the area with 99 percent isopropyl alcohol, apply a two-part waterproof epoxy resin filler, and sand the cured surface with 600-grit wet-dry sandpaper until flush. This process requires a controlled environment where humidity is below 50 percent to ensure the chemical bond achieves its maximum structural integrity. Most homeowners attempt a quick fix with single-part acrylic paint, but those materials lack the molecular density to withstand the thermal expansion of a hot bath. I spent three days grinding concrete on a job last month just so the floor wouldn’t click like a castanet, and I approach tub repair with the same level of obsession. If you do not create a mechanical bond through proper sanding, your patch will fail. It is a mathematical certainty. You are not just painting a spot. You are engineering a surface that must survive constant water pressure and temperature swings.
The physics of the porcelain bond
Porcelain is not just paint. It is a glass-fused-to-metal substrate fired at temperatures exceeding 1,500 degrees Fahrenheit. When a wrench or a heavy shampoo bottle drops, it creates a percussion fracture that separates the brittle glass layer from the underlying cast iron or steel. This creates a jagged crater. The edge of this crater is where most repairs fail because they do not account for the expansion coefficients. I once walked into a house where a homeowner tried to use car Bondo on a tub. Within a month, the edges had curled up because the Bondo expanded at a different rate than the iron. You need a filler that mimics the hardness of glass while maintaining enough flexibility to move with the metal. This is why we use modified resins. The repair site must be treated as a structural void. If the moisture is trapped under the patch, it will oxidize the metal and cause the porcelain to flake further from the inside out.
“A surface is only as durable as its preparation; chemical adhesion fails where mechanical bonding is neglected.” – Master Restoration Axiom
The tool kit for a permanent fix
Gathering the right materials is the difference between a lifetime fix and a messy weekend project. You need high-grit sandpaper, a high-quality two-part epoxy, and a steady hand. Avoid the cheap kits found in the clearance aisle of big-box stores. They use low-viscosity resins that shrink as they cure. You want a paste that stays where you put it. You will also need a respirator because the fumes from the catalyst are no joke. They will burn your throat if you are working in a tight bathroom without ventilation. Make sure you have a hairdryer or a heat gun on its lowest setting to assist in the curing process if you live in a high-humidity area like Florida or the Gulf Coast. Moisture is the enemy of the bond.
| Material Grade | Purpose | Expected Durability |
|---|---|---|
| Two-Part Epoxy | Structural Filling | 10 to 15 years |
| Acrylic Touch-up | Cosmetic Only | 6 to 12 months |
| UV-Cure Resin | Small Chips | 3 to 5 years |
The 1/8 inch that ruins everything
Preparation is the part where everyone gets lazy. You need to sand the inside of the chip and a small 1/8 inch perimeter around the edges. This creates a “tooth” for the resin to grab onto. If the surface is smooth, the resin has nothing to hold. It will just sit on top like a leaf on a pond. I use a Dremel tool with a small diamond bit if the chip is deep. This removes any rust or loose porcelain that is waiting to flake off. You have to be aggressive. If you see a tiny black speck of rust, you have to grind it out. If you leave it, it will grow under your repair like a cancer. Once the metal is shiny and the edges are roughened, you hit it with the alcohol. Do not use nail polish remover because it contains oils that will kill the bond. Only use pure alcohol.
Chemistry of the resin mix
Mixing the epoxy is a science, not an art. You need an exact 50-50 ratio of resin to hardener. If you use too much hardener, the patch becomes too brittle and will crack. If you use too little, it will stay tacky forever and collect lint. Mix it on a scrap piece of cardboard or a plastic lid for at least two minutes. You are looking for a consistent color and texture without any streaks. Once mixed, you have about ten minutes of working time before the polymer chains start to lock up. Apply it in thin layers. Do not try to fill a deep hole in one go. Build it up. This allows the air bubbles to escape so you don’t end up with tiny pinholes in your finish. It is tedious work. It requires patience that most people lack. But if you want it to last, this is the only way.
Transitioning to surrounding surfaces
A tub repair does not exist in a vacuum. It is often the first step in a larger bathroom refresh. Once the tub is fixed, the surrounding tile cleaning becomes the next obvious task. You cannot have a pristine tub next to yellowed grout. If the chip was caused by a shifting wall or a settling house, you should also look at your baseboards makeover to ensure the moisture barrier is still intact. Water travels. A chip in a tub can allow water to seep behind the apron and rot the subfloor. I have seen joists that looked like wet cardboard because a small chip was ignored for three years. The flooring is a system. The tub, the tile, and the wood must all work together to shed water away from the structure.
The sanding and polishing sequence
Once the epoxy has cured for at least 24 hours, you start the sanding. This is the sensory part of the job. You can feel when it is right. Start with 400-grit wet sandpaper. Use a small block of wood or a hard rubber pad. Do not use your fingers. Your fingertips are soft and will create a dip in the middle of the patch. You want to sand perfectly flat. Keep the area wet with a spray bottle. Move to 600-grit, then 1000-grit, and finally 2000-grit if you want a mirror finish. The transition should be so smooth that you cannot feel the line with your fingernail. If you can feel it, you aren’t done. Use a polishing compound at the very end to bring back the shine. It should look like the chip never happened. That is the goal of the master mechanic.
Managing regional humidity and cure times
If you are doing this in a place with high humidity, your cure times will double. In a dry climate like Arizona, the epoxy might flash-dry too fast. You have to monitor the ambient temperature. Ideal conditions are 70 degrees Fahrenheit with low moisture. If the air is too damp, the surface of the epoxy will develop an amine blush. This is a waxy film that prevents the next layer from sticking. If you see it, you have to wash it off with warm soapy water before sanding. Do not ignore the environment. The house is a living thing that reacts to the weather outside. Your repair is part of that environment.
“Porcelain enamel is a glass-to-metal fusion; any repair must respect the difference in expansion coefficients between the substrate and the filler.” – Enamel Science Institute
Common mistakes to avoid
- Using bleach on the repair site within the first week.
- Applying the filler too thick in a single pass.
- Sanding with dry paper which clogs the grit and scratches the surrounding porcelain.
- Failing to remove rust from the base metal before application.
- Using a color match that is too dark, as epoxy tends to yellow slightly over decades.
Maintaining the restored finish
After the repair is complete, you have to change how you clean. No more abrasive powders. No more steel wool. You treat it like the paint on a high-end car. Use mild soap and a soft cloth. This ensures the bond remains intact and the polish stays bright. If you take care of the grout restoration at the same time, the entire room will feel renewed. A bathroom is only as clean as its worst corner. Fixing a chip is a small act that prevents a total renovation. It saves the modern showers from looking aged before their time. Respect the material. Respect the process. The floor and the tub are the foundation of your home’s value. Don’t treat them like an afterthought.