
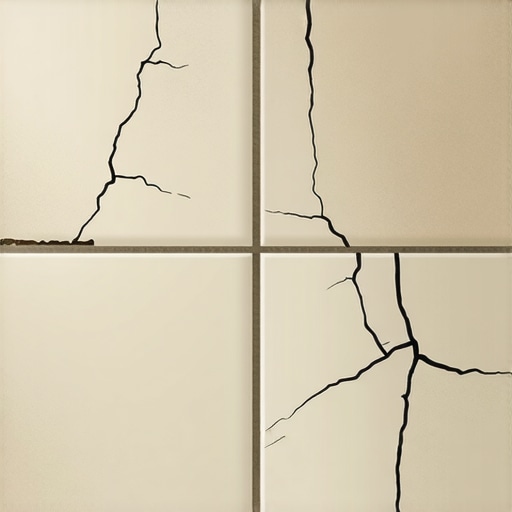
Why Your Grout Is Cracking in the Same Spot Twice
Most guys skip the leveling compound. They think the underlayment will hide the dip. It won’t. I spent three days grinding concrete on a job last month just so the floor wouldn’t click like a castanet. I see it every single week. A homeowner calls me out because they have a hairline fracture in their kitchen tile. They have already paid some handyman to scrape out the old grout and smash new stuff in there. Three months later, the crack is back. It is in the exact same spot. It looks like a jagged lightning bolt running through the floor. They think it is a product failure. They think the grout was a bad batch. It was not. The grout is just the messenger. It is telling you that the structure underneath is failing. When grout cracks twice in the same spot, you are not looking at a cosmetic issue. You are looking at a structural engineering failure that no amount of topical sealer can fix. My hands are stained with thin-set and my knees are shot from twenty five years of crawling on slabs, and if there is one thing I know, it is that the subfloor always wins. If you want to stop the cycle, you have to stop looking at the surface and start looking at the physics of the assembly.
The phantom of the flexing subfloor
Subfloor deflection and joist span are the primary reasons ceramic tile grout cracks repeatedly because vertical movement exceeds the tensile strength of cementitious materials. When a subfloor bends under a load, the grout, which is rigid, must either compress or pull apart. It lacks the elasticity to survive the cycle of footsteps and furniture weight. Most people assume their floor is solid. It is not. Every floor moves. The question is how much. In the industry, we talk about L over 360. That is the standard for ceramic tile set by the Tile Council of North America. It means the floor should not bend more than the length of the span divided by 360. If you are installing natural stone, that requirement jumps to L over 720. That is twice as stiff. Most modern residential construction is built to the absolute minimum code. That might be fine for carpet or cheap laminate, but it is a death sentence for a high-end tile job. If your joists are spaced twenty four inches on center and you are using single-layer five eighths inch plywood, your grout will crack. It is a mathematical certainty. You can buy the most expensive grout in the world and it will still fail because the foundation is like a trampoline. You have to stiffen the assembly with a second layer of subflooring or a specialized uncoupling membrane.
“A floor is only as good as the subfloor beneath it; deflection is the enemy of every joint.” – Master Flooring Axiom
The 1/8 inch that ruins everything
Surface preparation and floor flatness dictate the longevity of grout joints because voids in thin-set mortar create unsupported pressure points that snap grout lines under normal traffic. If your slab has a dip that is more than one eighth of an inch over ten feet, your tile is essentially bridging a canyon. When you step on that tile, it moves down into the void. The grout joint is the weakest link in that chain. It will crumble into powder. I have seen guys try to fix this by double-stacking underlayment or using more glue. That is a hack move. You need to use self-leveling underlayment to create a truly flat plane. This is especially true for the massive large format tiles that are popular now. Those tiles have zero flex. If the floor is not flat, the tile will teeter like a seesaw. Every time it teeters, the grout is being crushed or pulled. You need a mechanical bond and a flat substrate. If you are dealing with moisture issues or want to upgrade your bathroom, you should consider eco-friendly tile solutions for sustainable homes in 2025 to ensure your materials are compatible with modern subfloor systems.
| Substrate Type | Max Deflection Limit | Recommended Reinforcement |
|---|---|---|
| Ceramic Tile | L/360 | 1/2 inch Cement Board |
| Natural Stone | L/720 | Double Layer Plywood |
| Large Format Tile | L/360 (Flatness focus) | Self-Leveling Compound |
Chemistry of the fracture
Grout hydration and water-to-powder ratios determine the final compressive strength of the cement matrix because excessive water evaporation leaves behind microscopic air pockets that weaken the joint. Most installers use too much water. They want the grout to be easy to spread. They want it to slide into the joints without effort. But water is a placeholder. When that water evaporates during the curing process, it leaves holes. Think of it like a sponge versus a brick. If your grout is soft enough to scratch with a fingernail, it was mixed too thin. This is a common failure point in showers that wow modern designs for 2025 where moisture levels are high. If the grout is porous, it absorbs water, which then expands and contracts, further weakening the bond. You need a high-density, polymer-modified grout or, better yet, an epoxy grout for areas prone to movement. Epoxy is not cement. It is a plastic resin. It has incredible shear strength and it is waterproof. It is harder to work with, but it does not crack easily. If you are tired of the cycle, stop using the five dollar bag of basic grout. You need something with high polymer content that can handle the microscopic vibrations of a house settling. You might also want to look into grout restoration secrets for long lasting results to understand how to properly prep a failed joint before applying a superior product.
Showers and the secret of the movement joint
Change of plane cracking occurs in wet environments because perpendicular surfaces move independently due to thermal expansion and structural settling. This is the biggest mistake I see in shower installations. People put hard grout in the corners where the walls meet or where the wall meets the floor. That is a mistake. Those are move joints. A house is a living thing. It breathes. It expands in the summer and shrinks in the winter. When those two walls move at different rates, the grout in the corner will pop out. You must use a 100 percent silicone caulk that matches the grout color for every change of plane. Silicone is flexible. It can stretch and compress without breaking. If you see a crack in the corner of your shower, do not put more grout in it. You are just wasting time. Scrape it out and use a high-quality sealant. This is a critical step for showers with a style trendy ideas for small bathrooms where space is tight and movement is concentrated. Also, check your tile cleaning tips for a sparkling bathroom in 2025 to make sure you are not using harsh chemicals that degrade the silicone bond over time.
- Always use silicone at the transition between tile and tubs.
- Never grout the joint between the floor and the baseboards.
- Ensure the subfloor is dry before installation to prevent steam pressure.
- Use a moisture meter to check the studs behind the cement board.
- Allow grout to cure for at least 72 hours before heavy water exposure.
Baseboards and the lie of the perimeter
Baseboard installation and perimeter gaps are essential for allowing floor expansion because pinning the tile against a wall causes upward pressure that results in tented tiles and cracked grout. Many people think they should jam the tile tight against the wall and then cover it with the baseboard. That is a recipe for disaster. You need a quarter inch gap around the entire perimeter. This is the expansion joint. If the tile has nowhere to go when the temperature changes, it will push against the wall. Since the wall won’t move, the tile will lift. This creates a hollow sound and snaps the grout joints in the center of the room. When you are looking at baseboards makeover ideas to elevate your space or considering chic baseboard designs that transform rooms in 2025, remember that the baseboard is there to hide that necessary gap, not to pin the floor down. If your grout is cracking near the edges of the room, check if the installer left enough room for the floor to breathe.
“Movement is the only constant in construction; if you don’t design for it, the floor will create its own joints.” – TCNA Handbook Principles
The solution that actually works
Mechanical stabilization and uncoupling represent the gold standard for floor durability because shear stress is neutralized before it reaches the grout line. If you have a recurring crack, you have to get aggressive. You need to remove the affected tiles. Check the subfloor. If there is a crack in the concrete slab beneath the tile, that crack will always telegraph up through the tile. You need an uncoupling membrane. This is a layer of plastic with a fleece backing that sits between the tile and the subfloor. It allows the subfloor to move independently of the tile. It is a shear stress breaker. It is the only way to guarantee a crack-free floor over a compromised slab. While you are at it, you should learn how to refresh grout without replacing it for the areas that are still structurally sound. If the crack is caused by a joist that is too bouncy, you might need to go into the crawlspace and add a sister joist or a mid-span beam. It is a lot of work. It is expensive. But it is the only way to stop the cracking. Stop buying miracle glues and start fixing the bones of the house. If you need more specific advice or have a unique situation, feel free to contact us. We have seen it all, from the swampy humidity of the coast to the dry heat of the desert, and the physics of the subfloor never change. Make sure to review our privacy policy if you are submitting photos of your floor for a remote consultation.