
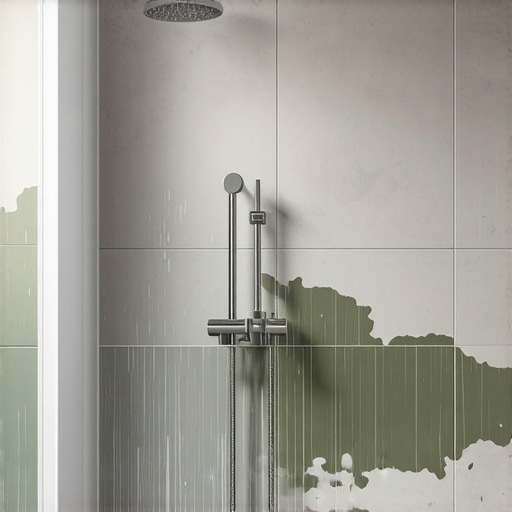
I have spent twenty five years with my hands in the mud and my eyes on the moisture meter. Most guys skip the leveling compound and think the underlayment will hide the dip. It won’t. I spent three days grinding concrete on a job last month just so the floor wouldn’t click like a castanet. That same level of neglect is what ruins shower niches. I once walked into a project where the homeowner thought they were safe because they had expensive porcelain. They were wrong. The studs behind the wall were so rotten they looked like wet cardboard. You cannot assume that because a surface looks dry that the cavity is safe. When we talk about showers, we are talking about managed water systems. If the system fails, your home rots from the inside out. This guide breaks down the structural engineering of why your niche is leaking and how to stop it before the mold takes over.
The physics of capillary action in porous substrates
Capillary action describes the process where water molecules are drawn through microscopic voids in cementitious materials. When a shower niche is constructed without a bonded waterproof membrane, moisture travels via surface tension through the grout and into the backer board. This hydrostatic pressure eventually forces liquid into the wall cavity. This is not a fast process. It is a slow, methodical migration of moisture that bypasses the tile and attacks the wood framing. Most installers rely on the tile to be the primary barrier. This is a fundamental error. Tile and grout are decorative. The real work happens at the substrate level. If you look at showers with a style, you must realize the beauty is skin deep. Underneath that beauty must be a continuous, impenetrable layer of protection. Without it, the laws of physics will ensure that water finds its way into your wall studs.
“A floor is only as good as the subfloor beneath it; deflection is the enemy of every joint.” – Master Flooring Axiom
The fatal flaw of negative pitch on niche sills
The niche sill must have a positive pitch of at least one eighth inch toward the shower floor to ensure gravity drainage. If the sill is level or back pitched, water will pool against the grout line at the back of the niche. This standing water creates a constant pressure head that eventually breaks down the sealant or waterproofing membrane. I see this mistake on eight out of ten failed jobs. The installer sets the niche box perfectly level because that is what the bubble says to do. In a wet environment, level is the enemy. You need a slope. When moisture sits on a flat surface, it begins the process of emulsification with any residual soaps or oils. This chemical cocktail is even more aggressive than plain water. It eats away at the polymer chains in your grout. If you are looking at modern designs for 2025, make sure your contractor understands the physics of drainage before they start worrying about the aesthetics of the marble.
The chemical breakdown of non modified thin set in wet areas
Using the wrong adhesive chemistry leads to interfacial failure where the tile bond separates from the waterproofing layer. In high moisture environments, a polymer modified thin set is required to provide the flexural strength needed to withstand thermal expansion. When hot water hits the tile, the materials expand at different rates. A rigid, non modified mortar will develop micro cracks. These cracks are the highways that water uses to reach the wall cavity. I have seen guys use mastic in a shower niche. That is professional negligence. Mastic is organic. It is food for mold. When it gets wet, it re emulsifies and turns back into glue. Your tile will literally slide off the wall. You need a C2 chemical rating for your mortars in these zones. We are talking about molecular bonds that must remain stable while submerged. This is why grout restoration secrets always start with ensuring the underlying mortar is intact. If the bond is gone, the grout is just a cosmetic bandage on a sucking chest wound.
| Material Type | Permeability Rating | Risk Level | Required Waterproofing |
|---|---|---|---|
| Cement Board | High | Extreme | Liquid or Sheet Membrane |
| Extruded Foam | Zero | Low | Sealed Joints Only |
| Greenboard | Total Failure | Critical | Never Use in Showers |
| Plywood | Absorbent | Critical | Never Use in Showers |
The failure of the critical corner seal
The corner junctions of a shower niche are the most common failure points due to structural movement. The vertical and horizontal studs of a home move constantly as humidity levels change. If the waterproofing membrane does not have the elongation properties to bridge these expansion gaps, it will tear. A tear as small as a human hair is enough to allow gallons of water into the wall cavity over a year. I prefer pre formed waterproof corners. These are factory made to ensure there are no pinholes. When an installer tries to fold sheet membrane into a tight niche corner, they often create a build up of material that makes the tile sit crooked. To fix this, they sometimes slit the membrane to make it lay flat. That slit is the death of the shower. Once that membrane is cut, the integrity of the moisture envelope is gone. You might as well not have waterproofed it at all. This is why tile cleaning tips often fail to mention that the black spots in your corners are not dirt, they are mold colonies growing from behind the tile. You can find more on this in our tile cleaning tips section, but remember that cleaning cannot fix a structural leak.
Why baseboards and transitions signal deeper moisture issues
When a shower niche leaks, the water does not just stay in the wall. It follows gravity down the stud bay and pools on the bottom plate of the wall. From there, it wicks into the drywall and the baseboards on the other side of the wall. If you see swollen baseboards or peeling paint in the bedroom adjacent to your bathroom, you have a catastrophic failure. The wood fibers in the baseboard act like a wick. By the time you see the damage on the mdf or pine, the structural lumber inside the wall is already saturated. This is why choosing baseboards makeover ideas should always involve a moisture check of the subfloor. I have seen people replace baseboards three times without ever realizing the shower niche ten feet away was the source of the rot. It is all connected. The flooring system, the walls, and the wet areas must be viewed as a single, interconnected assembly. If one part fails, the whole system is compromised.
“Negative pitch on a horizontal surface in a wet area is a guaranteed path to structural decomposition.” – Master Flooring Axiom
The checklist for a bulletproof shower niche installation
- Verify the niche box is secured to blocking and not just floating between studs.
- Ensure a minimum one eighth inch slope on the bottom sill toward the drain.
- Apply a continuous bonded membrane that overlaps the wall waterproofing by at least two inches.
- Check all inside and outside corners for pinholes using a bright flashlight.
- Use a 100 percent silicone sealant at the change of plane where the niche meets the field tile.
- Avoid using small mosaic tiles on the sill to minimize the number of grout lines.
The thermal dynamics of a bathroom also play a role. In colder climates, the temperature differential between the hot shower water and the cold exterior wall can cause condensation inside the wall cavity if the vapor barrier is incorrectly placed. This is why moisture management is about more than just liquid water. It is about vapor drive. If you use a vapor open backer board, you are inviting interstitial condensation. This is why I demand vapor closed systems like high density extruded polystyrene boards. They do not hold water, and they do not allow vapor to pass through. It is a one and done solution. If you are struggling with old grout issues, check out how to how to refresh grout without replacing it, but if the substrate is wet, no amount of refreshing will save you. You have to gut it and do it right. The cost of a properly waterproofed niche is a few hundred dollars. The cost of remediating mold and replacing floor joists is tens of thousands. Do not be the person who tries to save a buck on the most dangerous part of your home renovation. Keep your tile and grout maintained, but build your showers like they are meant to hold a lake. That is the only way to sleep at night in this business.