
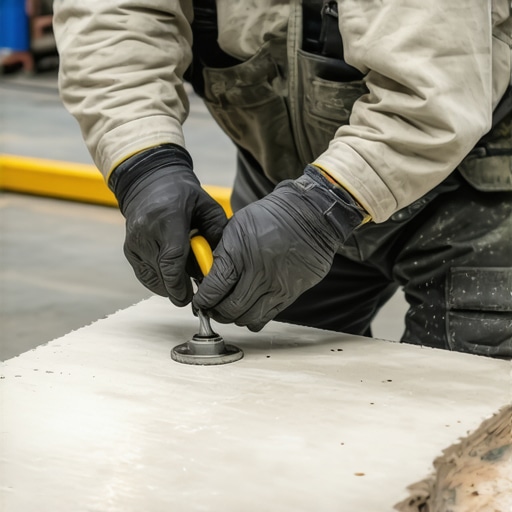
I once spent three days grinding concrete on a job last month just so the floor wouldn’t click like a castanet. Most guys skip the leveling compound. They think the underlayment will hide the dip. It won’t. That same lazy attitude is why most people fail when they try to cut porcelain. They treat it like ceramic. They think a cheap blade and a fast hand will get the job done. I watched a rookie ruin four boxes of rectified porcelain last winter because he wouldn’t listen about blade speed. Porcelain is not your average clay. It is a dense, vitrified beast fired at temperatures exceeding two thousand degrees Fahrenheit. If you do not respect the physics of the material, the glaze will shatter like glass every single time. Cutting porcelain without chips requires an understanding of thermodynamics, mechanical vibration, and the molecular bond of diamond abrasives. You cannot just muscle through it. You have to let the tool do the work while you manage the friction.
The physics of porcelain density and fracture points
Cutting porcelain tile requires specialized diamond blades and a constant flow of water to manage thermal expansion. Because porcelain has a water absorption rate of less than point five percent, it is incredibly dense. This density means that when a blade hits the surface, the heat generated is localized and intense. If the heat is not dissipated, the glaze expands faster than the body of the tile, leading to those jagged, ugly chips that ruin a layout. You are not really cutting the tile in the traditional sense. You are grinding it away at high speed. The friction at the point of contact can reach temperatures that would melt softer metals. This is why a wet saw is not a luxury for this material. It is a fundamental requirement for any professional result. When you look at the glaze under a magnifying glass, you can see the microscopic stress fractures that occur when a dull blade is used. These fractures grow into visible chips the moment the blade exits the cut.
“A floor is only as good as the subfloor beneath it; deflection is the enemy of every joint.” – Master Flooring Axiom
The diamond blade selection matrix for clean edges
A continuous rim diamond blade is the only acceptable tool for achieving a chip-free edge on porcelain surfaces. Do not use a segmented blade. Segmented blades are designed for aggressive cutting of stone or concrete where speed matters more than the finish. On porcelain, the gaps between the segments act like tiny hammers, striking the edge of the glaze thousands of times per minute. This constant impact is what causes the material to flake away. You need a blade with a high concentration of synthetic diamonds embedded in a soft metal bond. As you cut, the soft metal wears away, constantly exposing new, sharp diamond grit. If the bond is too hard, the diamonds get dull and the blade starts to heat up, which is exactly what we are trying to avoid. I prefer a blade with a thin kerf. A thinner blade removes less material, which means less friction and a cleaner path through the vitrified clay. This is especially vital when preparing tiles for showers that wow where every edge is visible.
| Blade Type | Best Application | Chip Risk | Bond Hardness |
|---|---|---|---|
| Continuous Rim | Porcelain and Glass | Low | Soft |
| Turbo Blade | General Ceramic | Medium | Medium |
| Segmented | Concrete and Pavers | High | Hard |
| J-Slot Blade | Hard Porcelain | Low | Medium |
The wet saw hydraulic cooling protocol
Proper water flow on a wet saw prevents the glaze from overheating and shattering during the grinding process. Most DIY installers barely trickle water onto the blade. This is a mistake. You need a consistent stream that hits both sides of the blade right where it enters the tile. The water serves two purposes. It carries away the slurry, which is the ground-up porcelain dust, and it keeps the temperature stable. If slurry builds up, it acts as an additional abrasive that can scratch the finish of the tile. I always check the water tray every few cuts. If the water looks like thick milk, it is time to change it. Recirculating dirty water is a fast way to dull your diamond blade. You also need to ensure the saw is sitting on a perfectly level surface. If the saw wobbles even a fraction of a millimeter, that vibration translates into the blade, which will then bounce against the tile and cause chipping. Vibration is the silent killer of clean tile edges. I have spent hours shimming saw stands just to get that perfect, glass-like cut.
The sacrificial board method for exit cuts
Placing a scrap piece of cement board or another tile beneath your workpiece prevents the blade from blowing out the bottom edge. This is a trick I learned decades ago. When the blade exits the tile, the lack of support often causes a large chunk to break off rather than being ground away. By using a sacrificial layer, you provide continuous support for the porcelain throughout the entire movement of the blade. It keeps the pressure even. You should also consider the speed of your feed. You want to push the tile into the blade with firm, steady pressure, but never force it. If the motor starts to bog down or the sound changes to a high-pitched whine, you are pushing too fast. Let the diamonds do their job. About an inch before you reach the end of the cut, slow down your movement even further. This reduces the torque on the very end of the tile, which is the most vulnerable point for cracking. This level of care is what differentiates a master installer from a handyman. It is the same attention to detail required for grout restoration secrets where precision is the only path to a quality finish.
Manual snap cutters for large format porcelain
High-quality manual snap cutters use a scoring wheel to create a controlled fracture line across the porcelain surface. While wet saws are the gold standard for intricate work, a good snap cutter is often better for long, straight rips on large format tiles. The key is the score. You only get one shot at it. You must apply even pressure across the entire length of the tile. If you score it twice, you create two fracture lines that compete with each other, usually resulting in a jagged break. I always tell my guys to listen to the sound of the score. It should sound like a crisp zipper. If it sounds like crunching gravel, your wheel is dull or you are pushing too hard. Once the score is made, the breaking assembly applies pressure to snap the tile. This method produces no heat and very little dust, making it ideal for indoor work. However, cheap snap cutters from big-box retailers often have too much flex in the rails. If the rails flex, the score won’t be straight, and the tile will shatter. Buy a professional grade cutter with a rigid base and solid steel rails. You get what you pay for in this industry.
- Check the diamond blade for any signs of glazing or dullness before starting.
- Ensure the water pump is fully submerged and providing a strong, steady stream.
- Always mark your cut lines with a fine-tip grease pencil or a professional wax marker.
- Apply a layer of blue painter’s tape over the cut line to help stabilize the glaze.
- Feed the tile slowly and consistently without pausing in the middle of the cut.
- Finish the edge with a diamond hand polishing pad to remove micro-burrs.
The angle grinder and the relief cut technique
Using an angle grinder for L-shaped or U-shaped cuts requires a steady hand and a series of relief scores to prevent cracking. When you have to cut around a toilet flange or a heating vent, a straight wet saw often cannot reach the corners. This is where the grinder comes in. Most people just try to dive right in. That is how you break a tile. You need to score the entire perimeter of your cut first, just deep enough to penetrate the glaze. This creates a boundary for the vibration. Then, make a series of parallel cuts within the waste area, known as relief cuts. These allow you to nibble away the material without putting too much stress on the main body of the porcelain. It is a slow, dusty process, but it is the only way to get those complex shapes without a water jet. Always wear a respirator. Porcelain dust is essentially microscopic glass and silica. It will ruin your lungs faster than you can finish the job. Once the rough cut is done, use a diamond drum bit or a polishing pad to smooth out the edges. This is especially important near baseboards makeover ideas where the transition needs to be tight and clean.
Dressing the blade and maintaining diamond exposure
A dressing stone is an essential maintenance tool that removes built-up porcelain slurry and exposes fresh diamonds on the blade. Over time, the metal bond on your diamond blade can become smeared with porcelain dust. This is called glazing. A glazed blade will not cut; it will only generate heat and smoke. To fix this, you run the blade through a dressing stone, which is a highly abrasive block. This wears down the metal bond and brings the sharp diamonds back to the surface. I do this every ten to fifteen cuts when working with exceptionally hard porcelain. If you do not have a dressing stone, a piece of scrap concrete or a common red brick can work in a pinch. You will feel the difference immediately. The saw will move smoother, and the noise will drop an octave. Keeping your tools sharp is the most basic rule of the trade. A sharp tool is a safe tool and a clean-cutting tool. Ignoring this leads to the kind of frustration that makes people give up on tile altogether. If you want a floor that looks professional, you have to treat your tools with professional respect.
Polishing the edge for a factory finish
Diamond hand pads in varying grits allow you to polish a cut edge until it is indistinguishable from a factory edge. Even the best wet saw cut will have a slightly sharp, raw feel. I always start with a 60-grit pad to knock down the sharpest part of the glaze. Then I move to 120 and finally 200 grit. This gives the edge a slight bevel, which not only looks better but also makes the tile more resistant to chipping after it is installed. When tiles are butt-jointed or meet at a corner, a polished edge is what makes the grout line look perfect. If the edge is jagged, the grout will highlight those imperfections rather than hiding them. This is a step that most amateurs skip because they are tired by the end of the day. But this is where the quality is made. I have seen beautiful bathrooms ruined by raw, sharp tile edges that catch the light and show every tiny flaw. Spend the extra twenty minutes with the polishing pads. Your feet and your eyes will thank you later. This is particularly true when following tile cleaning tips because a smooth edge is much easier to keep clean than a jagged one that traps dirt and grime.