
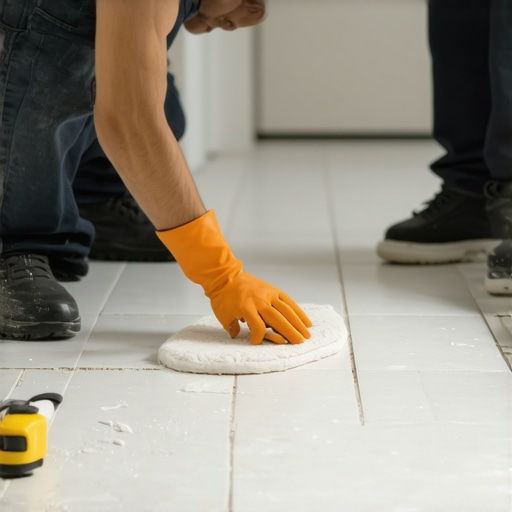
I spent three days grinding concrete on a job last month just so the floor wouldn’t click like a castanet. Most guys skip the leveling compound because they think the underlayment will hide the dip. It won’t. That same mindset of cutting corners is what destroys rental properties before the first lease is even signed. When it comes to grout, you are not just looking at a cosmetic filler. You are looking at a porous, cementitious network that is essentially a hard sponge. If you do not seal it correctly, every bit of mop water, skin oil, and spilled juice will migrate deep into the substrate. By the time a tenant moves out, those pristine white lines will be a permanent shade of charcoal. Sealing grout in a rental property is a structural engineering requirement to prevent moisture from compromising the subfloor and the adhesive bond of your tiles. You have to treat the surface with a level of technical respect that goes beyond a simple spray bottle and a rag.
The invisible war against rental moisture
To seal grout in a new rental property effectively, you must use a high-quality penetrating silane or siloxane sealer that creates a hydrophobic barrier within the pores. This chemical bond prevents liquid absorption while allowing vapor to escape, ensuring that moisture does not get trapped behind the tile. In a rental environment, this is the only way to protect the long term integrity of your showers and floors against heavy usage and aggressive cleaning. Unlike homeowners who might be careful with their surfaces, tenants often use harsh chemicals or let water sit for days. This creates a high-pressure environment for the grout joints. If the seal fails, the water will find a way through the capillary channels of the grout, eventually hitting the thin-set. Once the thin-set becomes saturated, its bond to the subfloor weakens, leading to hollow tiles and cracked grout lines. For a detailed look at keeping these surfaces clean over time, you can explore tile cleaning tips for a sparkling bathroom in 2025. This is why a professional sealer is the primary line of defense.
“A floor is only as good as the subfloor beneath it; deflection is the enemy of every joint.” – Master Flooring Axiom
The chemistry of porous grout lines
Grout is a mixture of Portland cement and sand that hardens through a hydration process leaving behind microscopic voids called pores. These pores are large enough to allow water molecules to enter through capillary suction, which is why unsealed grout darkens when it gets wet. In the world of molecular flooring physics, we measure the success of a sealer by how well it reduces the surface energy of the grout. A high-quality sealer lowers the surface energy so much that water beads up instead of soaking in. If you are dealing with a humid climate like the coastal regions of Florida or Texas, this becomes even more significant. High humidity means there is constant vapor drive pushing moisture into your building materials. Without a proper seal, the grout acts like a wick. This moisture can travel behind your baseboards and into the drywall, causing mold growth that is expensive to remediate. You need a sealer that targets the calcium silicate hydrate crystals within the cement to create a permanent change in the grout’s physical properties.
Penetrating sealers versus topical coatings
Penetrating sealers sit inside the grout while topical coatings sit on top and the choice between them determines the lifespan of the rental floor. For any professional installer, the penetrating sealer is the only choice for grout. Topical coatings like waxes or acrylics create a film that can peel, flake, and trap moisture underneath. In a rental property, a topical coating will be scratched off by furniture or worn away by foot traffic in months. A penetrating sealer, however, resides below the surface. It does not change the look of the grout, but it chemically alters the internal structure. This is vital for showers that wow because it keeps the grout looking new without the plastic sheen of a cheap coating. You want the sealer to be invisible but invincible. When the sealer is inside the pores, it is protected from the mechanical abrasion of scrubbing and walking. It only breaks down through chemical exposure over many years. This means less maintenance for the landlord and a better experience for the tenant.
| Sealer Category | Chemical Base | Durability Rating | Maintenance Requirement |
|---|---|---|---|
| Penetrating | Silane / Siloxane | High | Re-apply every 3-5 years |
| Topical | Acrylic / Wax | Low | Re-apply every 6-12 months |
| Colorant Sealer | Epoxy / Urethane | Extreme | Rarely needs re-application |
| Solvent Based | Fluoropolymer | High | Best for oil resistance |
The rigorous application process for long term results
Proper grout sealing requires a clean surface, a precise applicator, and a strict adherence to the cure times provided by the manufacturer. You cannot just dump sealer on a floor and walk away. First, the grout must be fully cured, which usually takes 48 to 72 hours after installation. If you seal too early, you trap moisture inside, which can lead to efflorescence. That is the white, powdery salt that rises to the surface and ruins the look of dark grout. Once the grout is dry, you apply the sealer using a brush or a specialized roller. The goal is to saturate the joint without leaving a heavy residue on the tile face. If you are working on showers with a style that uses porous stone or unglazed ceramic, you have to be even more careful. Excess sealer left on the tile can cause hazy spots that are nearly impossible to remove once they cure. You must wait about ten minutes for the sealer to soak in and then buff the excess off the tile with a clean microfiber cloth. This ensures the sealer is where it belongs, inside the grout, and not on the surface of your flooring material.
“Ensure grout joints are clean and dry before applying any sealant; moisture trapped within the joint can lead to bond failure or discoloration.” – TCNA Installation Handbook
Why your subfloor dictates your grout life
A stable subfloor prevents the microscopic movement that causes grout to crack and the seal to break down prematurely. If your subfloor has too much deflection, the grout joints will experience stress every time someone walks across the room. No sealer in the world can fix a structural failure. I have seen beautiful tile jobs in high-end rentals fall apart because the installer didn’t check the joist spacing or the thickness of the plywood. If the floor flexes, the grout cracks. Once the grout cracks, the seal is broken, and water has a direct path to the subfloor. This is especially dangerous in kitchens and bathrooms. If you are managing a renovation, you might consider grout restoration secrets if the tile is still in good shape but the grout has failed. However, if the subfloor is the problem, you are just putting a bandage on a broken bone. You need to ensure the substrate meets the L/360 deflection standard for ceramic tile or L/720 for natural stone before you even think about the sealer.
Essential checklist for a bulletproof rental bathroom
- Verify grout has cured for at least 48 hours before starting.
- Clean the lines with a vacuum to remove all dust and debris.
- Use a pH-neutral cleaner to ensure no acidic residue remains.
- Apply a solvent-based penetrating sealer for maximum oil and water resistance.
- Work in small sections to prevent the sealer from drying on the tile.
- Perform a water bead test after 24 hours to verify coverage.
- Inspect the transition where the tile meets the baseboards for gaps.
How to manage baseboards in wet areas
The junction between the tile floor and the baseboards is a critical point where water can bypass your grout seal and damage the wall framing. In a rental property, tenants often splash water out of the tub or spill liquids near the walls. If you have a gap between your floor and your chic baseboard designs, that water will disappear under the wall. I always recommend using a color-matched 100 percent silicone caulk at the floor-to-wall transition instead of grout. Grout is rigid and will crack at this change of plane. Silicone is flexible and creates a waterproof gasket. When you seal your grout, make sure you don’t neglect this perimeter. If water gets behind the baseboards, it will rot the bottom plate of your wall studs. I have seen entire bathrooms that had to be gutted because a simple bead of caulk and a good grout sealer were missing. You want to create a bathtub-like environment where all water is contained on the surface of the tile and directed toward the drain.
Protecting your investment from tenant neglect
Educating tenants on proper care and using the right chemical products is the final step in maintaining a sealed grout surface. You should provide tenants with a list of approved cleaners. Harsh bleach-based products or acidic cleaners like vinegar will slowly eat away at the sealer. Over time, this exposes the grout pores again. I suggest giving them a bottle of pH-neutral stone and tile cleaner as part of their move-in package. It is a small expense that saves you thousands in floor repairs. If the grout starts to look dingy, you can look into how to refresh grout without replacing it to bring back the original look. This usually involves a deep clean and a re-application of the penetrating sealer. In a rental property, you should inspect the grout every time the lease renews. Drop a few beads of water on the grout line. If it stays in a bead, the seal is good. If it soaks in and the grout darkens, it is time to re-seal. It is a one-hour job that prevents a ten-thousand-dollar failure.