
The chemistry of porous cementitious matrices
Grout sealing requires a second coat if the porosity of the cementitious material remains high after the first application. Penetrating sealers work by filling the microscopic voids within the Portland cement structure, and a single pass often fails to achieve total saturation of the capillary channels. Most installers skip the second coat. They think the first pass is enough because the bead of water stays on top for ten seconds. It is not enough. I spent three days grinding concrete and scraping out ruined grout on a job last month just so the floor would not click like a castanet. That job failed because the previous guy used a cheap hardware store spray and called it a day. He did not understand the physics of moisture. He did not care about the hydrostatic pressure building up behind the tile. I see this every week. People spend ten thousand dollars on beautiful Italian porcelain and then balk at spending fifty bucks on a high quality solvent based sealer. You have to understand that grout is a sponge. It is a series of interconnected tunnels that want to suck up every drop of dirty mop water and spilled wine. If you do not fill those tunnels with a hydrophobic resin, the dirt will find a home there. I have seen white grout turn a sickly shade of grey in six months because the installer was too lazy to wait forty minutes for a second application. It is about the bond at the molecular level. If the first coat is absorbed too deeply, the surface remains vulnerable. You need that secondary layer to ensure the surface tension is high enough to repel liquids effectively.
“A floor is only as good as the subfloor beneath it; deflection is the enemy of every joint.” – Master Flooring Axiom
Why one coat is often a lie
Applying grout sealer in a single layer rarely provides long term protection against moisture infiltration or staining agents. High absorption rates in sanded grout mean the chemical solids in the sealer often sink too deep to protect the surface interface. You are looking for a specific reaction. When you apply the first coat, the grout is hungry. It drinks the liquid. If you see the sealer vanish instantly, that is a sign that the internal structure is still empty. You need to keep going until the grout can no longer accept the liquid. This is not about making it look shiny. It is about structural integrity. A floor is a performance surface. It takes the weight of your furniture and the friction of your feet. If the grout is weak or wet, the whole system fails. This is especially true near chic baseboard designs where moisture tends to pool and cause wood rot. I have pulled up baseboards that were black with mold because the homeowner thought a one coat wonder sealer would protect their bathroom. It never does. You need to verify the seal. If you drop a teaspoon of water on the grout line and it darkens within thirty seconds, your sealer failed. You need coat number two. Maybe coat number three if you are dealing with a very wide joint in a high traffic area. Do not listen to the bottle when it says one coat is sufficient. The bottle wants to sell you more bottles by making the job look easy. I am telling you the truth from the trenches. It is about the density of the resin left behind once the solvent evaporates.
The absorption test that never fails
Testing grout sealer efficacy involves the water bead test to determine if the hydrophobic barrier is fully functional. If the water droplet is absorbed into the grout joint, the molecular density of the sealer is insufficient to prevent liquid migration. It is a simple physics problem. You take a spray bottle. You mist the floor. If the water beads up like a freshly waxed car, you are in the clear. If the grout changes color, you have a problem. The color change is the water filling those tiny air pockets. If water can get in, so can bacteria. So can mold. This is critical in showers that wow because those environments are constant battlegrounds for moisture. I once walked into a custom shower where the homeowner was complaining of a musty smell. The tile looked great. The grout looked fine. But when I did a moisture probe, the subfloor was a swamp. The sealer was a cheap water based product applied once. It looked sealed but it was porous as a screen door. We had to rip the whole thing out. It was a twenty thousand dollar mistake that a second coat of sealer could have prevented. I do not take shortcuts with chemistry. You also have to look at the type of tile. If you are working with eco friendly tile solutions, some of those materials are more porous than traditional ceramics and require even more care during the sealing process to ensure the edges do not absorb the sealer and create a dark frame around each tile.
| Sealer Type | Solids Content | Acclimation Time | Performance Rating |
|---|---|---|---|
| Water Based Penetrating | Low | 2 to 4 Hours | Moderate |
| Solvent Based Penetrating | High | 24 Hours | Superior |
| Topical Acrylic | High | 12 Hours | Low (Traffic Sensitive) |
| Epoxy Grout (No Sealer) | 100% | None | Maximum |
The ghost in the expansion gap
Expansion gaps and perimeter joints are often the first places where grout sealers fail due to structural movement. These areas require flexible sealants or double coating to ensure that the bond line remains impermeable during seasonal shifts. You have to remember that your house is a living thing. It breathes. It moves. The wood in your walls expands in the summer and shrinks in the winter. If your grout is brittle and poorly sealed, it will crack. Once it cracks, the seal is broken. That is why I always check the corners and where the floor meets the wall. People get obsessed with the middle of the room, but the failures happen at the edges. I always recommend looking at baseboards makeover ideas that incorporate proper caulking at the floor line rather than just grout. Grout at a change of plane is a rookie move. It will crack every time. You need a color matched siliconized caulk. But if you must grout it, you better seal it until it can not hold another drop. While most people want the thickest underlayment, too much cushion actually causes the locking mechanisms on LVP to snap under pressure, and a similar logic applies to grout. Too much topical sealer creates a plastic film that can peel. You want the sealer inside the grout, not sitting on top like a cheap coat of nail polish.
- Vacuum all grout lines to remove microscopic dust that blocks sealer penetration.
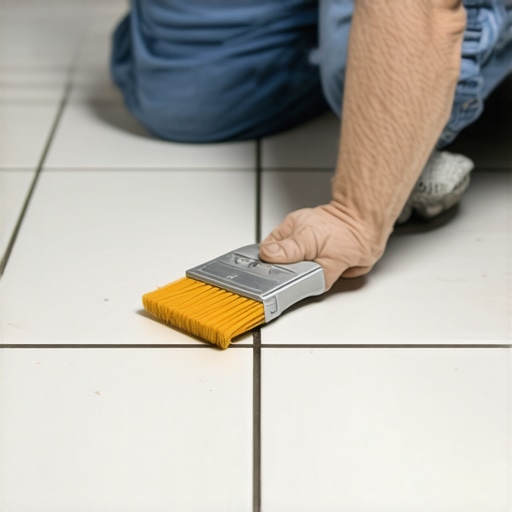
- Apply the first coat using a brush or roller to ensure mechanical agitation into the pores.
- Wait at least thirty minutes but no more than one hour before the second application.
- Wipe excess sealer off the tile face immediately to prevent hazy residue.
- Perform the water bead test twenty four hours after the final coat.
- Avoid harsh chemicals for the first week to allow the fluoropolymers to cross link.
The 1/8 inch that ruins everything
Grout joint width dictates the volume of sealer required to create a stable barrier against contaminants. A wide sanded joint has significantly more surface area and internal volume than a rectified tile joint, necessitating a multi coat approach. Most guys skip the leveling compound. They think the underlayment will hide the dip. It won’t. If the floor is not flat, the grout joints will be uneven. Uneven joints collect water. Water breeds problems. I have seen floors where the grout was thick in one spot and thin in another. The thick spots needed three coats of sealer because they were so porous. If you do not account for the volume of the material, you are just guessing. And guessing is how you end up with a floor that looks like a checkerboard of stains. For those looking at grout restoration secrets, the first secret is always cleanliness. You cannot seal dirt. If you apply a second coat over a dirty first coat, you are just laminating the grime into the floor forever. You need to use a pH neutral cleaner and let it dry for twenty four hours before you even touch a bottle of sealer. The moisture levels in the slab must be below four percent. If the slab is wet, the sealer will pop off like old paint. It is simple chemistry. Water and oil do not mix, and most high quality sealers are oil or solvent based.
“Cementitious grout is inherently porous; without a hydrophobic barrier, moisture migration is inevitable.” – TCNA Handbook Logic
Why your subfloor is lying to you
Subfloor moisture can migrate upward through capillary action, forcing grout sealers to delaminate from the cement matrix. Proper moisture barrier installation is the only way to ensure that a second coat of sealer remains chemically bonded to the grout line. You think the top is the problem? Usually, it is the bottom. If you have a crawlspace with high humidity, that moisture is pushing through the subfloor, through the thin set, and into the grout. It pushes the sealer right out of the pores. I have seen sealer peeling off in long strips because the vapor pressure from the ground was too high. You need to check your humidity. If you live in a swampy area, you might need a specialized vapor barrier before you even lay the first tile. This is vital for showers with a style in basement conversions. Basements are notorious for moisture. If you do not seal the grout twice with a high grade solvent sealer, that basement smell will become a permanent part of your home. You can find more tile cleaning tips to help maintain the surface, but no amount of scrubbing will fix a failed moisture barrier. You have to build it right from the dirt up. If you are struggling with old grout, check out how to refresh grout without replacing it before you decide to rip everything out. Sometimes a deep clean and a double coat of color sealer can save a floor, but only if the structural integrity is still there. If the grout is sandy and crumbling, it is game over. You are just throwing good money after bad. Always test the hardness of the grout with a screwdriver. If it scratches easily, it is soft. If it is soft, it was mixed with too much water, and no amount of sealer will save a weak mix. That is the hard truth of the trade. If you have questions about specific installations, you can always contact us for a professional opinion. We have seen it all. We have fixed it all. Do not let a ten minute task like a second coat of sealer be the reason your floor fails in five years. Precision matters. Chemistry matters. And your knees will thank you when you only have to do the job once. Check our privacy policy for more information on how we handle your data when you reach out for help with your flooring projects.